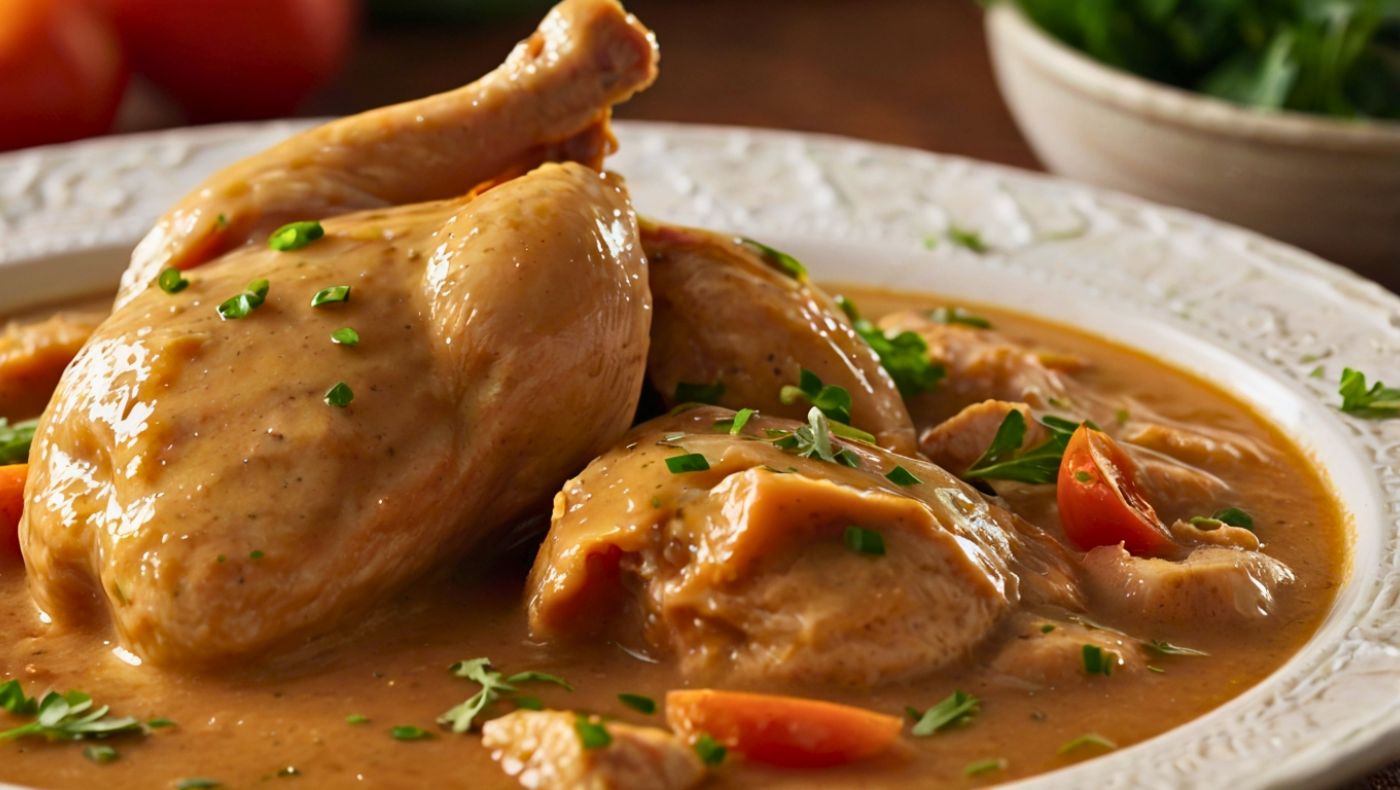
Have you ever served a hearty dinner and felt like something was missing? That warm, savory finishing touch that ties everything together? That’s the magic of Easy Homemade Chicken Gravy, it turns simple meals into cozy, crave worthy comfort food. Just a drizzle over mashed potatoes or roasted chicken brings everything to life. It’s that one thing guests always reach for seconds of.
I still remember learning how to make Easy Homemade Chicken Gravy in my grandmother’s kitchen. The aroma of sizzling pan drippings filled the room as she stirred patiently, turning humble ingredients into something extraordinary. “This,” she smiled, “is what makes people feel at home.” Her gravy had a way of bringing comfort with every bite. It wasn’t fancy, just made with love and simple technique.
In this guide, you’ll discover how to make Easy Homemade Chicken Gravy that’s smooth, rich, and full of flavor, better than anything from a jar. We’ll explore the right base, roux, and seasoning for that perfect silky texture. Whether it’s Sunday dinner or a holiday table, this gravy will become your go to favorite. Let’s turn your kitchen into a place where every meal feels special.
What Makes This Easy Homemade Chicken Gravy Extraordinary
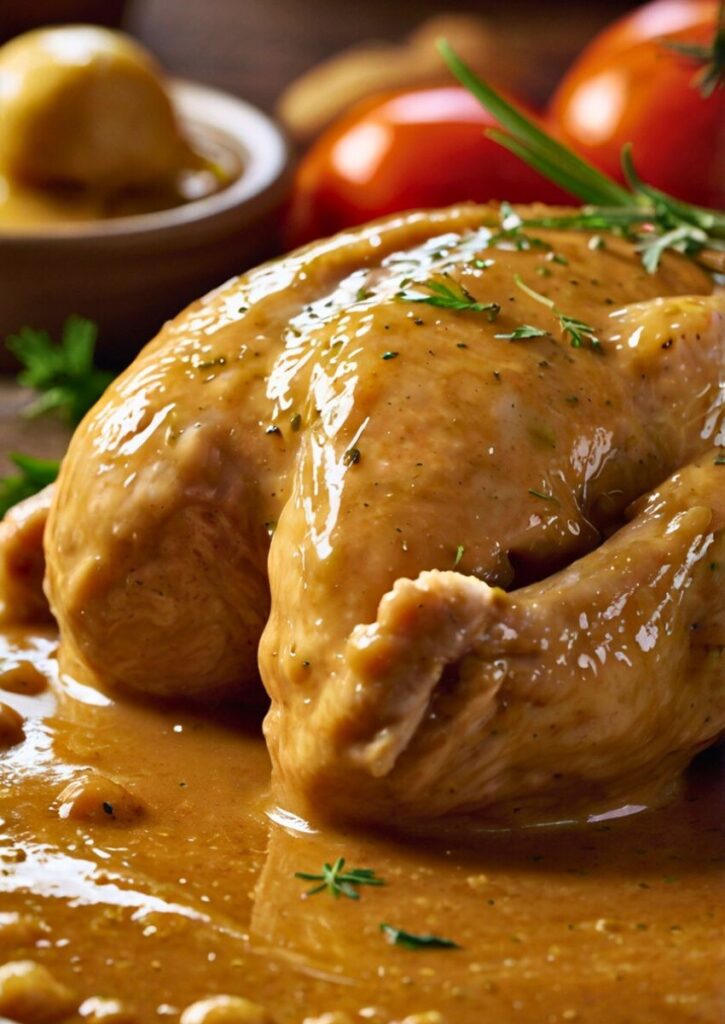
This isn’t your average easy homemade chicken gravy that separates five minutes after you make it. We’re talking about a restaurant quality chicken gravy that holds its structure, delivers rich, complex flavor, and elevates every bite on your plate. The secret lies in understanding the science behind emulsification, the art of building layers of savory depth, and the patience to let each step shine.
The technique I’m sharing blends classical French roux methods with Southern comfort food wisdom, perfect for making chicken gravy from scratch. It creates an incredibly smooth texture while preserving those deep, roasted homemade chicken gravy flavors that make this dish unforgettable..
Ingredients & Substitutions for Easy Homemade Chicken Gravy
Essential Ingredients
Chicken drippings or stock (4 cups): The foundation of exceptional gravy starts here. Fresh drippings from a roasted chicken provide unmatched depth, but high quality chicken stock works beautifully too. Look for stock with a golden color and rich aroma avoid anything that smells metallic or overly salty.
All purpose flour (4-6 tablespoons): This creates our roux, the thickening agent that gives gravy its body. All purpose flour contains just enough gluten to provide structure without making the gravy gummy. Avoid cake flour (too delicate) or bread flour (too much gluten).
Butter or chicken fat (4 tablespoons): Butter adds richness and helps create a smooth roux, while rendered chicken fat contributes deeper poultry flavor. The best approach? Use half and half for complexity.
Heavy cream (1/4 to 1/2 cup): This transforms good gravy into transcendent gravy. The fat content creates luxurious mouthfeel and prevents the sauce from breaking.
Fresh herbs (thyme, sage, or rosemary): A teaspoon of fresh herbs brightens the rich sauce and adds aromatic complexity that dried herbs simply can’t match.
Salt and white pepper: White pepper maintains the gravy’s clean appearance while providing subtle heat. Taste constantly the salt level should enhance, not dominate.
Smart Substitutions
For dairy free versions, replace butter with additional chicken fat or olive oil, and substitute cream with full fat coconut milk. The coconut adds subtle sweetness that complements chicken beautifully.
Gluten free cooks can use rice flour or cornstarch instead of wheat flour. Rice flour creates similar body to wheat flour, while cornstarch produces a glossier finish. Use about 2/3 the amount of rice flour, or half the amount of cornstarch.
If you’re short on drippings, enhance store bought stock by simmering it with chicken bones, onion scraps, and herbs for 30 minutes. This concentrates flavors and creates that homemade depth you’re after.
Step by Step Instructions
Building the Roux Foundation
Start by heating your fat in a heavy bottomed saucepan over medium heat. The pan choice matters here thin pans create hot spots that burn your roux before you know it. Cast iron or heavy stainless steel distributes heat evenly.
Add flour gradually, whisking constantly to prevent lumps. This is where patience pays dividends. Cook the roux for 3-4 minutes, stirring continuously, until it smells nutty and turns light golden. You develop flavor here, not just mix ingredients.
Common mistake alert: Adding flour too quickly creates lumps that are nearly impossible to smooth out later. Sprinkle it in gradually while whisking vigorously.
Incorporating the Liquid
Here’s where technique separates amateur gravy from professional quality sauce. Remove the pan from heat temporarily this prevents violent bubbling when you add liquid. Add warm stock gradually, about 1/2 cup at first, whisking constantly until completely smooth.
Return to medium heat and continue adding liquid slowly, whisking continuously. The gravy thickens as it heats, so don’t panic if it seems thin initially. Temperature remains crucial keep it hot enough to activate the flour’s thickening power, but not so hot that it scorches.
For silky texture, strain the gravy through a fine mesh sieve after it reaches the desired consistency. This removes any stubborn lumps and creates restaurant quality smoothness.
Final Seasoning and Enrichment
Once your gravy reaches nappe consistency (it should coat the back of a spoon), reduce heat to low and whisk in cream gradually. This step requires gentle heat too much heat will cause the cream to curdle and ruin your beautiful sauce.
Season thoughtfully with salt and white pepper, tasting after each addition. The gravy should taste rich and savory with balanced seasoning that enhances rather than masks the chicken flavor.
Fresh herbs go in during the last minute of cooking. This preserves their bright flavor and prevents them from turning bitter from prolonged heat exposure.
Cooking Techniques & Science for Beginners: Learn to Cook Smarter

Understanding Roux Chemistry
A roux is essentially a cooked mixture of fat and flour that acts as both thickener and flavor enhancer. When flour proteins cook, they develop nutty, complex flavors while the starches swell and create thickening power. The fat protects flour particles from clumping and contributes richness.
Different roux colors provide different flavors and thickening strengths. A blonde roux (light golden) offers maximum thickening power with subtle nutty flavor perfect for chicken gravy. Darker roux develop more complex flavors but lose thickening ability.
Temperature Control Mastery
Maintaining proper temperature throughout the process prevents common gravy disasters. Too high heat creates lumps, scorching, and broken emulsions. Too low heat prevents proper thickening and flavor development.
The ideal temperature range keeps the mixture gently bubbling without violent boiling. You should see small bubbles breaking the surface consistently, indicating active thickening without aggressive heat that damages delicate proteins.
Emulsification Principles
Great gravy is actually an emulsion a stable mixture of fat and water that shouldn’t normally combine. The flour acts as an emulsifier, helping fat particles stay suspended in the liquid base. Gentle heat and constant whisking maintain this delicate balance.
When cream enters the equation, you create an even more complex emulsion. The cream’s fat content stabilizes the sauce while adding luxurious mouthfeel. Add it slowly and keep temperatures moderate to prevent breaking.
Essential Equipment for Making Easy Homemade Chicken Gravy
A heavy bottomed saucepan distributes heat evenly and prevents scorching. Thin pans create hot spots that can ruin your roux before you realize what’s happening.
A quality whisk makes all the difference in creating smooth texture. Look for one with flexible wires that can reach pan corners and break up potential lumps effectively.
A fine mesh strainer ensures professional smoothness by catching any stubborn lumps or herb bits that might affect texture.
Serving & Pairing Suggestions
Classic Presentations
Serve immediately in a warmed gravy boat or pour directly over mashed potatoes, allowing it to pool in the valleys and coat every bite. The visual appeal of glossy, golden gravy cascading over fluffy potatoes is part of the experience.
For biscuits and gravy, serve alongside warm, flaky buttermilk biscuits that can soak up every precious drop. The contrast between tender biscuit interior and rich, savory gravy creates textural magic.
Creative Applications
This gravy transforms simple roasted vegetables into something special. Drizzle over roasted carrots, Brussels sprouts, or cauliflower for an instant upgrade that makes vegetables irresistible.
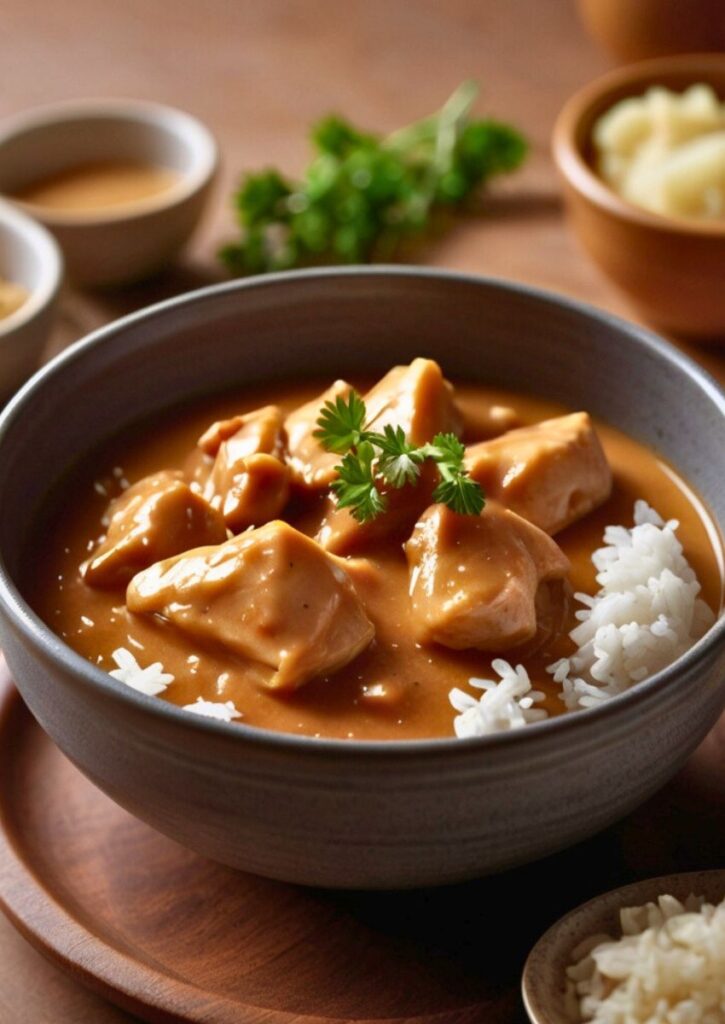
Use as a base for chicken pot pie filling, adding diced vegetables and shredded chicken for a complete meal. The gravy provides the creamy binding that holds everything together beautifully.
Try it over crispy fried chicken for the ultimate comfort food combination. The rich gravy contrasts beautifully with crispy coating while keeping the meat incredibly moist.
Wine and Beverage Pairings
A crisp white wine like Chardonnay or Sauvignon Blanc cuts through the richness without overwhelming delicate chicken flavors. The acidity brightens the palate between bites.
For non alcoholic options, sparkling water with lemon or unsweetened iced tea provide palate cleansing properties that complement rich gravy perfectly.
Advanced Variations
Herb Infused Gravy
Create depth by infusing your stock with fresh herb bundles before making gravy. Tie together thyme, sage, and bay leaves with kitchen twine, simmer in the stock for 15 minutes, then remove before proceeding with the recipe.
Mushroom Enhanced Version
Sauté sliced mushrooms until golden, then add to finished gravy for earthy complexity. Cremini or shiitake mushrooms work particularly well, adding umami depth that complements chicken beautifully.
Wine Enriched Gravy
Deglaze your roasting pan with white wine before adding stock. This technique captures all the caramelized bits while adding subtle acidity that brightens the finished sauce.
Troubleshooting Common Issues
Lumpy gravy: Strain through a fine mesh sieve and whisk vigorously. For stubborn lumps, use an immersion blender briefly to smooth the texture.
Too thin: Make a slurry with equal parts flour and cold water, then whisk into simmering gravy gradually until you reach the desired thickness.
Too thick: Thin with warm stock or cream, adding gradually while whisking to maintain smooth consistency.
Broken or separated gravy: Remove from heat immediately and whisk in cold butter one piece at a time to re emulsify the sauce.
Storage and Reheating
Properly made chicken gravy keeps refrigerated for up to four days in a sealed container. The surface may develop a skin, but you can whisk this out easily during reheating.
To reheat, warm gently over low heat while whisking constantly. Add a splash of stock or cream if the consistency seems too thick. Avoid high heat, which can cause the gravy to break or develop an unpleasant texture.
For longer storage, freeze portions in ice cube trays, then transfer to freezer bags. Individual portions thaw quickly and provide just enough gravy for single servings.
Perfect easy homemade chicken gravy represents the intersection of technique, patience, and understanding. It’s not about following a rigid formula it’s about developing the skills to create something greater than the sum of its parts. The smooth texture, rich flavor, and versatility of well made gravy transforms ordinary meals into memorable experiences.
Master this technique, and you’ll have a skill that serves you for life. Whether you’re preparing Sunday dinner for family or impressing dinner guests, exceptional easy homemade chicken gravy elevates everything it touches. The key lies in respecting the process, understanding the science, and never rushing the steps that create liquid perfection.
Remember: great easy homemade chicken gravy isn’t made, it’s crafted. Each batch teaches you something new about heat control, seasoning balance, and texture development. Embrace the learning process, trust your instincts, and soon you’ll be creating easy homemade chicken gravy that rivals the best restaurants or even grandmother’s legendary Sunday sauce.
Frequently Asked Questions
Can I make easy homemade chicken gravy ahead of time?
Absolutely, but with caveats. Make the easy homemade chicken gravy completely, then cool and refrigerate for up to 3 days. Reheat gently over low heat, whisking constantly and adding warm stock if needed to restore consistency. The texture might be slightly different, but the flavor remains excellent.
Why does my gravy always turn out lumpy?
Lumps form when flour isn’t properly incorporated into fat, or when liquid is added too quickly to the roux. Always cook flour and fat together thoroughly before adding liquid, and incorporate stock gradually while whisking vigorously. A fine mesh strainer can save lumpy gravy after the fact.
What’s the difference between using drippings versus stock?
Drippings provide much deeper, more complex flavor because they contain concentrated chicken essence and caramelized bits from roasting. Stock works well but produces lighter flavor. For best results, combine both use drippings as your base and extend with stock to reach desired quantity.
How thick should proper gravy be?
Perfect gravy should coat the back of a spoon without being gloppy or thin. It should flow smoothly but cling to food surfaces. Think of it as slightly thicker than heavy cream but much thinner than pudding. The consistency should allow it to pool slightly when poured but not run off food immediately.
Can I fix oversalted gravy?
Yes, but prevention is better than correction. Add unsalted stock or cream to dilute saltiness, then adjust other seasonings accordingly. A small amount of sugar can help balance excessive salt, but use sparingly. For severely oversalted gravy, make a fresh batch and combine with the salty version to balance flavors

Swiftly Captions by Tina Smith — Quick, flavorful food recipes made simple, bringing fresh inspiration to your kitchen every day


