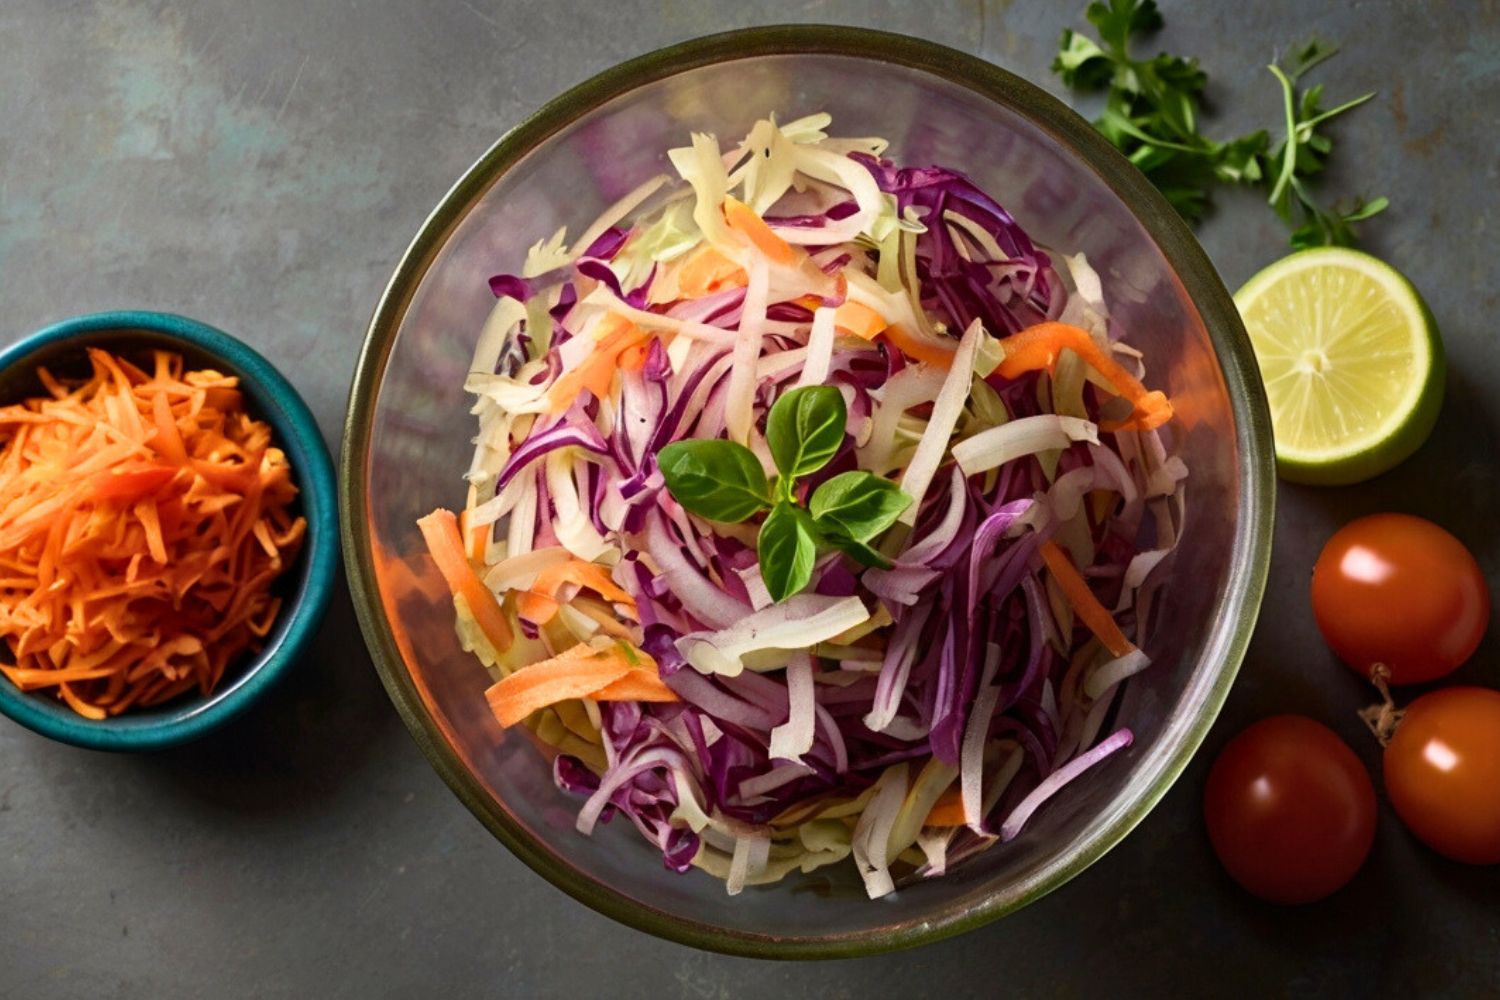
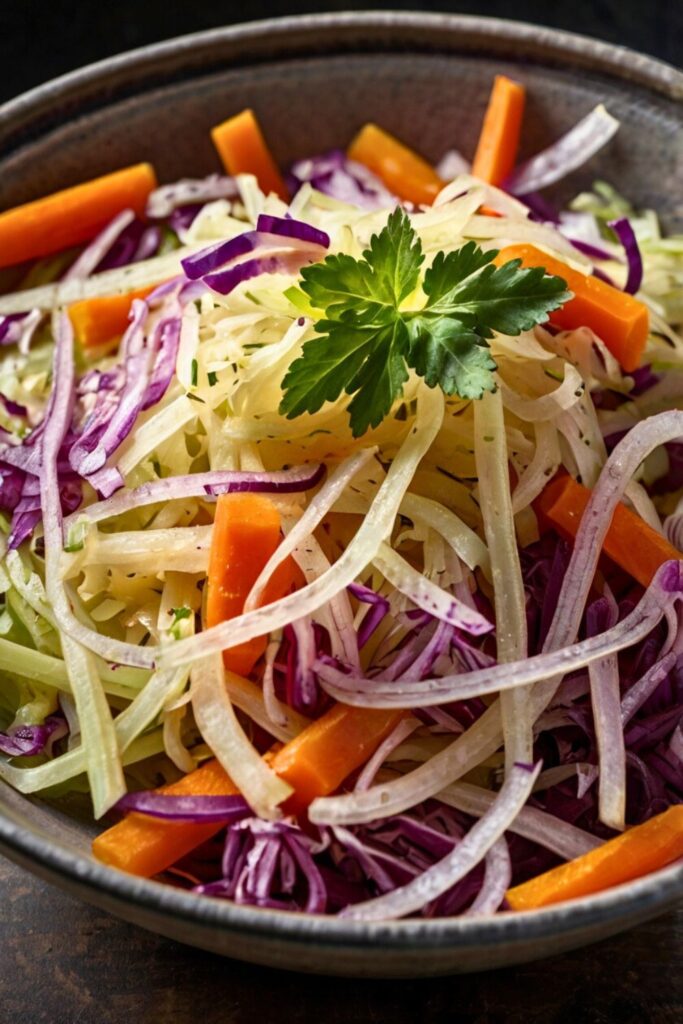
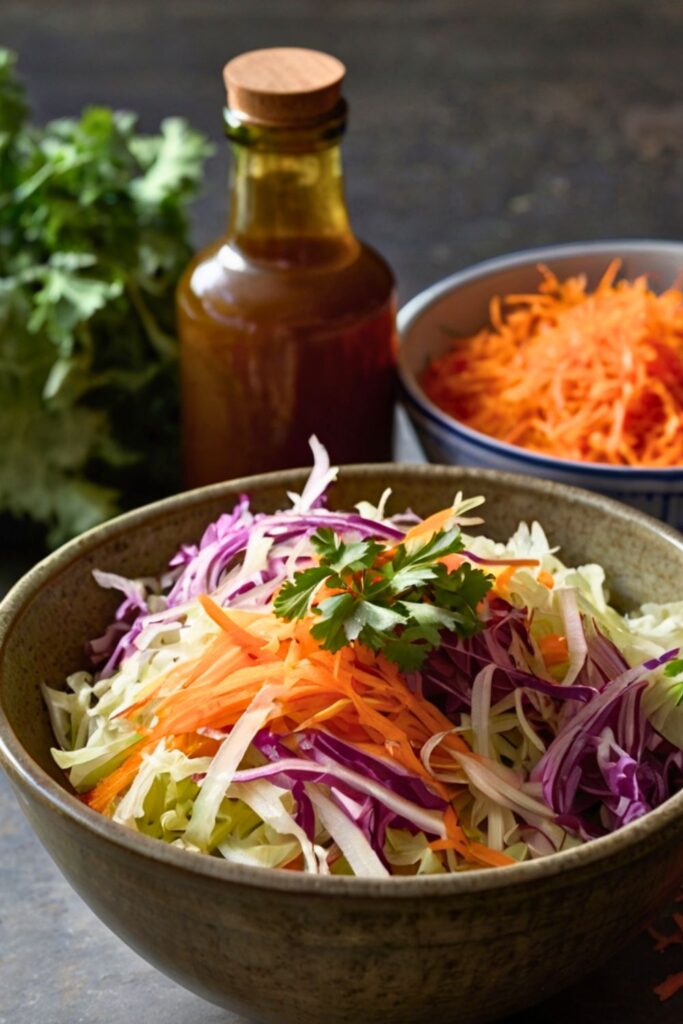
Have you ever tasted something so simple yet bold it transforms your entire meal? That’s the magic of Curtido Salvadoran, a tangy, crunchy, fermented cabbage slaw that brings life to every bite. Made with cabbage, carrots, onions, and oregano soaked in vinegar, it’s a staple in Salvadoran cuisine, especially served with warm pupusas.
This Easy Curtido Recipe (Salvadoran) delivers all that bold, zesty flavor with just a few everyday ingredients and simple steps.
I first tried Curtido Salvadoran at a roadside stall in El Salvador. The pupusas were delicious, but it was the curtido that stole the show. Crisp, zesty, and refreshing, it cut through the richness and added a punch of flavor I’ll never forget. It’s simple, but unforgettable.
In this post, you’ll learn how to make Curtido Salvadoran at home with easy steps and everyday ingredients. I’ll also share tips to get the perfect ferment and explain what makes this dish culturally and culinarily special.
Whether you’re looking to explore authentic Latin flavors or just want a vibrant, healthy side dish, Curtido Salvadoran is the perfect addition to your table. Get ready to add a fresh, flavorful twist to your meals, one crunchy bite at a time..
The Cultural Heritage Behind Curtido Salvadoran

Curtido Salvadoran emerged from necessity during El Salvador’s colonial period when refrigeration didn’t exist. Indigenous cooks adapted European fermentation techniques, incorporating local chiles and vegetables. This fusion created something uniquely Salvadoran that has remained virtually unchanged for centuries.
Every Salvadoran family guards their Curtido Salvadoran recipe fiercely. Some add carrots for sweetness, others include radishes for extra bite. The variations are endless, but the core remains the same: cabbage, onions, jalapeños, and time.
The name “curtido” comes from the Spanish verb “curtir,” meaning to tan or cure leather. It’s a fitting metaphor the vegetables undergo a transformation through fermentation that preserves them while developing complex flavors.
Understanding the Science of Fermentation
Fermentation isn’t magic, though it might seem like it. Naturally occurring lactobacilli bacteria on the vegetables consume sugars and produce lactic acid. This acid preserves the vegetables while creating that distinctive tangy flavor we crave.
The salt concentration is crucial here. Too little salt allows harmful bacteria to flourish; too much kills the beneficial ones. The sweet spot sits around 2-3% salt by weight enough to create the perfect environment for lacto fermentation.
Temperature plays a vital role too. Warmer conditions speed fermentation but can lead to mushy vegetables. Cooler temperatures slow the process but maintain better texture. Most experts recommend fermenting curtido at room temperature for 3-5 days, then refrigerating to slow the process.
Ingredients & Substitutions
Primary Ingredients:
- 1 medium green cabbage head (about 2 pounds), finely shredded
- 1 large white onion, thinly sliced
- 3-4 fresh jalapeño peppers, sliced into rings
- 2 tablespoons kosher salt (avoid iodized salt it can inhibit fermentation)
- 1 tablespoon dried oregano
- 1 bay leaf
- 1 cup white vinegar
- 1 cup warm water
Optional Enhancements:
- 1 large carrot, julienned (adds natural sweetness)
- 2-3 radishes, thinly sliced (provides extra crunch)
- 1 teaspoon cumin seeds (traditional in some regions)
- 2 cloves garlic, minced (intensifies flavor)
Smart Substitutions:
When jalapeños aren’t available, serrano peppers work beautifully just use fewer since they pack more heat. For a milder version, substitute with poblano peppers or even bell peppers, though you’ll lose some authenticity.
Red cabbage can replace green cabbage for a stunning purple curtido that’s Instagram worthy. The flavor remains nearly identical, but the anthocyanins in red cabbage provide additional antioxidants.
Apple cider vinegar substitutes well for white vinegar and adds subtle complexity. Some traditionalists swear by it, claiming it produces superior fermentation results.
For those avoiding nightshades, omit the peppers entirely and add extra oregano and cumin. While not traditional, it creates a delicious sauerkraut style condiment that pairs wonderfully with Central American dishes.
Step by Step Instructions
Day 1: Preparation
Start by shredding your cabbage as finely as possible. A sharp knife works, but a mandoline slicer or food processor saves time and ensures uniform pieces. Uniformity matters it ensures even fermentation and prevents some pieces from becoming mushy while others remain tough.
Place the shredded cabbage in a large mixing bowl and sprinkle with salt. Mix thoroughly with your hands, massaging the salt into every strand. This process draws out moisture and begins breaking down cell walls.
Add the sliced onions, jalapeños, and any optional vegetables. The jalapeño seeds can stay or go seeds add heat but can make the curtido bitter if over fermented. I prefer removing about half for balanced heat.
Creating the Brine
Combine warm water and vinegar in a separate bowl. The water should be warm enough to dissolve the salt completely but not hot enough to kill beneficial bacteria. Think baby bottle temperature warm to the touch but not scalding.
Add oregano and bay leaf to the brine. Some cooks toast the oregano first for deeper flavor, but fresh is perfectly acceptable. Let the brine cool to room temperature before proceeding.
The Packing Process
Transfer the salted vegetables to clean glass jars, leaving about 2 inches of headspace. Pack them down firmly with a wooden spoon or clean hands you want to eliminate air pockets that could harbor harmful bacteria.
Pour the cooled brine over the vegetables until they’re completely submerged. This is critical any vegetables exposed to air will likely develop mold. If needed, place a clean weight (like a smaller jar filled with water) on top to keep everything submerged.
Days 2-5: The Waiting Game
Cover the jars with cheesecloth secured with rubber bands. This allows gases to escape while preventing dust and insects from entering. Never use airtight lids during active fermentation the buildup of gases could cause the jars to explode.
Place the jars at room temperature away from direct sunlight. Check daily and push down any vegetables that float to the surface. You’ll notice bubbling within 24-48 hours this is normal and indicates healthy fermentation.
Taste the curtido after three days. It should be tangy but not overpoweringly sour. The vegetables should maintain some crunch while being tender enough to bite through easily.
Common Mistakes to Avoid
Never use metal utensils during fermentation they can react with the acid and create off-flavors. Stick to wood, plastic, or glass implements throughout the process.
Don’t panic if you see white foam on the surface. This kahm yeast is harmless and can be skimmed off. However, if you notice any fuzzy mold (especially black or green), discard the entire batch and start over.
Patience is key here. Rushing the process by increasing temperature might speed fermentation but often results in mushy, overly sour curtido that lacks the complex flavors of properly fermented versions.
Cooking Techniques & Science
The magic of curtido lies in controlled decomposition. Lactobacillus bacteria naturally present on vegetables consume sugars and starches, producing lactic acid as a byproduct. This acid not only preserves the vegetables but creates the signature tangy flavor.
Salt concentration creates a selective environment where beneficial bacteria thrive while harmful microorganisms can’t survive. This is why precise measurements matter too little salt invites spoilage, while too much kills everything, including the good bacteria.
The anaerobic environment (absence of oxygen) is crucial for proper fermentation. Oxygen allows aerobic bacteria and molds to flourish, which can ruin the entire batch. This is why keeping vegetables submerged under brine is non negotiable.
Temperature Control Strategies
Room temperature fermentation (68-72°F) typically takes 3-5 days. Warmer temperatures accelerate the process but can lead to mushy textures and overly sour flavors. Cooler temperatures slow fermentation but often produce superior texture and more complex flavors.
Some professional kitchens use fermentation chambers set at exactly 70°F for consistent results. Home cooks can achieve similar control by placing jars in a consistently cool area like a basement or using a fermentation belt designed for homebrewing.
Essential Equipment
Glass jars are preferred over plastic because they don’t absorb odors or stain. Mason jars work perfectly, but any wide mouth glass container will suffice. Avoid metal containers entirely the acid will react with metal and create off flavors.
A kitchen scale ensures accurate salt measurements, which is crucial for successful fermentation. Measuring salt by volume can be inconsistent due to varying crystal sizes, but weight measurements are always precise.
Advanced Techniques for Professional Results
Dry Salting Method
Instead of using brine, some professional chefs rely entirely on dry salting to draw out the vegetables’ natural moisture. This technique requires more precision but often produces superior texture and flavor concentration.
Mix the shredded vegetables with salt and let them sit for 2-3 hours until they release significant liquid. Pack them into jars with their own juices no additional brine needed. This method typically produces a more concentrated flavor profile.
Temperature Stepping
Start fermentation at room temperature for 24 hours to kickstart bacterial activity, then move to a cooler location (around 60°F) to slow the process. This technique allows for better control over texture while still achieving proper fermentation.
Some chefs use a three stage process: 24 hours at room temperature, 48 hours at 65°F, then refrigeration. This creates incredibly complex flavors while maintaining perfect texture.
Serving & Pairing Suggestions
Curtido shines brightest alongside rich, fatty foods where its acidity cuts through richness beautifully. The classic pairing with pupusas isn’t accidental the fermented vegetables balance the dense, cheesy masa perfectly.
Serve curtido at room temperature for maximum flavor impact. Cold curtido mutes the complex flavors that fermentation creates. Let it sit out for 15-20 minutes after removing from the refrigerator.
Creative Serving Ideas
Curtido elevates simple grilled meats into restaurant quality dishes. The acidity tenderizes tough cuts while the fermented flavors add depth that expensive cuts often lack naturally.
Use curtido as a base for salad dressings by blending it with olive oil and lime juice. The fermented vegetables add umami depth that transforms simple greens into something memorable.
Top tacos, burritos, or quesadillas with curtido for authentic Central American flair. The acidity brightens heavy dishes while adding textural contrast.
Beverage Pairings
Cold beer pairs naturally with curtido’s tangy heat. The carbonation cleanses the palate between bites while the malt sweetness balances the acidity.
Horchata provides a cooling contrast to curtido’s heat while the rice milk’s richness complements the fermented flavors. This combination is popular throughout Central America.
Fresh fruit juices like tamarind or hibiscus agua fresca create beautiful flavor harmonies with curtido’s complexity. The natural sweetness balances the sourness while complementing the heat.
Storage and Longevity
Properly fermented curtido can last 6-8 months in the refrigerator when stored correctly. The key is maintaining the anaerobic environment that prevented spoilage during fermentation.
Always use clean utensils when serving curtido to prevent contamination. Never double dip or use utensils that have touched other foods. Contamination is the fastest way to spoil a perfectly good batch.
The flavor continues evolving even during refrigerated storage, becoming more complex over time. Many aficionados prefer curtido that’s aged for several weeks over freshly fermented versions.
Signs of Proper Storage
Well stored curtido maintains its crunch and bright color for months. The brine should remain relatively clear with perhaps some slight cloudiness from fermentation this is normal and harmless.
If the curtido develops an off smell (rotten rather than tangy), slimy texture, or visible mold, discard it immediately. Trust your senses good curtido smells appealingly sour, never putrid.
Troubleshooting Common Issues
Mushy Texture Problems
Over fermentation is the usual culprit behind mushy curtido. Once the vegetables lose their crunch, there’s no recovering the texture. Prevention is key taste daily and refrigerate when the texture is perfect.
Using old vegetables can also cause mushiness. Fresh, crisp cabbage and onions are essential for proper texture. Wilted vegetables won’t improve during fermentation.
Overly Sour Results
Curtido that’s too sour has usually fermented too long or at too high a temperature. While you can’t reverse the sourness, diluting with fresh vegetables and a bit of sugar can make it more palatable.
Slow or Stalled Fermentation
If fermentation isn’t beginning after 48 hours, the salt concentration might be too high, or the temperature too cool. Try moving to a warmer location or adding a pinch of sugar to feed the bacteria.
Using chlorinated water can also inhibit fermentation since chlorine kills bacteria indiscriminately. Always use filtered or distilled water for best results.
Regional Variations and Innovations
Different regions of El Salvador have developed unique curtido variations that reflect local tastes and available ingredients. Coastal areas often add lime juice for extra brightness, while mountain regions prefer earthier spices like cumin.
Modern chefs are experimenting with curtido by incorporating non traditional vegetables like Brussels sprouts, fennel, or even fruit like pineapple. While purists might object, these innovations often create delicious results.
Restaurant Applications
High end restaurants are discovering curtido’s versatility beyond traditional Central American cuisine. Its complex flavor profile makes it an excellent component in fusion dishes where acidity and umami are needed.
Some chefs use curtido liquid as a base for vinaigrettes or cocktail mixers. The fermented brine has incredible depth that adds sophistication to simple preparations.
Final Thoughts on Easy Curtido Recipe (Salvadoran)
Curtido Salvadoran represents the beautiful intersection of necessity, tradition, and flavor that defines the best of Central American cuisine. This fermented cabbage relish transforms simple vegetables into something transcendent through patience and proper technique.
The process might seem intimidating at first, but Curtido Salvadoran is remarkably forgiving once you understand the basic principles. Salt, time, and proper anaerobic conditions will almost always produce delicious results.
Whether you’re serving traditional pupusas or experimenting with fusion cuisine, Curtido Salvadoran adds layers of complexity that elevate any dish. The investment of time yields returns that last for months, providing you with a versatile condiment that improves nearly everything it touches.
Master the basic recipe first, then experiment with additions and variations that suit your taste preferences. Remember that the best Curtido Salvadoran comes from understanding the process, not just following instructions blindly.
Frequently Asked Questions about Easy Curtido Recipe (Salvadoran)
Q: How long does curtido need to ferment before it’s ready to eat?
A: Curtido typically needs 3-5 days at room temperature for proper fermentation. You’ll know it’s ready when it tastes tangy but still maintains a crisp texture. The vegetables should be tender enough to bite through easily but not mushy. Taste it daily starting on day 3 to monitor progress.
Q: Can I make curtido without the fermentation process?
A: Yes, you can make a quick version by simply marinating the vegetables in the vinegar brine for a few hours. However, this won’t develop the complex flavors and beneficial probiotics that true fermentation creates. The quick version tastes more like pickled vegetables rather than authentic curtido.
Q: What should I do if my curtido develops mold during fermentation?
A: If you see any fuzzy mold (especially black, green, or blue), discard the entire batch immediately. White film or foam on the surface (kahm yeast) is usually harmless and can be skimmed off. To prevent mold, ensure vegetables stay completely submerged under brine and use proper salt concentrations. Always trust your nose good curtido smells tangy, never rotten.
Q: How can I make my curtido spicier or milder?
A: For spicier curtido, increase the jalapeños or substitute with serrano or habanero peppers. You can also add crushed red pepper flakes during fermentation. For milder versions, remove jalapeño seeds and membranes, or substitute with bell peppers. Some people add a small amount of sugar to balance heat while maintaining flavor complexity.
Q: Can I use curtido liquid in other recipes?
A: Absolutely! The fermented brine makes an excellent base for salad dressings, marinades, or even cocktail mixers. Many chefs use curtido liquid to add umami and acidity to sauces and soups. It’s packed with beneficial probiotics and has incredible flavor depth that enhances many dishes beyond traditional Central American cuisine.

Swiftly Captions by Tina Smith — Quick, flavorful food recipes made simple, bringing fresh inspiration to your kitchen every day


