Picture this: you’re scrolling through your phone at 3 PM on a Tuesday, stomach growling, when your best friend texts you a photo that stops you mid scroll. It’s a plate of succulent lobster that looks like it belongs in a five star restaurant, but the caption reads “Made this in 20 minutes while binge watching Netflix.” That friend just discovered what I’m about to share with you, the art of creating restaurant quality Lazy Lobster without breaking a sweat or your bank account.
Here’s what nobody tells you about this Lazy Lobster technique: it doesn’t need fancy methods or complicated sauces to shine. In fact, the best lobster dishes are often the simplest ones. This approach breaks every rule about “proper” lobster preparation, and honestly? That’s exactly why it works so brilliantly.
The magic isn’t in complexity, it’s in understanding that lobster wants to be the star, not buried under layers of unnecessary fuss. We’re gonna strip away all the intimidating parts and focus on what really matters: bringing out that sweet, briny perfection that makes lobster so special.
What Makes This Lazy Lobster So Amazing?
Let’s talk about why this particular Lazy Lobster approach will change your weeknight dinner game forever. Traditional lobster recipes often involve multiple pots, precise timing, and enough stress to make you order takeout instead. But here’s the thing, lobster is naturally tender and flavorful. It doesn’t need us to complicate things.
This method uses a single pan and relies on gentle heat to coax out every bit of that oceanic sweetness. No boiling water. No cracking shells over newspapers. Just pure, simple technique that lets the lobster do what it does best.
The “amazing” part comes from a little secret I learned from a Maine fisherman’s wife during a food writing assignment. She taught me that the key to perfect Lazy Lobster isn’t in the cooking time, it’s in the temperature control and knowing exactly when to stop.
This technique transforms expensive shellfish into an accessible weeknight meal. You’ll master restaurant quality results without the restaurant level stress. That’s the beauty of this lazy approach, maximum impact, minimum effort.
Why Lazy Lobster Works Better Than Traditional Methods
Traditional lobster cooking methods were designed for commercial kitchens with industrial equipment. Home cooks don’t need those complicated techniques. This Lazy Lobster method acknowledges that your kitchen is different, and that’s actually an advantage.
Commercial kitchens often overcook lobster because they’re cooking in large batches. Your home kitchen lets you give each tail individual attention. You can watch for those subtle visual cues that spell perfection.
The lazy approach also reduces waste. No giant pots of boiling water. No special tools you’ll use once a year. Just basic equipment you already own and techniques that make sense for real home cooking.
Getting Your Hands on the Good Stuff
Before we dive into cooking, let’s talk about selecting lobster that’ll make this dish sing. Fresh is obviously ideal, but don’t stress if frozen is your only option. Quality frozen lobster tails can be absolutely stunning when handled right.
Look for tails that feel heavy for their size. The shells should have that deep reddish brown color with no black spots or strong fishy smell. If you’re buying fresh, the meat should be firm and translucent, not mushy or opaque.
Here’s a pro tip that most home cooks miss: let frozen lobster thaw slowly in the refrigerator overnight. Never rush it with warm water or the microwave. Patience here pays off in texture later.
When shopping, don’t get intimidated by the fishmonger. Ask questions. A good seafood counter will let you smell the lobster before buying. Fresh lobster smells like the ocean, clean and briny, never fishy or ammonia like.
Ingredients That Make Magic Happen
For this Lazy Lobster masterpiece, you’ll need:
- 4 lobster tails (6-8 oz each), thawed if frozen
- 4 tablespoons butter (the good stuff, not margarine)
- 3 cloves garlic, minced fine
- 1 lemon, juiced and zested
- 2 tablespoons white wine (or chicken broth)
- 1 teaspoon fresh thyme leaves
- Salt and white pepper to taste
- 1 tablespoon olive oil
- Fresh parsley for garnish
- Optional: 1 pinch of paprika for color
Smart Swaps for Every Kitchen
Don’t have white wine? Dry sherry works beautifully, or even a splash of dry vermouth. No fresh thyme? Dried works too, just use half the amount since it’s more concentrated.
Butter running low? You can substitute with ghee for a nuttier flavor, or even a good quality olive oil if you’re avoiding dairy. The key is using something with richness to complement the lobster’s natural sweetness.
Can’t find white pepper? Regular black pepper is fine, but white pepper gives cleaner heat that doesn’t compete with delicate lobster flavor. It’s worth seeking out if you can find it.
Out of fresh lemons? Bottled lemon juice works in a pinch, but fresh really makes a difference. The oils in fresh lemon zest add aromatic complexity that bottled juice can’t match.
The Lazy Lobster Step by Step Magic
Preparing Your Lobster Tails
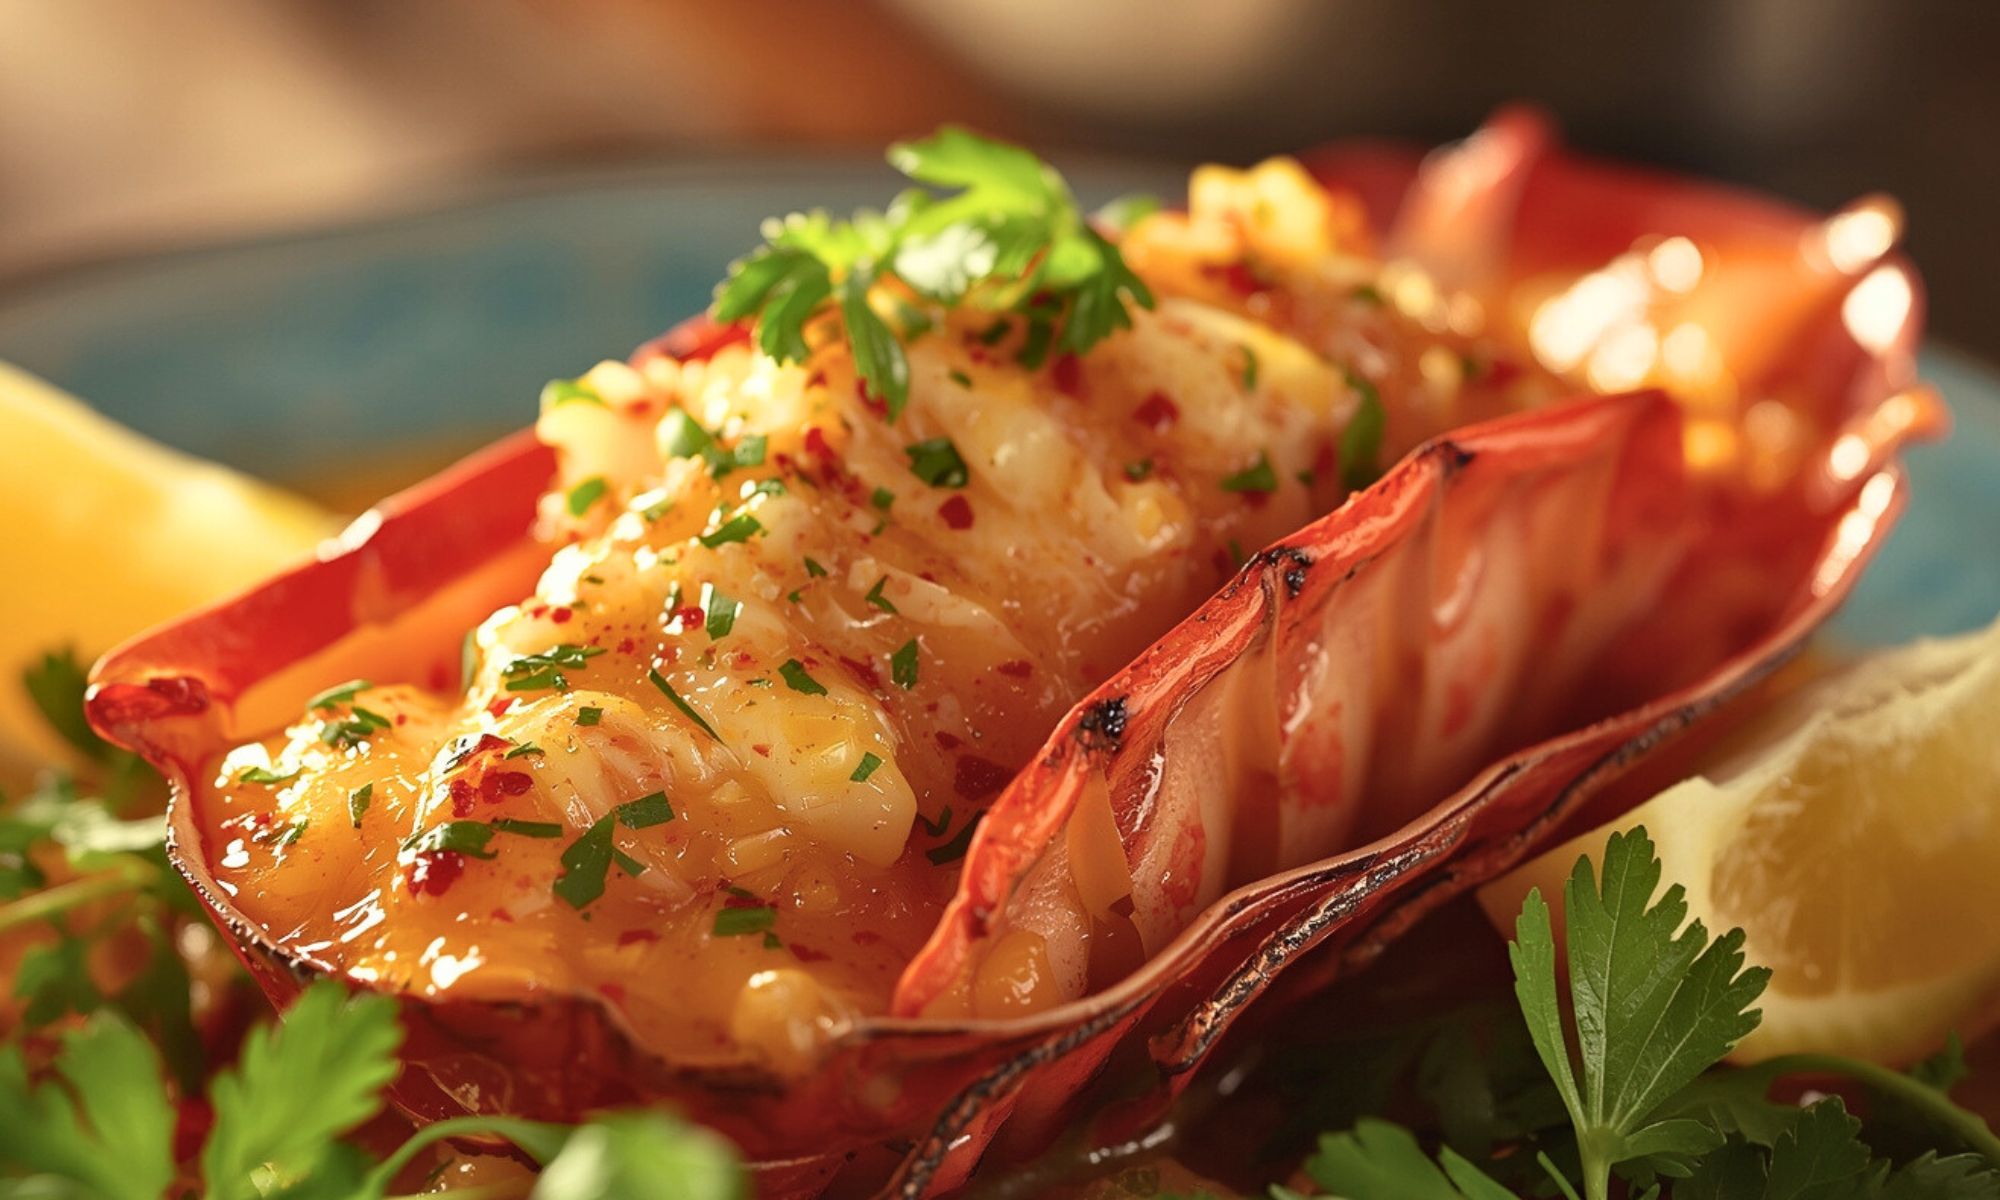
First things first, we’re gonna butterfly these tails, and it’s easier than it sounds. Using kitchen shears, cut through the top of the shell lengthwise, stopping just before the tail fin. Don’t cut all the way through the meat.
Gently pry open the shell and lift the meat up, letting it rest on top of the shell. This technique, called “piggybacking,” gives you that fancy restaurant presentation while ensuring even cooking.
Pat the meat dry with paper towels. This step is crucial, moisture is the enemy of that beautiful golden sear we’re after. Really dry those tails. Use multiple paper towels if needed.
Score the meat lightly with a sharp knife in a crosshatch pattern. This prevents curling and helps seasonings penetrate. Don’t cut deep, just barely break the surface.
The One Pan Wonder Method
Heat your olive oil in a large oven safe skillet over medium heat. While it’s warming, season your lobster tails lightly with salt and white pepper. Remember, lobster is naturally salty, so go easy.
Place the tails meat side down in the hot pan. You should hear a gentle sizzle, not an angry sputter. If it’s too loud, turn the heat down a touch.
Here’s where patience pays off: let them sear undisturbed for 2-3 minutes. Don’t peek, don’t poke, don’t worry. The meat will release naturally when it’s ready to flip.
This is the moment that separates good Lazy Lobster from great. That initial sear creates flavors you simply can’t get any other way. The Maillard reaction, that’s the browning that happens, adds depth and complexity.
Flip the tails shell side down and immediately add your butter to the pan. As it melts and starts to foam, toss in the minced garlic. The residual heat will cook the garlic perfectly without burning it.
The Basting Technique
Baste the lobster meat with the foamy butter using a spoon. This technique, called arroser, adds incredible richness and ensures even cooking. Do this for about 1-2 minutes, then add your white wine and lemon juice.
The liquid will bubble up and steam, that’s exactly what we want. Sprinkle in your thyme leaves and give the pan a gentle shake to distribute everything evenly.
Watch the butter carefully during this phase. It should stay golden and foamy, not brown. If it starts darkening too much, pull the pan off the heat for a moment.
This basting step is what makes this Lazy Lobster technique so effective. You’re essentially poaching the lobster in flavored butter while maintaining that gorgeous seared exterior.
The Finishing Touch
If your tails are on the larger side (over 6 oz), slide the whole pan into a 400°F oven for 3-4 minutes to finish cooking. Smaller tails will be done right in the pan.
How do you know they’re perfect? The meat should be opaque white with just a hint of translucency in the very center, and it should feel firm but still give slightly when pressed with a finger.
Internal temperature should hit 145°F exactly. Any higher and your expensive Lazy Lobster becomes expensive rubber. This is where an instant read thermometer becomes your best friend.
The pan juices should be golden and aromatic, with no raw garlic smell. If the garlic still smells sharp, give it another 30 seconds over low heat.
The Science Behind Perfect Lazy Lobster

What’s really happening here is controlled protein coagulation. Lobster meat is mostly protein and water, and heat causes those proteins to firm up and squeeze out moisture. Too much heat, too fast, and you get rubbery, dry lobster.
By starting with a medium heat sear, we’re creating a flavorful crust while keeping the interior tender. The butter basting adds fat that helps conduct heat evenly, while the wine and lemon juice provide acid that brightens the natural sweetness.
The thyme isn’t just for flavor, herbs contain compounds that complement shellfish beautifully. Thyme specifically has notes that echo the briny oceanness of good lobster without overwhelming it.
Temperature is everything with shellfish. This Lazy Lobster method respects those temperature requirements while making the process foolproof for home cooks.
Understanding Your Tools
The right pan makes all the difference here. Cast iron holds heat beautifully and gives great searing power. Stainless steel works too, but might require a bit more oil to prevent sticking. Non stick pans work in a pinch, but you won’t get quite the same depth of flavor from the fond.
A good instant read thermometer takes the guesswork out. Stick it into the thickest part of the tail, you want 145°F, no more, no less.
Heavy bottomed pans distribute heat more evenly, which is crucial for this gentle Lazy Lobster cooking method. Thin pans create hot spots that can overcook sections while leaving others underdone.
Advanced Lazy Lobster Techniques
Flavor Variations
Once you’ve mastered the basic Lazy Lobster technique, try these variations. Add a pinch of saffron to the butter for Mediterranean flair. Or stir in a spoonful of Dijon mustard for French bistro vibes.
Asian inspired Lazy Lobster works beautifully too. Replace the thyme with fresh ginger and add a splash of rice wine instead of white wine. Finish with sesame oil and scallions.
For spice lovers, a tiny pinch of cayenne in the butter creates warmth without overwhelming the delicate lobster. Start small, you can always add more next time.
Presentation Secrets
Professional plating doesn’t require professional skills. Start with warm plates, cold plates steal heat from delicate seafood faster than you’d think. Run them under hot water and dry thoroughly before plating.
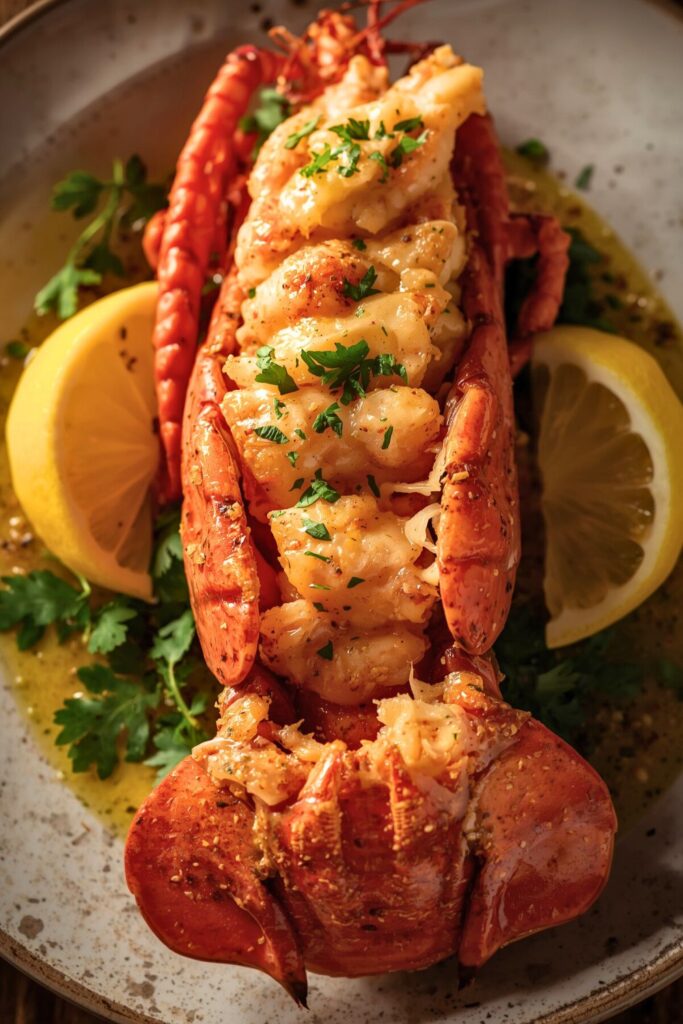
Drizzle that gorgeous pan sauce around the plate first, then nestle your Lazy Lobster on top. The contrast between the golden butter sauce and the white meat is stunning all by itself.
A simple sprinkle of fresh parsley adds color and a tiny hit of freshness that cuts through the richness. Don’t go overboard, this Lazy Lobster deserves to be the star.
Making It Beautiful and Delicious
Perfect Pairings
This Lazy Lobster pairs beautifully with simple sides that won’t compete. Think butter poached asparagus, a light arugula salad with lemon vinaigrette, or even just good crusty bread for soaking up that incredible pan sauce.
Wine wise, you want something crisp and clean. A good Sauvignon Blanc or unoaked Chardonnay complements without masking. Even a light Pinot Grigio works wonderfully with this Lazy Lobster preparation.
If you’re feeling fancy, a small portion of risotto or creamy polenta makes this feel like a special occasion meal. The creaminess plays beautifully with the lobster’s natural sweetness.
Roasted vegetables work too, but keep them simple. Roasted cherry tomatoes, blanched green beans, or even plain steamed broccoli lets the Lazy Lobster shine.
Storage and Reheating
Leftover Lazy Lobster (if there is any) keeps well for one day in the refrigerator. Reheat gently in a covered pan with a splash of butter or white wine. Never microwave, it’ll turn your beautiful lobster into seafood leather.
The pan sauce can be made ahead and refrigerated for up to three days. Reheat gently and whisk in a pat of cold butter to bring back that silky texture.
Troubleshooting Your Lazy Lobster
Common Mistakes and Solutions
Overcooked lobster happens to everyone. If your Lazy Lobster turns rubbery, don’t panic. Chop it up and fold it into pasta with that gorgeous pan sauce. Or make lobster salad with mayo and herbs.
Undercooked lobster is easier to fix. Just pop it back in the pan for another minute or two over low heat. The residual heat in the pan will usually finish the job without overcooking.
If your butter burns during the basting process, start over with fresh butter. Burnt butter adds bitter flavors that compete with the sweet lobster. It’s worth the do over.
Curled lobster tails mean you didn’t score the meat deeply enough. Next time, make those crosshatch cuts a bit deeper, about 1/4 inch into the meat.
Seasonal Considerations
Winter Lazy Lobster benefits from heartier herbs like rosemary or sage. Summer versions shine with lighter touches, maybe fresh basil or tarragon instead of thyme.
Cold weather calls for richer accompaniments. Think roasted root vegetables or creamy mashed potatoes alongside your Lazy Lobster. Hot weather pairs better with fresh salads and light vegetables.
Market availability affects your Lazy Lobster plans too. Spring brings fresh peas that are gorgeous with lobster. Fall means apple cider reductions that complement the sweetness beautifully.
Wrapping It Up
The beauty of this Lazy Lobster technique lies in its simplicity and the confidence it builds. Once you master this method, you’ll realize that restaurant quality seafood isn’t about complicated procedures, it’s about respecting good ingredients and not overthinking the process.
Remember, the goal isn’t perfection on your first try. It’s about understanding how this Lazy Lobster responds to heat and developing that instinct for when things are just right. Each time you make this, you’ll get better at reading the visual cues and trusting your timing.
The most important thing? Don’t be afraid to make this Lazy Lobster your own. Maybe you prefer a touch of cayenne for heat, or perhaps some fresh herbs from your garden. The technique stays the same, but the flavors can evolve with your preferences.
Keep it simple, keep it fresh, and let that beautiful Lazy Lobster shine. That’s what makes this dish so amazing every single time.
Frequently Asked Questions
Can I use frozen lobster tails for this Lazy Lobster recipe?
Absolutely! Frozen lobster tails work perfectly for this recipe. The key is proper thawing, move them from freezer to refrigerator the night before you plan to cook. Never thaw at room temperature or in warm water, as this can make the meat mushy. Once thawed, pat them completely dry before seasoning and cooking. Quality matters more than fresh versus frozen.
How do I know when the Lazy Lobster is perfectly cooked?
Perfect lobster meat is opaque white with just a tiny bit of translucency in the very center. It should feel firm but still give slightly when pressed with your finger. If you have an instant read thermometer, aim for 145°F in the thickest part of the tail. Overcooked lobster becomes rubbery and loses that sweet, tender texture we’re after.
What if I don’t have an oven safe skillet for this Lazy Lobster?
No problem! For smaller tails (under 6 oz), you can finish everything right on the stovetop. Just reduce the heat to medium low after adding the wine and lemon juice, cover the pan, and let it steam for 2-3 minutes. For larger tails, you can transfer them to a baking dish and finish in the oven, though you’ll miss out on some of that gorgeous pan sauce.
Can I make this Lazy Lobster recipe dairy free?
Yes, you can substitute the butter with high quality olive oil or even coconut oil for a different flavor profile. The technique remains the same, though you won’t get quite the same richness that butter provides. Ghee is another excellent option if you can tolerate clarified butter but want to avoid regular dairy.
How far ahead can I prep the Lazy Lobster tails?
You can butterfly the tails and have them ready up to 4 hours ahead of time. Keep them covered in the refrigerator and bring them to room temperature about 15 minutes before cooking. Don’t season them until just before cooking, as salt will draw out moisture and affect the searing process. The actual cooking should happen right before serving for best results.

Swiftly Captions by Tina Smith — Quick, flavorful food recipes made simple, bringing fresh inspiration to your kitchen every day


