You just got home from work. It’s 7:30 PM. You’re exhausted. The kids need dinner in twenty minutes. Takeout feels lazy again. But cooking from scratch? That’s a thirty minute commitment you don’t have. Here’s where the TOASTED ITALIAN SANDWICH becomes your superhero.
I discovered this during my craziest work week. Three deadlines. Two client meetings. Zero time to breathe. My daughter asked what’s for dinner. I almost panicked. Then I remembered my grandmother’s sandwich trick. Twenty minutes later? Everyone was happy. Including me.
This sandwich fits modern life perfectly. Fast enough for weeknight chaos. Impressive enough for unexpected guests. Satisfying enough that nobody complains. Flexible enough to use whatever’s in your fridge.
You don’t need fancy skills here. No complicated techniques to master. Just smart assembly and heat. That’s it. But the results? People think you spent an hour. You know it took twenty minutes.
Working women everywhere need this recipe. Single professionals living alone need it too. College students on tight budgets? Absolutely. Anyone juggling too much with too little time. This is your solution.
The TOASTED ITALIAN SANDWICH doesn’t require planning ahead. No marinating overnight. No advance prep on Sundays. You make it when you need it. Start to finish in under thirty minutes. That’s modern cooking at its finest.
Why the Toasted Italian Sandwich Changes Everything
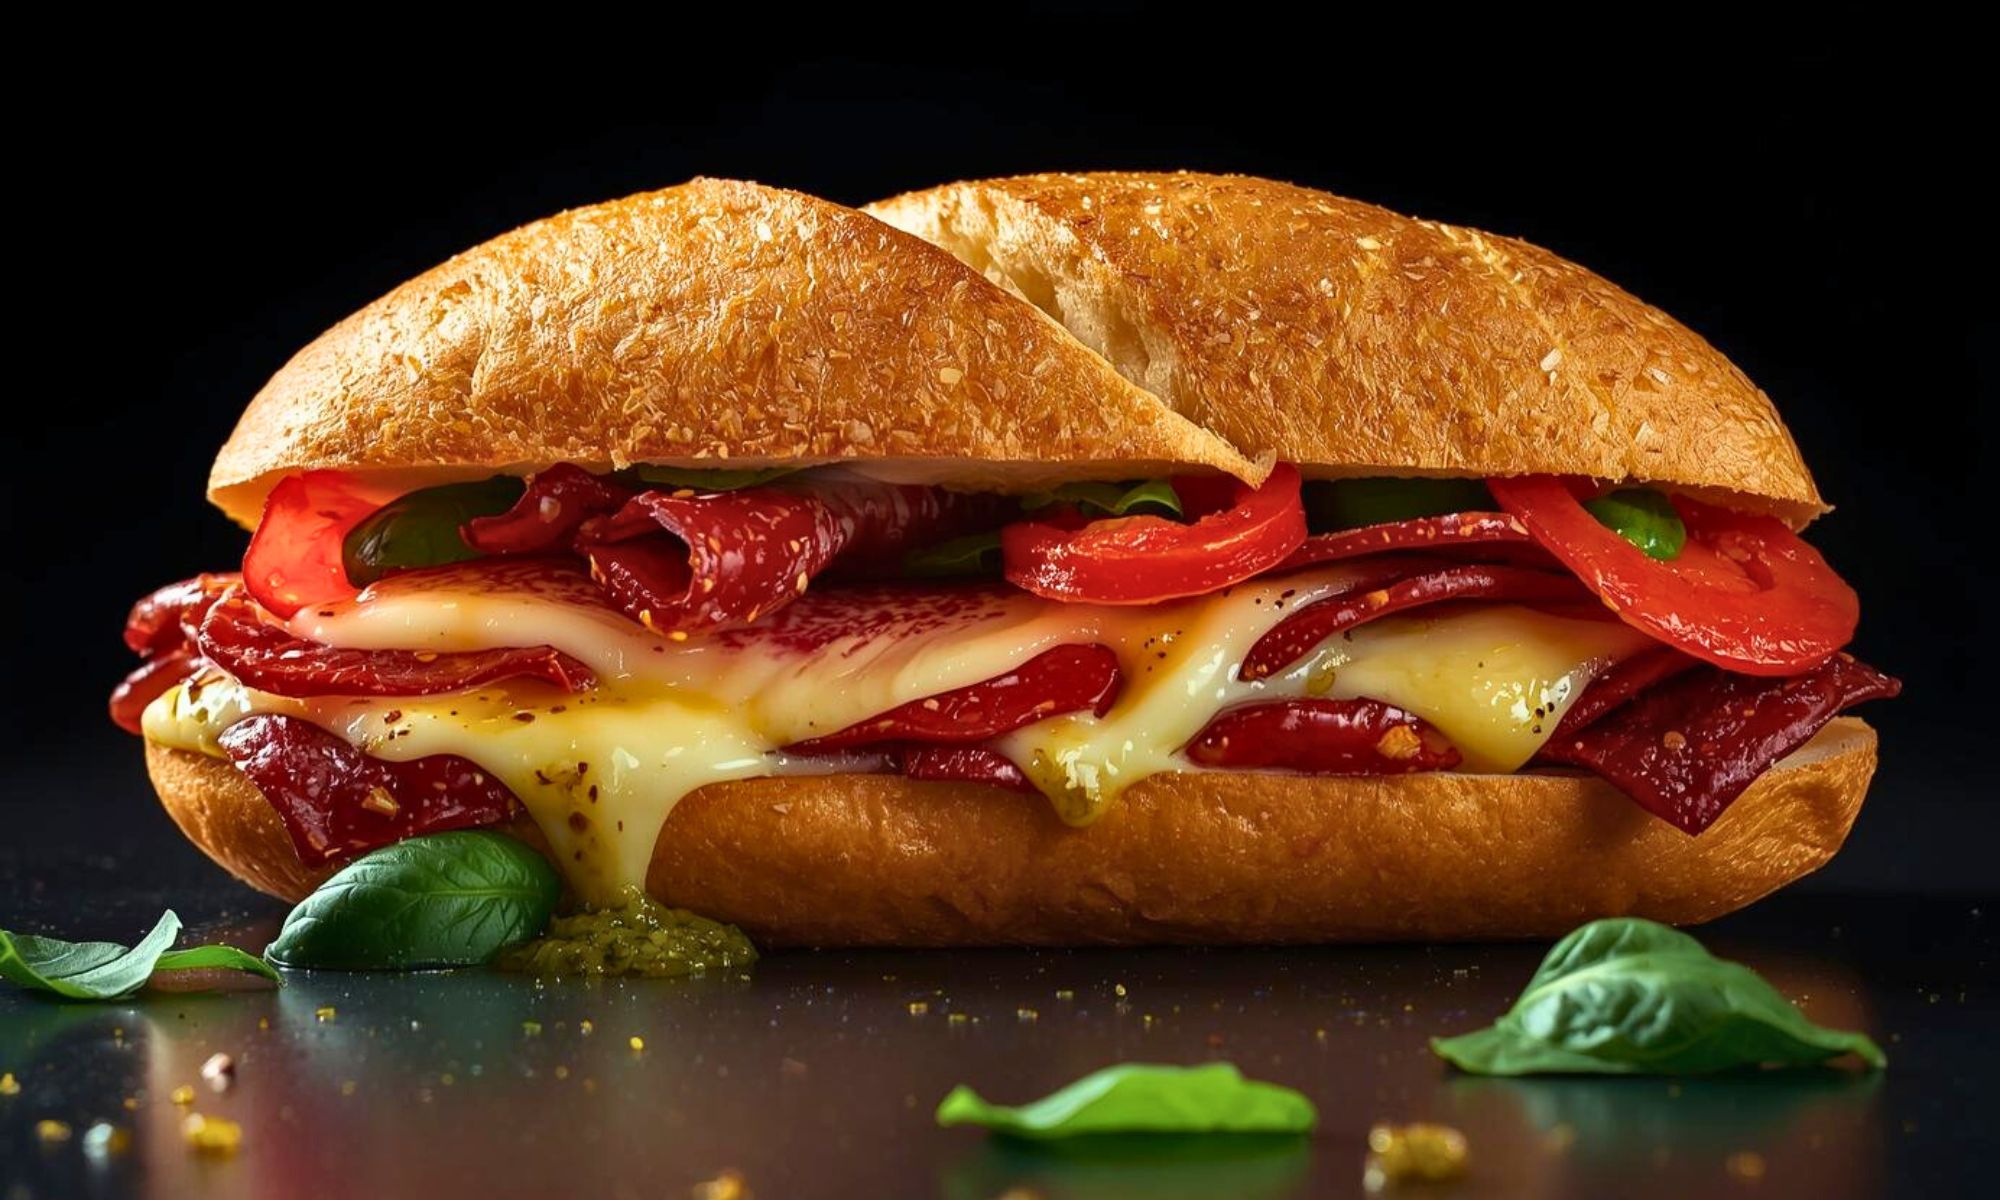
Cold Italian subs are fine for lunch. But toasted? That’s a different experience entirely. Heat transforms every single ingredient.
The cured meats release their oils. Flavors intensify dramatically. Salami edges get slightly crispy. Capicola develops caramelized spots. Everything tastes richer, deeper, better.
Cheese becomes the hero it was meant to be. Cold provolone just sits there doing nothing. Melted provolone? It binds everything together. Creates that gorgeous stretch. Makes every bite cohesive.
Bread gets a complete makeover. The exterior crisps up beautifully. Inside stays soft and yielding. That textural contrast makes people swoon.
This technique comes from old school Italian American delis. Places that understood speed and flavor equally. They fed construction workers on lunch breaks. Everyone needed something fast and filling. This delivered both.
The method spread through working class neighborhoods. Became a staple for busy families. No elaborate cooking required. Just solid technique and quality ingredients.
Modern life makes this even more relevant. You work long hours? This fits your schedule. Kids have practice at six? Make this first. Unexpected dinner guests? You’re covered.
The versatility is genuinely impressive. Lunch for tomorrow’s workday? Done. Game day feeding hungry friends? Perfect. Midnight snack when you’re starving? Absolutely.
Ingredients & Smart Swaps
Here’s what you actually need. No fancy stuff. Just things that work.
The Bread Foundation
- 1 large Italian sub roll
- Or ciabatta bread, sliced lengthwise
- Focaccia works great too
Bread choice matters more than you’d think. Italian rolls have perfect structure. Ciabatta brings extra chew. Focaccia adds herby depth. Any works. Just needs strength under pressure.
The Meat Trio
- 3 slices Genoa salami (2 ounces)
- 3 slices capicola (sweet or hot)
- 2 slices mortadella
- Optional: 2 slices prosciutto
This isn’t random selection. Each meat serves a purpose. Salami brings spice and firmness. Capicola adds sweetness and richness. Mortadella contributes smooth texture. Together they create magic.
The Cheese Situation
- 3-4 slices provolone (mild or sharp)
- Optional: 1 slice fresh mozzarella
Provolone is non negotiable here. Its tang cuts through rich meat perfectly. Sharp provolone brings attitude. Mild keeps things mellow. Mozzarella adds extra gooeyness.
The Flavor Boosters
- 3-4 pepperoncini peppers, sliced
- 3 thin tomato slices
- Shredded iceberg lettuce (1/2 cup)
- Thinly sliced red onion (optional)
- 5-6 banana pepper rings
The Dressing
- 2 tablespoons olive oil
- 1 tablespoon red wine vinegar
- 1/2 teaspoon dried oregano
- Pinch salt and black pepper
- Optional: 1/2 teaspoon Italian seasoning
Smart Swaps for Real Life
No capicola at your store? Use extra salami or sopressata. Both work beautifully. Sopressata might be spicier actually.
Provolone sold out? Try aged white cheddar instead. Not traditional but melts perfectly. Swiss works too. Fontina brings creaminess.
Can’t find Italian bread? French baguette works fine. Portuguese rolls are excellent. Even good sourdough does the job. Just avoid soft, squishy stuff.
Going vegetarian? Load up grilled vegetables instead. Eggplant, zucchini, roasted red peppers shine. Add extra cheese for protein. Sun dried tomatoes bring umami depth.
Watching sodium intake? Most Italian meats run high. Look for lower sodium versions at the counter. Or use less meat, more vegetables.
Picking Quality Ingredients Fast
Here’s what matters at the deli counter. Ask for freshly sliced meats. Pre packaged stuff dries out faster. Fresh cut makes a difference you’ll taste.
Check salami color quickly. Should be vibrant red with white marbling. Gray or brown means oxidation. Not dangerous. Just not optimal.
Provolone should feel slightly springy. Not rubbery. Not crumbly. Smell it if possible. Should have mild tang. No ammonia smell.
Bread freshness counts big time. Day old is actually perfect here. Slight dryness helps it toast better. Super fresh gets soggy easier. There’s a sweet spot.
Step by Step Magic: Building Your Toasted Italian Sandwich
Let’s build this thing right. Technique separates good from legendary here.
Step 1: Prep Your Workspace
Clear your counter space completely. Get everything within arm’s reach. Heat your pan or press now. Medium heat is your friend here. Too hot burns bread before cheese melts. Too cool makes everything soggy.
Cast iron skillet works perfectly for this. Heavy griddle is great too. Even regular frying pan does fine. Just needs weight for pressing. Second pan, a pot, foil wrapped brick all work.
Step 2: Prepare the Bread
Slice your roll lengthwise carefully. Don’t cut all the way through. Leave a hinge on one side. Keeps everything contained. Makes assembly way easier.
Pro move here: lightly toast inside first. Just thirty seconds under the broiler. Creates a moisture barrier. Prevents sogginess from wet ingredients later. Game changer for sandwich integrity.
Step 3: Build the Foundation Layer
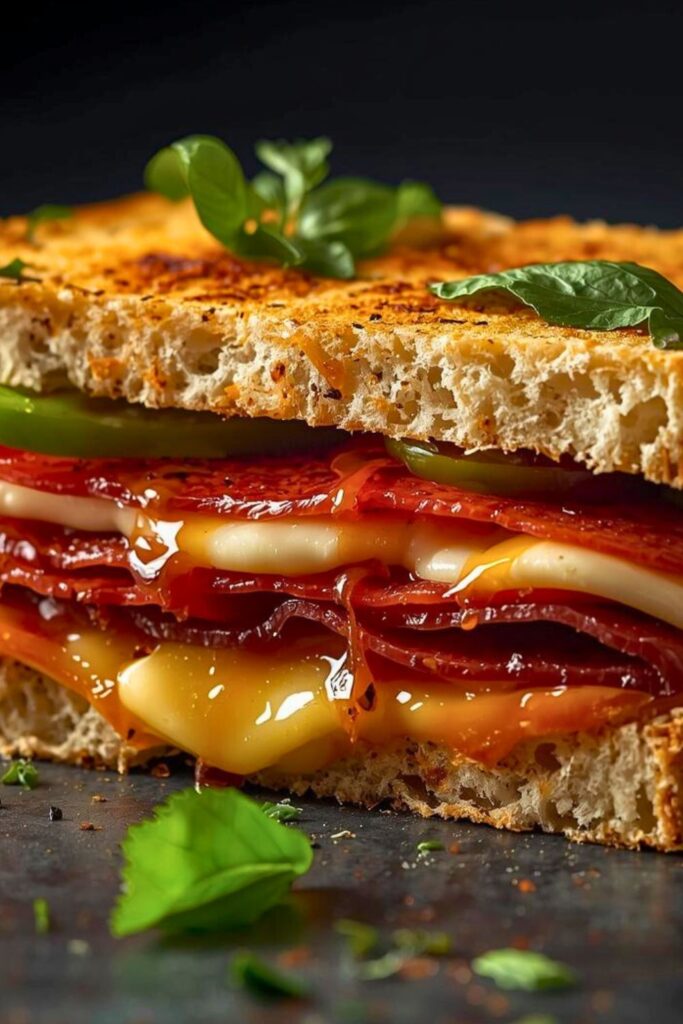
Start with cheese on the bottom. This acts as protective layer. Prevents bread from getting wet. Plus bottom cheese melts into bread. Creates amazing texture.
Now add your meats carefully. Fold each slice rather than flat. Creates more surface area. Better texture in every bite. Alternate between different meat types. Distributes flavors evenly throughout.
Step 4: Add Vegetables Strategically
This is where mistakes happen most. Tomatoes go directly on meat only. Their moisture soaks into protein. Doesn’t make bread soggy at all. Peppers scatter across evenly everywhere. They’re flavor bursts throughout. Distribute them well.
Onions are controversial but I vote yes. Thin slices only though. Too thick overwhelms everything else. Raw onion brings sharp contrast. Cuts through fat beautifully.
Step 5: The Dressing Application
Mix oil, vinegar, and seasonings together first. Don’t just drizzle them separately. Emulsified dressing coats more evenly. Drizzle over vegetables and meat only. Never on bare bread. That’s soggy territory.
Some folks love mayo here too. I get it completely. Adds creaminess. But traditional Italian subs skip mayo. Oil and vinegar is authentic. Your kitchen, your rules though.
Step 6: Top Cheese Layer
Add more cheese on top of vegetables. This creates a cheese umbrella effect. When it melts, it encases everything. Holds the sandwich together structurally. Plus more cheese is never wrong.
Step 7: The Crucial Pressing
Close your sandwich gently but firmly. Place it in your heated pan. Now comes the magic moment. Press down firmly with your spatula. Or place weighted pan on top.
Pressure does several things at once. Compresses layers together tightly. Increases surface contact with heat. Creates those gorgeous grill marks. Squeezes out excess moisture too.
Toast 3-4 minutes on first side. You’ll hear it sizzling nicely. Smell that toasting bread developing. When edges get golden, flip carefully. Press again with same pressure. Another 3-4 minutes.
Step 8: The Final Touch
Once both sides are golden? Remove from heat immediately. Let it rest one full minute. Don’t skip this step ever. Rest time lets cheese set slightly. Prevents everything sliding out first bite.
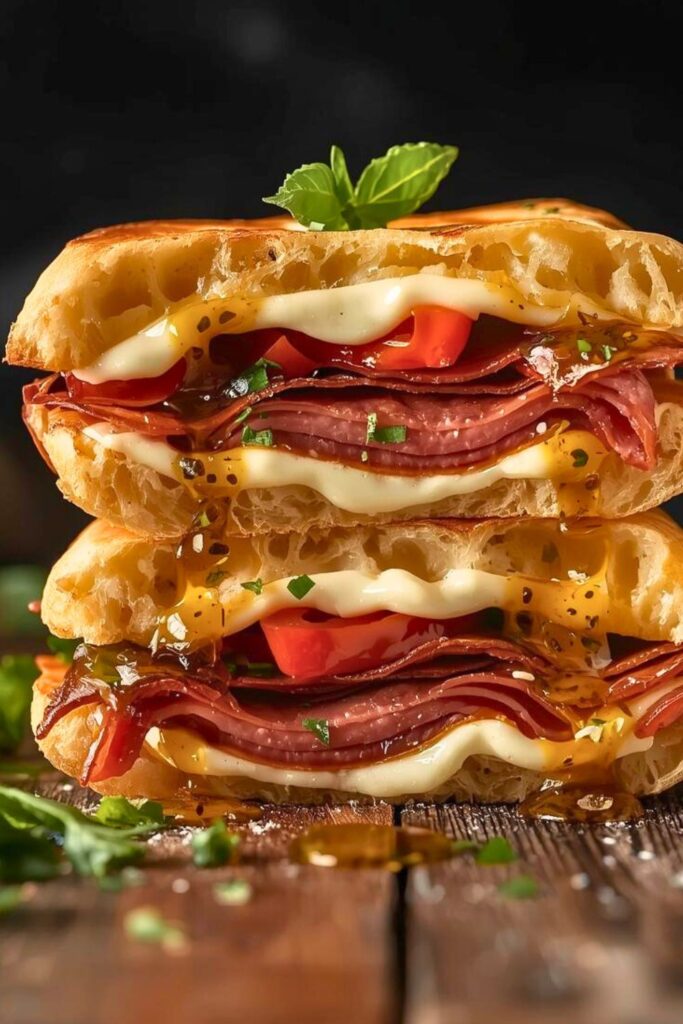
Cut diagonally always. Never straight across. More surface area to admire. Easier to eat too. Shows off those beautiful layers.
Common Mistakes to Dodge
Too much filling is problem number one. I know it’s tempting to pile on. More meat equals better, right? Wrong. Overstuffed sandwiches don’t press properly. Everything slides out messily.
Adding lettuce before toasting ruins everything completely. Lettuce wilts and gets super slimy. Always add fresh lettuce after toasting. Trust me on this one.
Not drying tomatoes causes major sogginess. Pat them with paper towels first. Removes excess moisture completely. Huge difference in sandwich integrity.
Forgetting to heat pan properly causes problems. Cold pan means uneven toasting. Soggy spots develop. Always preheat properly first.
Cutting immediately is another big mistake. That minute rest really matters. Lets everything settle properly. Makes sandwich much easier to eat.
Delicious Variations Worth Trying
The Spicy Toasted Italian Sandwich
Use hot capicola instead of sweet. Throw in spicy Italian sausage. Drizzle hot honey before closing. Calabrian chili paste brings serious heat. Not for faint of heart.
The Herbaceous Version
Add fresh basil leaves between meat. Use pesto instead of oil vinegar. Fresh arugula after toasting adds bite. Becomes almost salad like. In a good way.
The Deluxe Toasted Italian Sandwich
Add prosciutto to your meat lineup. Use fresh mozzarella instead of provolone. Roasted red peppers replace tomatoes. Drizzle balsamic glaze at end. Special occasion worthy.
The Breakfast Italian
Start with the same meats. Add a fried egg on top. Some arugula for freshness. Maybe a hash brown patty. Breakfast sandwich meets Italian sub. Dangerous territory.
The Science Behind That Perfect Crunch
Let’s talk about what’s happening here. When you press while toasting? You’re creating maximum contact between surfaces. This drives moisture out of bread. Creates that crispy texture we love.
The Maillard reaction kicks in too. That’s browning between proteins and sugars. Creates hundreds of flavor compounds. Why toasted tastes different than plain. Chemistry working for you.
Melting cheese involves protein chains loosening. They slide past each other. Creates that stretchy quality. Different cheeses melt at different temps. Provolone hits sweet spot around 150°F.
Fat in cured meats renders when heated. Those fats carry flavor compounds. They release more aroma when warm. Why hot Italian meats taste intense. Science backs up tradition here.
Pressing also creates structural integrity. Compressed sandwiches hold together better. Each bite contains all layers proportionally. No structural collapse halfway through.
Tools That Make Life Easier
A good panini press is worth considering. Even contact on both sides. Consistent heat distribution throughout. Grill marks look professional. But you don’t need one. Heavy pan works great.
Cast iron is my preferred tool. Retains heat beautifully. Creates even browning. Those ridges on grill pan? Make gorgeous marks. Purely aesthetic but presentation matters.
Sturdy spatula is essential here. You need leverage for pressing hard. Flimsy spatulas bend under pressure. Metal works better than plastic. Handles heat without melting.
Sharp knife for slicing cleanly. Serrated blade cuts crusty bread easily. Doesn’t compress the sandwich. Clean cuts show off your work.
Cultural Roots and Evolution
The Italian sub originated in Italian American communities. Early 1900s, Italian immigrants arrived. Brought cured meat traditions with them. Combined them with American sandwich culture. Created something uniquely hybrid.
The name varies by region dramatically. Hoagie in Philadelphia. Hero in New York City. Grinder in New England. Sub everywhere else. Same concept, different names.
Toasting became popular in the 1970s. Sandwich shops wanted to differentiate. Heat made sandwiches feel more substantial. More meal like and satisfying. The trend stuck because it worked.
Modern food trucks revived interest recently. They elevated the technique significantly. Used better ingredients. Refined the pressing method. Now it’s experiencing a renaissance.
Making Your Toasted Italian Sandwich Beautiful

Plating matters even for sandwiches. Cut that diagonal slice carefully. Stand one half up. Shows off the layers. Creates visual interest. Photograph worthy presentation.
Add a side of extra pepperoncini. Maybe some olives. Potato chips are classic pairing. Kettle cooked chips bring extra crunch. Or go healthy with arugula salad.
Wine pairing? Chianti works beautifully here. Its acidity cuts through rich meat. Sangiovese brings cherry notes. Even crisp Italian lager complements nicely. Peroni or Moretti are solid.
For non alcoholic options? Italian sodas are fun. Sparkling water with lemon. Even iced tea works well. Something to cleanse your palate.
Serve it hot obviously. But here’s a secret. These are excellent at room temperature. Pack one for lunch tomorrow. By noon it’s still delicious. Flavors meld together beautifully.
Photography Tips for Sharing
Natural light is your friend here. Window light shows off grill marks. Melted cheese catches light beautifully. Artificial light makes everything flat.
Shoot from a slight angle. Not straight overhead. Not completely side on. Forty five degrees shows dimension. Captures that pulled apart cheese shot.
Use a dark cutting board. Makes colors pop dramatically. Golden bread stands out. Red peppers look vibrant. White plates work too. Avoid busy patterns.
Get that pull apart shot. Take one bite first. Pull halves apart slowly. Capture those cheese strings. That’s the money shot. Everyone stops scrolling for cheese.
Wrapping It All Together
This TOASTED ITALIAN SANDWICH changes your weeknight routine. Possibly your lunch game too. Maybe even midnight snacks. No judgment here.
You’ve learned the building blocks. Quality meats and cheese. Proper layering technique. The all important pressing method. Heat application that creates magic.
Remember, cooking is about confidence. These guidelines aren’t rules forever. They’re suggestions from someone who’s made hundreds. Who’s learned from mistakes. Who wants you to succeed.
Start simple with basic version. Master that first. Then experiment freely. Add your favorite ingredients. Adjust spice levels. Make it uniquely yours.
The best part? It’s incredibly fast. Twenty minutes start to finish. Perfect for busy weeknights. When cooking feels overwhelming. But you still want satisfaction.
It’s also impressive to serve. Make these for casual dinner parties. People think you worked way harder. Crispy exterior. Melted cheese. Layered meats. Looks restaurant quality. Tastes even better.
Pack one for lunch tomorrow. Your coworkers will definitely ask. That smell travels far. Share if you’re feeling generous. Or guard it jealously. Both valid.
Final Pro Tips
Always quality check your deli meats. Fresh makes all the difference. Don’t settle for dried out stuff. Worth the extra two dollars.
Experiment with different bread types. Each brings different texture and flavor. Keep trying until you find favorites. No single right answer exists.
Don’t skip the resting period. Patience pays off big here. That minute lets everything settle. Makes eating so much easier.
Consider making two at once. They keep well wrapped in foil. Reheat in pan later. Or eat at room temperature. Meal prep friendly.
Finally, have fun with this. Cooking should be enjoyable. Not stressful at all. This TOASTED ITALIAN SANDWICH is forgiving. Hard to mess up completely. Even mistakes taste pretty good.
Frequently Asked Questions
Can I make this Toasted Italian Sandwich ahead?
Absolutely, with some modifications here. Build the sandwich completely cold. Wrap tightly in foil. Store in fridge. When ready to eat, unwrap. Toast as normal. Pressing works on cold sandwiches. Just needs slightly longer cooking. Maybe six minutes per side. Don’t add lettuce until after though.
What if I don’t have equipment?
No problem whatsoever. Regular frying pan works perfectly. Just need something heavy to press. Another pan filled with cans works. Foil wrapped brick is classic. Even a pot of water works. Key is consistent pressure across sandwich. Get creative with kitchen tools.
How do I prevent sogginess?
Several strategies work here. First, toast bread interior slightly beforehand. Creates moisture barrier. Second, never put wet ingredients on bread. Cheese acts as protective layer. Third, pat tomatoes dry. Fourth, add lettuce after toasting only. Finally, don’t over dress. Light drizzle is plenty.
Can I freeze these sandwiches?
Not recommended honestly. Texture suffers significantly. Bread gets mushy when thawed. Vegetables lose their crispness. Cheese becomes grainy. If you must freeze? Assemble without vegetables or dressing. Wrap very tightly. Thaw in fridge overnight. Add fresh vegetables after toasting.
What’s the best reheating method?
Skip the microwave completely. Makes bread rubbery. Instead use pan or toaster oven. Low heat around 300°F. Wrap in foil to prevent drying. Heat for ten minutes. Or use pan with lid. Creates steam that warms evenly. Honestly though? These are great cold. Don’t underestimate room temperature.

Swiftly Captions by Tina Smith — Quick, flavorful food recipes made simple, bringing fresh inspiration to your kitchen every day