Some cookies satisfy a craving.
Chocolate Half Moon Cookies do something more they take you back.
Back to grandma’s kitchen. To bakery windows you pressed your face against as a kid. To the kind of cookie that didn’t just taste good… it meant something.
These cookies aren’t just treats they’re time machines. One bite, and you’re wrapped in comfort. A soft, cake like base that melts on your tongue. One side dressed in glossy, rich chocolate. The other in smooth vanilla fondant that tastes like sweet simplicity.
It’s balance. It’s contrast. It’s indulgence without pretense.
They’re beautiful to look at. But they’re made to be devoured. Slowly, maybe. Or all at once, warm from the counter. Your call.
And the best part? You don’t need a culinary degree to pull this off. No fussy steps. No impossible tools. Just real technique, smart ingredients, and a little patience.
Because when you bake Chocolate Half Moon Cookies, you’re not just making dessert.
You’re making smiles. Making memories. Making magic one perfect half at a time.
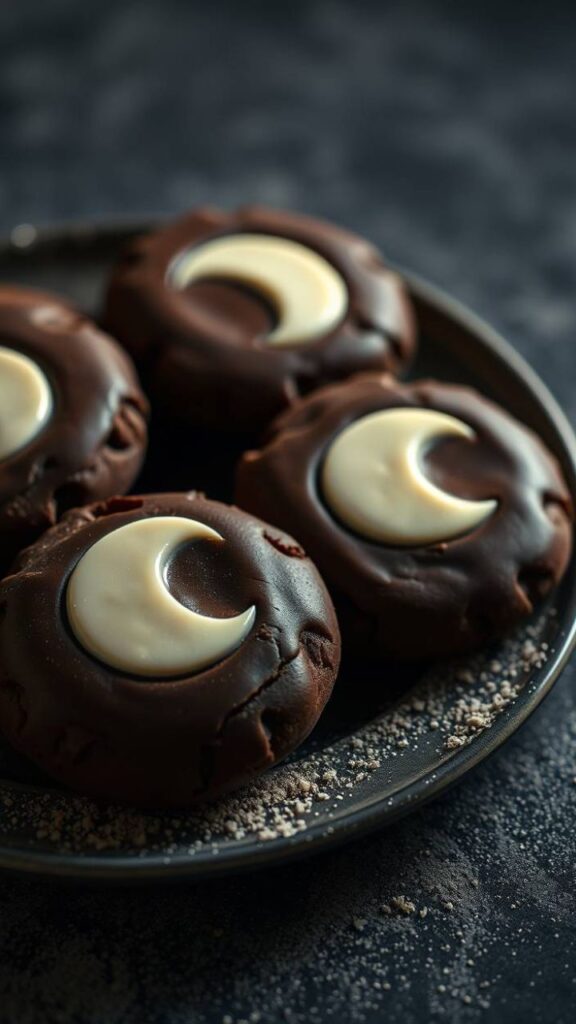
Why Chocolate Half Moon Cookies Are Absolutely Magical
Chocolate half moon cookies crush every other cookie in your recipe box. Here’s why. They’re cake cookies. Soft, pillowy, tender. They practically melt on your tongue. We skip the crispy nonsense here.
The real magic lives in the fondant glazes. Picture two perfectly smooth, glossy coatings. They don’t just look stunning. They taste like childhood dreams. Vanilla fondant covers one side. Sweet and creamy. Chocolate covers the other. Rich enough to make you close your eyes and sigh.
Most people miss this: these cookies are edible architecture. You need a base sturdy enough to hold gorgeous glazing. But tender enough that each bite feels like biting into a cloud. This delicate balance separates pros from weekend warriors.
You won’t find complicated techniques here. But you will find precision. Master this technique? You become the hero of every potluck. Every bake sale. Every family gathering. For life.
Chocolate Half Moon Cookies Ingredients That’ll Make Your Kitchen Sing
For the Cookie Base:
- 2 cups all purpose flour (don’t even think about cake flour here)
- 1 teaspoon baking powder
- 1/2 teaspoon salt
- 1/2 cup unsalted butter, room temperature
- 2/3 cup granulated sugar
- 1 large egg
- 1/2 cup whole milk
- 1 teaspoon vanilla extract
For the Vanilla Fondant:
- 2 cups powdered sugar
- 3 tablespoons milk
- 2 tablespoons light corn syrup
- 1/2 teaspoon vanilla extract
For the Chocolate Fondant:
- 2 cups powdered sugar
- 3 tablespoons milk
- 2 tablespoons light corn syrup
- 1/4 cup unsweetened cocoa powder
- 1 ounce dark chocolate, melted
Smart Swaps That Actually Work
Can’t do dairy? Swap the butter for vegan butter. Use the stick kind, not tubs. Use your favorite plant milk. Make sure it’s unsweetened. Extra sugar will throw off our balance.
You can’t find corn syrup? Use honey instead. But use half as much. Honey runs sweeter. Your fondant might lose some gloss. But it’ll still taste incredible.
Here’s a secret most bakers hide: vanilla extract quality makes huge differences in these cookies. You’re using artificial stuff? You’re cheating yourself. Splurge on real vanilla. It separates good cookies from recipe worthy cookies.
And about that flour – all purpose is your friend here. Cake flour makes these too delicate, and bread flour makes them tough. We want that perfect middle ground that gives structure without being chewy.
Step by Step Guide to Chocolate Half Moon Cookies
Getting Your Dough Right
Cream your butter and sugar until light and fluffy. Really fluffy. This isn’t a two-minute job. Plan for five to seven minutes with a stand mixer. Longer if you’re mixing by hand. This step creates that tender crumb everyone raves about.
Beat in your egg until completely mixed. Add that vanilla. Don’t rush this part. You want everything evenly distributed.
Here’s where people mess up: they dump all the flour at once. Then they wonder why their cookies turned tough. Mix your dry ingredients separately first. Add them to your butter mixture in three parts. Alternate with the milk. Start and end with flour. Mix just until combined. Overworking dough creates tough cookies fast.
Shaping Like a Pro
Your dough’s gonna be soft – that’s exactly what we want. Chill it for about 30 minutes if it’s too sticky to handle, but don’t go longer or you’ll have trouble scooping.
Use a large cookie scoop or just eyeball portions about the size of a golf ball. Place them on parchment lined baking sheets, leaving plenty of space between each one. These babies spread, and crowded cookies are sad cookies.
Here’s a trick that’ll change your cookie game: lightly flatten each portion with your palm. We want them round and even, about 3 inches across. This gives you that classic half moon shape and ensures even baking.
Baking to Perfection
Preheat your oven to 375°F – and make sure it’s actually at temperature before you put anything in there. An oven thermometer is worth its weight in gold for consistent results.
Bake for 15-18 minutes, until the edges are just set but the centers still look slightly underdone. They’ll finish cooking on the hot pan, and this prevents that dreaded dry cookie syndrome.
Let them cool completely on the baking sheets. I know waiting is torture, but trust me on this – warm cookies and fondant don’t play nicely together.
The Science Behind Those Perfect Glazes
Here’s where the real magic happens, and it’s all about understanding what fondant actually is. We’re creating a sugar syrup that dries to a smooth, glossy finish – think professional bakery level stuff.
The corn syrup isn’t just there for sweetness. It prevents crystallization and gives you that perfect, smooth texture that doesn’t crack when it dries. Skip it, and you’ll get a lumpy, grainy mess instead of that gorgeous mirror finish.
Making Vanilla Fondant
Sift your powdered sugar – I’m serious about this. Lumps in your sugar mean lumps in your fondant, and nobody wants that. Whisk together the milk, corn syrup, and vanilla in a separate bowl until smooth.
Gradually whisk the liquid into your powdered sugar until you get a smooth, pourable consistency. It should coat the back of a spoon but still drip off easily. Too thick? Add milk a teaspoon at a time. Too thin? More powdered sugar.
Chocolate Fondant That’ll Make You Weep
For the chocolate version, sift together your powdered sugar and cocoa powder. This step is even more crucial because cocoa powder loves to clump. Melt your chocolate and let it cool slightly – hot chocolate will seize up your fondant faster than you can say “disaster.”
Whisk your milk, corn syrup, and cooled melted chocolate together, then gradually incorporate your dry ingredients. The chocolate fondant should be slightly thicker than the vanilla because cocoa absorbs more liquid.
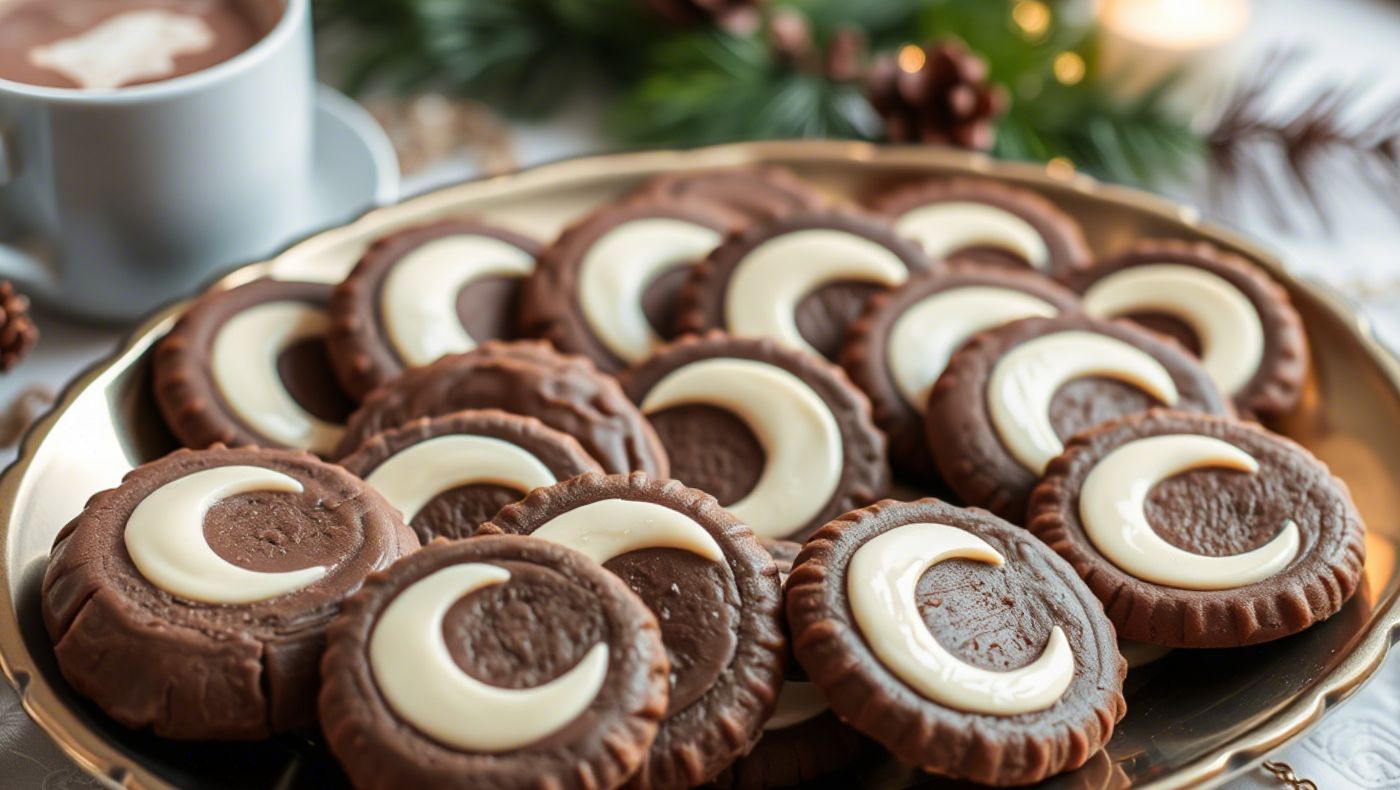
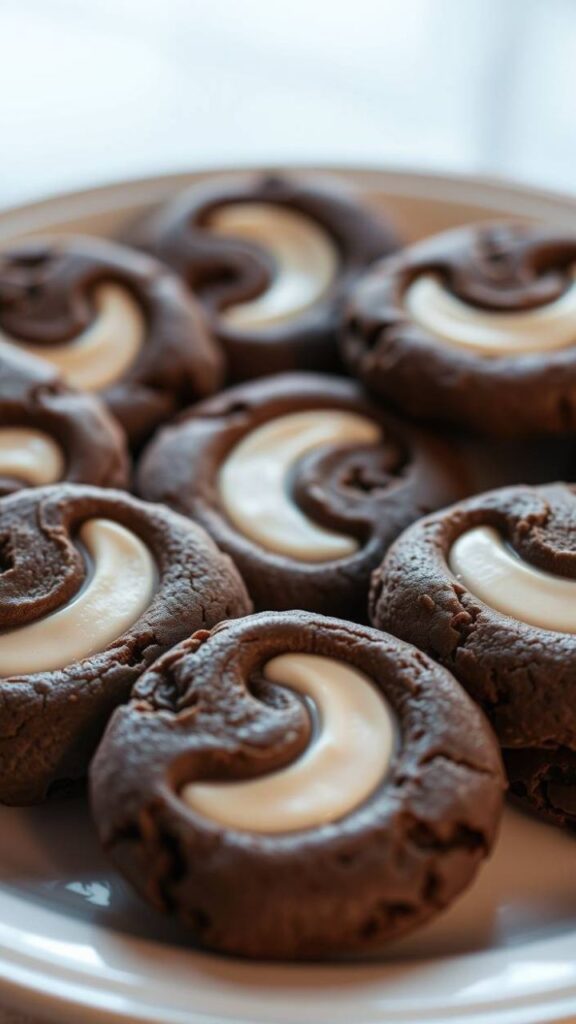
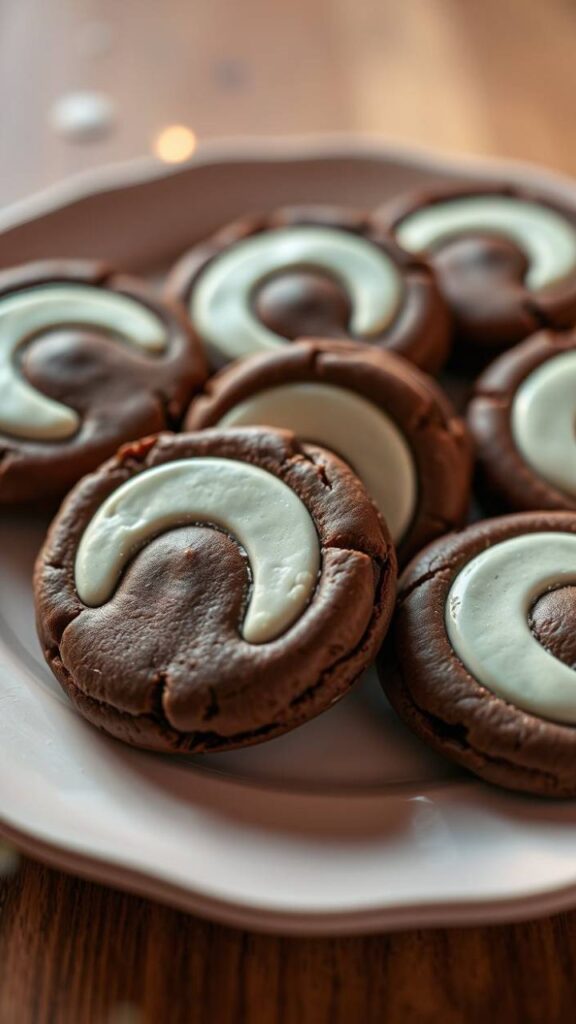
Creating Those Picture Perfect Half Moons
Now comes the fun part – and the part that separates amateur hour from bakery level gorgeous. You’re gonna glaze half of each cookie with vanilla fondant and half with chocolate. But here’s the secret: you don’t just slap it on and hope for the best.
Use an offset spatula to spread the vanilla fondant on one half of each cookie, creating a clean line right down the middle. Work quickly but carefully – fondant starts setting fast, and you can’t really fix mistakes once it’s begun to dry.
For the chocolate side, I like to use a different spatula (prevents color mixing) and work from the center line outward. The goal is two distinct halves that meet in a perfectly straight line.
Here’s a pro tip that’ll blow your mind: run a toothpick along the center line while the fondant is still wet. This creates a clean separation and prevents the colors from bleeding into each other.
Making Them Beautiful and Instagram Worthy
Let your glazed cookies set for at least an hour before you even think about moving them. The fondant needs time to firm up completely, or you’ll end up with fingerprints and smudges all over your beautiful work.
If you’re photographing these beauties, natural light is your best friend. Position them near a window and shoot from slightly above – this shows off that perfect half and half design that makes these cookies so iconic.
For serving, arrange them on a white platter or cake stand. The contrast makes those glazes pop, and honestly? They look like they came straight from a fancy New York bakery.
These cookies pair beautifully with coffee – the slight bitterness plays perfectly against the sweet fondant. They’re also incredible with a glass of cold milk or even a cup of hot tea on a chilly afternoon.
The Most Important Takeaways
Chocolate half moon cookies aren’t just another recipe to add to your collection, they’re a statement piece. They say you care enough to do something special, something that takes time and attention to detail.
The key to success is patience. Don’t rush the creaming process. Don’t skip the sifting. Don’t try to glaze cookies that aren’t completely cool. Every step matters, and cutting corners shows in the final product.
But here’s what I really want you to remember: these cookies are meant to be shared. They’re conversation starters, smile creators, and memory makers. The first time you nail that perfect fondant glaze, you’re gonna feel like you can conquer the world.
Start with the basic recipe, master the technique, then make it your own. Maybe you’ll add a hint of almond extract to the vanilla fondant, or use espresso powder in the chocolate side. The possibilities are endless once you’ve got the fundamentals down.
Frequently Asked Questions
Why did my fondant crack when it dried?
A: This usually happens when the fondant is too thick or your cookies weren’t completely cool when you glazed them. The fondant should be pourable but not runny, and patience is key – those cookies need to be at room temperature before glazing.
Can I make these cookies ahead of time?
A: Absolutely! The unglazed cookies freeze beautifully for up to three months. Just thaw completely before glazing. Once glazed, they’ll keep at room temperature for about a week in an airtight container.
My cookies spread too much during baking. What went wrong?
A: Either your butter was too warm when you started, or your dough needed more chilling time. Next batch, make sure your butter is soft but not melty, and don’t skip that 30-minute chill if the dough feels too soft to handle.
The chocolate and vanilla fondant look different textures. Is that normal?
A: Yes! The chocolate fondant will be slightly thicker because cocoa powder absorbs moisture. As long as both glazes spread smoothly and dry to a nice finish, you’re golden.
Can I use a different type of chocolate for the fondant?
A: Stick with dark chocolate or semi sweet for the best flavor balance. Milk chocolate makes the fondant too sweet, and white chocolate can make it seize up. Trust me, I’ve been down that road and it’s not pretty!

Swiftly Captions by Tina Smith — Quick, flavorful food recipes made simple, bringing fresh inspiration to your kitchen every day