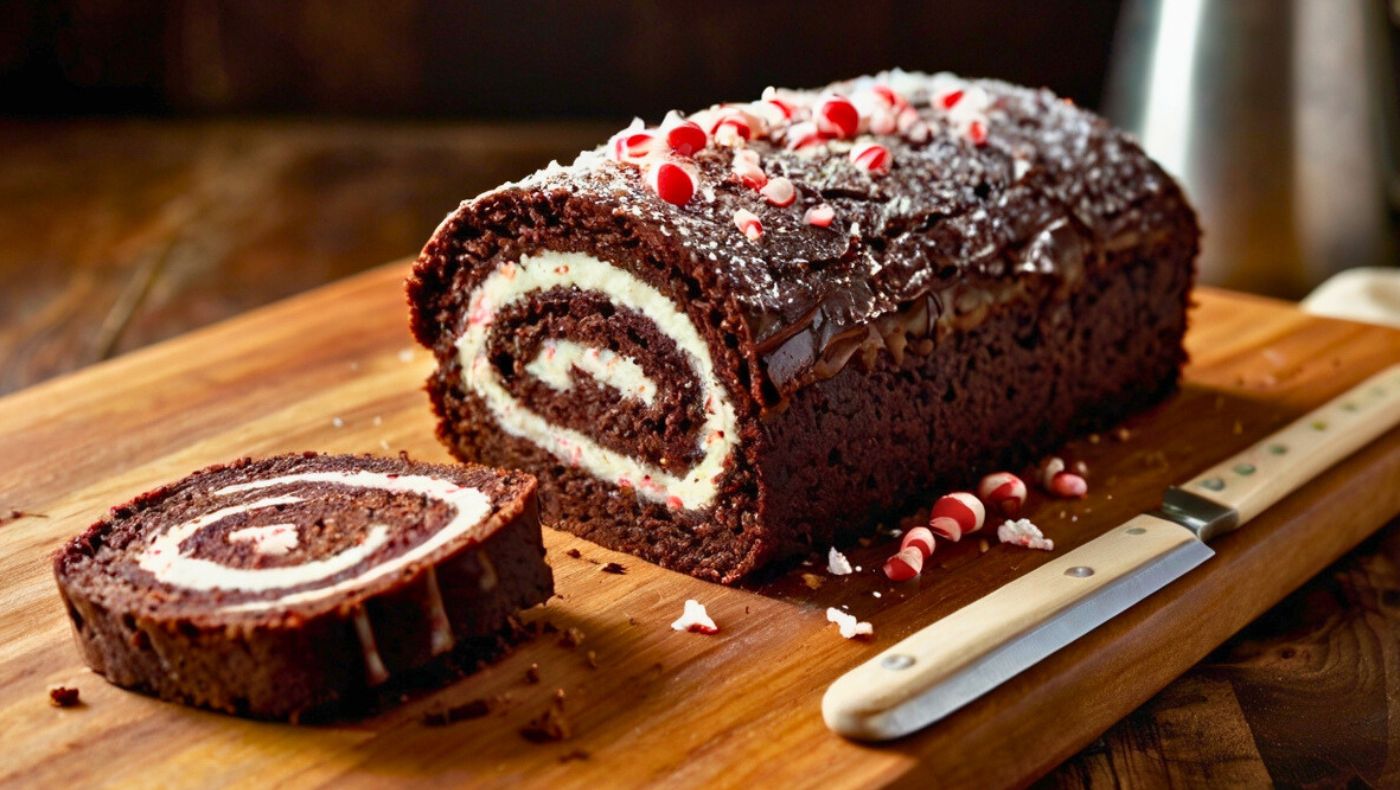
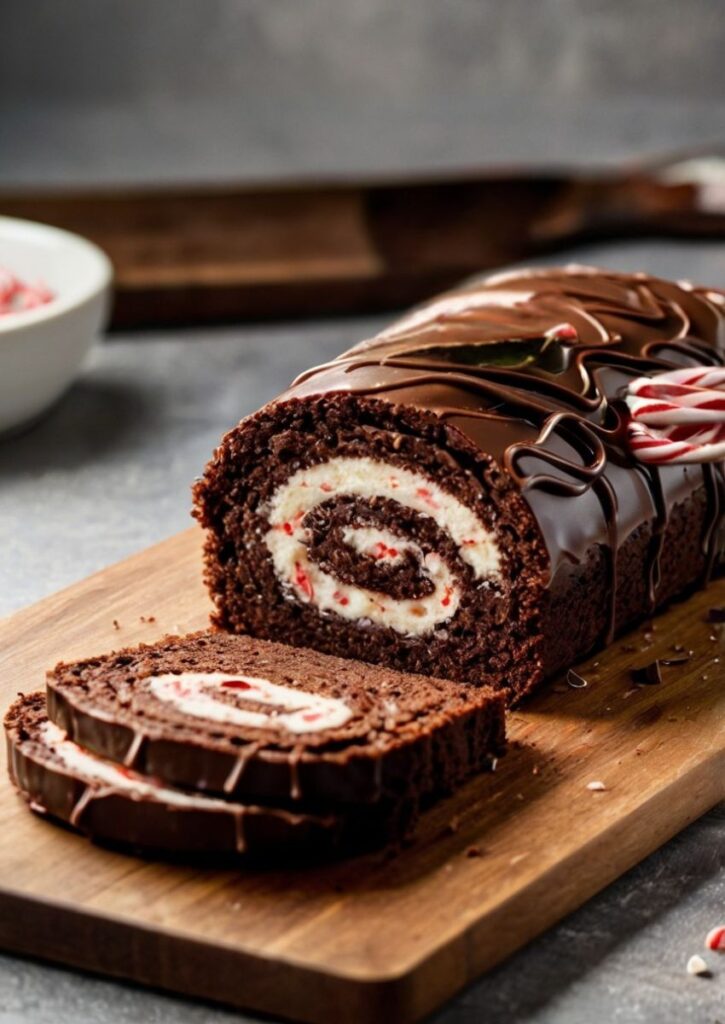
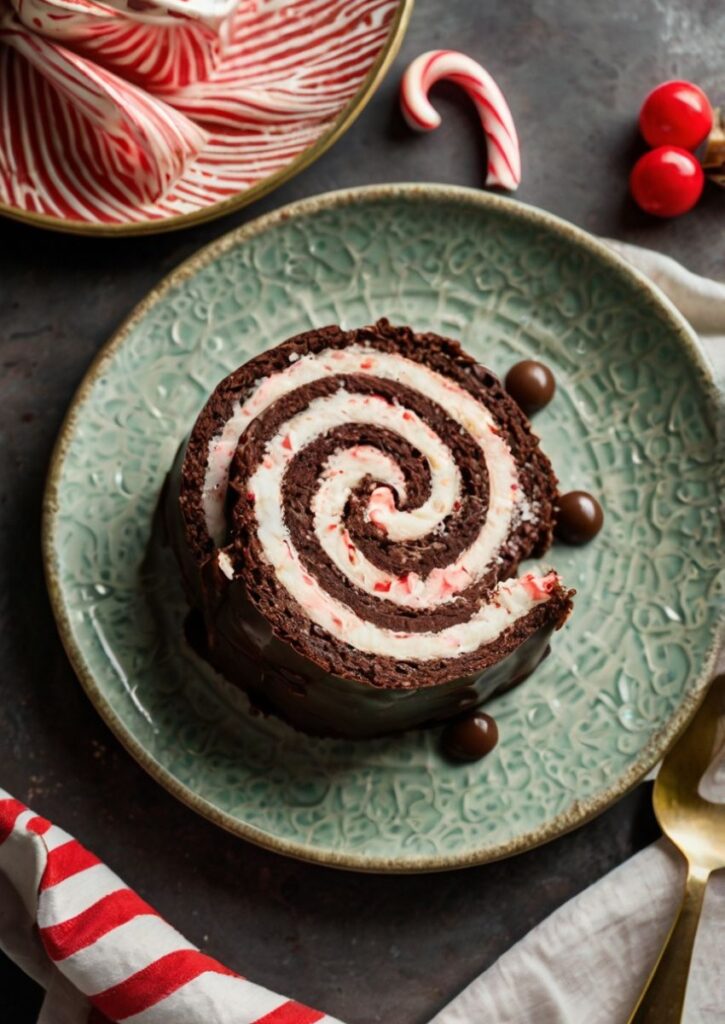
Have you ever craved a dessert that feels like a winter wonderland on a plate? Imagine a swirl of rich chocolate cake and cool peppermint cream wrapped up into one stunning treat. That’s the magic of the Chocolate Peppermint Cake Roll. It’s festive, flavorful, and perfect for the holidays.
Here’s the thing: holiday desserts don’t have to be complicated to look impressive. The Chocolate Peppermint Cake Roll proves that. With its striking spiral and refreshing twist, it’s guaranteed to wow your guests and your taste buds. Whether you’re hosting a dinner or just baking for fun, this recipe brings both beauty and bold flavor to your table.
I still remember the first time I made a Chocolate Peppermint Cake Roll snow falling outside, the aroma of cocoa and mint filling the kitchen, and the look of pure delight on everyone’s face after the first bite. It quickly became a family favorite.
In this post, I’ll walk you through how to create this eye catching dessert from scratch. You’ll learn how to make a soft sponge cake, whip up a creamy peppermint filling, and roll it all into a picture perfect log. With my easy tips and tricks, you’ll get that flawless roll every time. Let’s bake something unforgettable!
This dessert combines rich chocolate sponge with cool peppermint cream creating a flavor that’s both nostalgic and exciting. What makes this roll special isn’t just its stunning looks, but the simple techniques that help you nail that perfect spiral every time.
The secret to success? Understanding why each step matters. Don’t worry I’ll share all my tried and true tips to help you create a flawless Chocolate Peppermint Cake Roll that looks as impressive as it tastes.
Ingredients & Substitutions
The Chocolate Sponge Foundation
6 large eggs, separated and at room temperature, Temperature matters enormously here. Cold eggs won’t whip properly, and your sponge will lack the necessary structure. Room temperature eggs incorporate air more effectively, creating the light texture that prevents cracking during rolling.
3/4 cup granulated sugar, divided, Use superfine sugar if available. The finer crystals dissolve more completely, preventing grittiness in your finished sponge. Reserve 1/4 cup for the egg whites, 1/2 cup for the yolks.
1/3 cup unsweetened cocoa powder – Dutch processed cocoa creates a deeper, more sophisticated chocolate flavor. Natural cocoa works too, but you’ll get a lighter, more acidic taste. Sift this twice lumps are the enemy of smooth sponge.
1/4 cup all-purpose flour – Cake flour would seem logical, but all purpose provides just enough structure to support the roll without becoming tough. Don’t substitute here; the protein content is crucial.
1/4 teaspoon salt – Enhances the chocolate flavor dramatically. Sea salt works beautifully if you prefer a more complex mineral note.
The Peppermint Cream Center
1 1/2 cups heavy whipping cream – Must be at least 35% fat content. Lower fat creams won’t hold their structure when rolled. European style creams with higher fat content create an even more luxurious texture.
1/3 cup powdered sugar – Dissolves completely unlike granulated sugar, preventing grittiness. Some bakers prefer superfine sugar, but powdered creates the smoothest finish.
1 teaspoon pure peppermint extract – Quality matters tremendously here. Artificial extracts often taste harsh and medicinal. Pure peppermint extract provides clean, bright flavor without overwhelming sweetness.
1/4 teaspoon vanilla extract – Rounds out the peppermint and prevents it from becoming one dimensional. Madagascar vanilla works best for its subtle complexity.
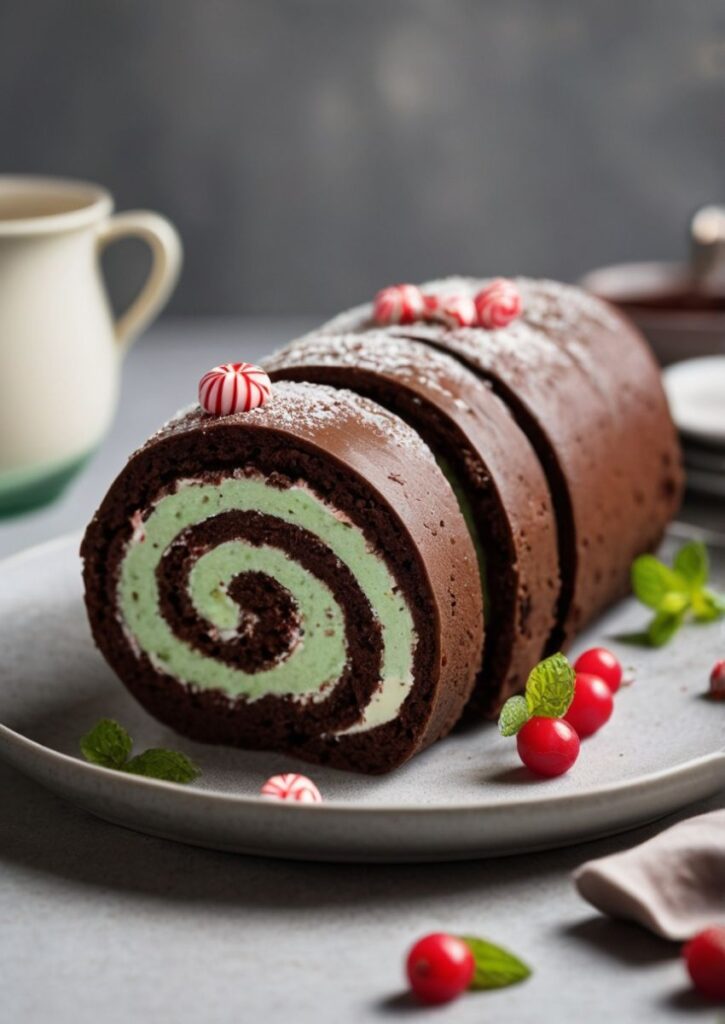
Green food coloring (optional) – Gel colorings provide more vibrant results than liquid versions. Start with just a toothpick amount you can always add more, but you can’t take it back.
Professional Substitution Notes
For gluten free versions, substitute the flour with a blend of almond flour and tapioca starch (3:1 ratio). The texture changes slightly, becoming more tender, but the roll remains structurally sound.
Dairy free adaptations work well with coconut cream that’s been chilled overnight. The natural coconut flavor complements both chocolate and peppermint beautifully, though the texture becomes slightly denser.
Sugar substitutions require careful consideration. Erythritol works in the cream but creates a cooling sensation that competes with the peppermint. Stevia concentrate works better, though you’ll need only 1/8 teaspoon to replace the powdered sugar.
Step by Step Instructions
Preparing Your Workspace
Preheat your oven to 375°F and position the rack in the center. Line a 15×10-inch jelly roll pan with parchment paper, allowing 2-inch overhangs on the short sides. These overhangs become your lifting handles later trust me, you’ll need them.
Prepare a clean kitchen towel by dusting it generously with powdered sugar. This towel will cradle your hot cake during the initial roll, preventing sticking and creating the muscle memory your sponge needs for its final form.
Creating the Perfect Chocolate Sponge
Separate your eggs while cold, then let them reach room temperature for 30 minutes. Cold separation prevents yolk contamination in your whites, while room temperature eggs whip to greater volume.
Beat egg yolks with 1/2 cup sugar until the mixture becomes pale and thick about 3 minutes with a stand mixer. The ribbon test works perfectly here: lifted beaters should create ribbons that hold their shape for 3 seconds before dissolving back into the mixture.
Sift together cocoa powder, flour, and salt twice. This isn’t optional lumps will create dense spots that crack under pressure. Fold this mixture into the yolk base gently, using a rubber spatula in a figure-eight motion.
Now comes the critical moment: whipping your egg whites. Clean your bowl and beaters with vinegar first any fat residue prevents proper whipping. Beat whites until foamy, then gradually add the remaining 1/4 cup sugar. Continue beating until stiff, glossy peaks form. Over beaten whites become grainy and won’t fold properly.
Fold 1/3 of the whites into the chocolate base to lighten it, then fold in the remaining whites in two additions. Use a light hand deflated whites mean a dense, crack prone sponge.
The Baking Ballet
Spread batter evenly in your prepared pan using an offset spatula. Work quickly but gently the air you’ve incorporated starts escaping immediately. Tap the pan once on the counter to release large air bubbles.
Bake for 10-12 minutes until the surface springs back when lightly touched. Don’t overbake a dry sponge cracks inevitably. The edges should just start pulling away from the pan sides.
Immediately invert the hot cake onto your powdered sugar dusted towel. Peel away the parchment paper carefully it should release easily if your pan was properly prepared. Starting from a short end, roll the cake in the towel while still warm. This creates the roll’s shape memory.
Cool completely in this rolled position patience here prevents heartbreak later.
Crafting the Peppermint Cream
Chill your bowl and beaters for at least 15 minutes before whipping cream. Cold equipment creates more stable whipped cream that holds its shape during assembly.
Whip cream to soft peaks first, then add powdered sugar, peppermint extract, and vanilla. Continue whipping to firm peaks but watch carefully. Over whipped cream becomes grainy and eventually turns to butter.
Add food coloring drop by drop if desired. Gel colors provide more control than liquid versions, which can thin your cream unexpectedly.
The Final Assembly
Unroll your cooled cake gently it should release from the towel without resistance. If it sticks, your towel wasn’t powdered enough or your cake was slightly over baked.
Spread peppermint cream evenly, leaving a 1/2-inch border on all sides. The cream will spread as you roll, so this border prevents overflow.
Re roll the cake without the towel, using the parchment paper overhang to guide and support the process. Roll tightly but not aggressively you want a snug spiral without compressing the delicate sponge.
Wrap the completed roll in plastic wrap and refrigerate for at least 2 hours. This sets the shape and allows flavors to meld beautifully.
Cooking Techniques & Science
The Physics of Perfect Sponge
The chocolate peppermint cake roll relies on the science of foam stability. Egg yolks provide lecithin, a natural emulsifier that helps bind ingredients while adding richness. The proteins in egg whites coagulate during baking, creating the structure that supports your roll.
Temperature control becomes absolutely critical during mixing. Room temperature ingredients blend more easily, creating a more uniform batter. Cold eggs won’t whip properly, while hot ingredients can deflate your carefully created foam.
The rolling technique itself exploits the principle of muscle memory in baked goods. Rolling while warm creates tiny compressions in the sponge structure that remember this shape even after cooling. Attempting to roll a completely cooled cake usually results in cracking because the structure has set without this flexibility.
Understanding Cocoa Behavior
Dutch processed cocoa undergoes alkalization, which neutralizes its natural acidity. This process creates a darker color and milder flavor, but more importantly, it affects how the cocoa interacts with other ingredients. Natural cocoa’s acidity can toughen proteins, making your sponge less flexible.
The fat content in cocoa powder also impacts texture. Higher fat cocoas create more tender results but can make the batter heavier. Finding the balance between flavor intensity and structural integrity requires understanding your specific cocoa’s characteristics.
Cream Stability Science
Heavy cream whips successfully because of its fat globule structure. When agitated, these globules partially break down and reform into a network that traps air. Temperature affects this process dramatically cream that’s too warm won’t hold air, while extremely cold cream can separate during whipping.
The addition of powdered sugar provides more than sweetness. The cornstarch in powdered sugar acts as a stabilizer, helping maintain the cream’s structure over time. This is why powdered sugar works better than granulated in whipped applications.
Serving & Pairing Suggestions
Presentation Excellence
Dust the finished roll with powdered sugar using a fine mesh sieve for professional appearance. For holiday presentations, create a diagonal lattice pattern using strips of parchment paper as stencils before dusting.
Slice using a sharp, thin knife dipped in warm water between cuts. This prevents the cream from smearing and creates clean, distinct spirals that showcase your technique.
Individual plating benefits from contrasting elements. A small pool of chocolate sauce, a few fresh mint leaves, and perhaps a delicate tuile cookie create restaurant quality presentations.
Flavor Harmony
The chocolate peppermint combination pairs beautifully with coffee service. A rich espresso or coffee liqueur enhances the chocolate while providing counterpoint to the mint’s brightness.
Dessert wines work surprisingly well a late harvest Riesling or vintage port both complement the flavor profile without overwhelming the delicate textures.
For non alcoholic pairings, consider peppermint tea or hot chocolate with a dash of vanilla. The temperature contrast between warm beverages and cool cake creates an engaging sensory experience.
Seasonal Adaptations
During summer months, serve smaller portions with fresh berries. The acidity cuts through the richness while adding textural interest and vibrant color.
Winter presentations benefit from warm accompaniments a small portion of bread pudding or warm caramel sauce provides comfort food appeal while maintaining sophistication.
Conclusion
The chocolate peppermint cake roll represents everything beautiful about advanced baking: precision, patience, and an understanding of how ingredients interact. Master this technique, and you’ve conquered one of pastry’s most challenging yet rewarding desserts.
Success comes from respecting each step’s importance rather than rushing toward the finish. Temperature control, timing, and gentle handling transform simple ingredients into something extraordinary. The visual drama of that perfect spiral, revealed only when sliced, makes every careful moment worthwhile.
Remember that even professional bakers occasionally encounter cracks or imperfect rolls. The key lies in understanding why problems occur so you can prevent them next time. Each attempt teaches valuable lessons about ingredient behavior and technique refinement.
Your chocolate peppermint cake roll becomes more than dessert it becomes a statement of your skill and dedication to the craft. The combination of rich chocolate and refreshing mint, wrapped in technical precision, creates memories that last far beyond the final bite.
Frequently Asked Questions
Q: Why does my cake roll crack when I roll it?
A: Cracking typically results from over baking or attempting to roll a completely cooled cake. The sponge must be rolled while still warm to create shape memory. Also, ensure your towel is generously dusted with powdered sugar to prevent sticking.
Q: Can I make the cake roll ahead of time?
A: Absolutely. The assembled roll actually improves after refrigeration for 2-4 hours as flavors meld. You can prepare it up to 24 hours in advance, but dust with powdered sugar just before serving to maintain the best appearance.
Q: What’s the best way to store leftover cake roll?
A: Wrap tightly in plastic wrap and refrigerate for up to 3 days. The cream filling makes room temperature storage unsafe. For longer storage, wrap in plastic then aluminum foil and freeze for up to 1 month thaw overnight in the refrigerator before serving.
Q: My whipped cream filling became too soft. How do I fix it?
A: If the cream hasn’t been added to the cake yet, try chilling it for 30 minutes then re whipping briefly. Adding a tablespoon of powdered sugar can also help stabilize it. If it’s already assembled, refrigerate the entire roll for at least 2 hours to firm up.
Q: Can I substitute the peppermint extract with fresh mint?
A: Fresh mint creates a different flavor profile more subtle and grassy rather than the bright, clean taste of peppermint extract. If using fresh mint, steep 1/4 cup chopped leaves in the cream for 30 minutes, then strain before whipping. You’ll need to add 1-2 tablespoons of additional cream to compensate for the loss during straining

Swiftly Captions by Tina Smith — Quick, flavorful food recipes made simple, bringing fresh inspiration to your kitchen every day