Forget everything you know about preparing shrimp. A groundbreaking baking technique now delivers crispy, golden Baked Butterfly Shrimp without oil splatter, temperature guessing, or kitchen disasters. This innovation transforms ordinary home cooks into seafood masters through strategic butterflying and precise oven control.
Professional chefs guard their secrets, but this Baked Butterfly Shrimp method breaks the code. You’ll achieve that coveted restaurant texture and presentation while your kitchen stays clean and your confidence soars. The technique centers on maximizing surface area through proper butterflying, then leveraging controlled oven heat for consistent results.
Why Baked Butterfly Shrimp Beats Deep Frying Every Time
Traditional fried shrimp is a nightmare, wrong oil temperature means soggy coating or burnt disasters, plus messy cleanup and lingering smells.
Baking solves everything. Your oven delivers steady heat without guesswork, oil splatter, or temperature anxiety.
The butterfly technique is brilliant: Cutting along the back lets shrimp lay flat for even cooking, doubles the coating surface area, and creates a professional restaurant look.
Properly baked butterfly shrimp gets crispy coating while staying tender inside. The gentle, consistent heat prevents rubbery texture, giving you restaurant quality results without the stress or mess.
The Ultimate Golden Brown Shrimp Coating Technique
Essential Ingredients for Perfect Baked Butterfly Shrimp Results
Gather these ingredients in the order you’ll use them:
- 2 pounds large shrimp, peeled and butterflied perfectly
- 1 cup all purpose flour
- 3 large eggs, beaten with 2 tablespoons water
- 1½ cups panko breadcrumbs
- 1 cup regular breadcrumbs
- 1½ teaspoons garlic powder
- 1 teaspoon onion powder
- 1½ teaspoons paprika
- ½ teaspoon cayenne pepper (adjust to taste)
- 1½ teaspoons salt
- ¾ teaspoon black pepper
- 4 tablespoons olive oil
- 3 tablespoons melted butter
- 1 tablespoon fresh lemon juice
Smart Swaps That Actually Work for Butterfly Shrimp
Can’t find panko breadcrumbs? Make your own by pulsing day old bread until you get light, airy flakes. Regular breadcrumbs work in a pinch, but you’ll lose some crispiness factor. The texture won’t be quite as restaurant perfect.
Gluten free cooks can substitute almond flour for regular flour and use gluten free breadcrumbs or crushed cornflakes successfully. The coating texture changes slightly but tastes fantastic regardless. Some people actually prefer the nutty flavor almond flour adds naturally.
No paprika? Smoked paprika elevates the flavor profile even more dramatically. Chili powder works too, but use half the amount, it’s more potent than expected. For heat sensitive palates, skip the cayenne and double the garlic powder instead completely.
Here’s my secret weapon for perfect baked butterfly shrimp: mixing panko with regular breadcrumbs creates perfect texture balance. Panko provides those gorgeous crispy peaks that photograph beautifully, while regular breadcrumbs fill gaps for complete coverage success. Every bite gets maximum crunch potential.
The egg mixture benefits from that splash of water, it helps the coating spread more evenly across surfaces. Some cooks add hot sauce directly to eggs for extra flavor penetration throughout. Buttermilk can replace eggs entirely if allergies concern you, though the coating won’t stick quite as tenaciously.
Step by Step Crunchy Seafood Baking Mastery
Preheat your oven to 425°F, this temperature creates perfect balance between crispy coating development and gentle shrimp cooking. Too low and the coating stays pale disappointingly; too high and the outside burns before the inside finishes properly.
Set up your breading station like a culinary assembly line. Use three shallow dishes: seasoned flour first, beaten eggs second, spiced breadcrumb mixture third. This organization prevents messy cross contamination and keeps your workspace clean throughout.
Season that flour with half your salt and pepper. This initial seasoning layer builds flavor from ground up. Many home cooks skip this step and wonder why their baked butterfly shrimp coating tastes bland despite seasoned breadcrumbs.
Here’s where technique separates good cooks from great ones: handle each shrimp gently but deliberately. Dredge in flour, shaking off excess, you want coverage, not clumps. Too much flour creates gluey paste that prevents proper browning.
The egg bath comes next in sequence. Let excess drip off completely. We’re creating thin binding layer, not giving shrimp swimming lessons. Then comes the breadcrumb mixture, press gently to ensure adherence without crushing those delicate panko flakes.
The Critical Baking Process
Line your baking sheet with parchment paper and arrange coated shrimp with space between each piece. Crowded shrimp steam instead of getting crispy properly. Think of them as needing personal space to develop their best texture.
Mix that olive oil, melted butter, and lemon juice together thoroughly. Drizzle this mixture evenly over the coated shrimp, it’s what transforms them from pale to golden, from good to restaurant worthy excellence. Don’t skip this step; it makes all the difference.
Bake for 6 minutes, then flip carefully, using tongs. Another 4-6 minutes should do it, depending on shrimp size exactly. They’re done when the coating turns golden brown and the shrimp feel firm but springy when gently pressed. Overcooked shrimp turn rubbery, nobody wants that disaster.
If your baked butterfly shrimp coating isn’t browning as expected, hit them with broiler for the final minute. Watch closely though, broilers move from perfect to burnt in seconds.
The Science Behind Perfectly Baked Shrimp
Understanding what happens during baking makes you better. That golden brown color developing on your coating? That’s the Maillard reaction, complex chemical changes that create hundreds of flavor compounds. It only happens at temperatures above 300°F, which explains why proper oven heat matters.
The butterfly cut serves multiple scientific purposes immediately. By increasing surface area, it allows faster, more even heat penetration. The flattened shape ensures consistent cooking throughout, no thick spots staying raw while thin areas overcook.
Shrimp proteins set differently under steady oven heat than in hot oil. The gentle, consistent heat allows proteins to set gradually, maintaining tenderness perfectly. Hot oil can cause proteins to seize up quickly, creating that dreaded rubber texture.
The oil and butter mixture we drizzled serves as heat conductor, helping coating brown evenly. It also creates steam that keeps shrimp moist while outside crisps. Fat carries flavor too, it’s why restaurant food often tastes richer than home cooking.
Essential Tool Knowledge for Baked Butterfly Shrimp
A heavy duty rimmed baking sheet prevents your carefully coated shrimp from sliding around during flipping. The rim also contains any oil drips that might cause oven smoking.
Wire cooling racks elevate your cooking game literally. Place the rack on your baking sheet, then arrange shrimp on the rack. Air circulates completely around each piece, creating crispy surfaces on all sides instead of soggy bottoms.
Parchment paper isn’t just convenient, it actually aids browning by reflecting heat back up at food. It also prevents sticking without adding extra oil that might make coatings soggy.
Advanced Techniques
Flavor Variations That Wow
Once you’ve mastered the basic baked butterfly shrimp technique, variations become your creative playground. Coconut lovers can replace half the breadcrumbs with unsweetened shredded coconut. The result tastes like tropical vacation on a plate.
Italian inspired versions work beautifully with grated Parmesan mixed into breadcrumbs, plus dried basil and oregano. Asian fusion happens when you add sesame seeds and five spice powder to coating.
Spicy versions can handle serious heat, add chipotle powder, hot sauce to egg mixture, or crushed red pepper flakes to breadcrumbs. Start conservatively; you can always add more heat next time.
Professional Presentation Secrets
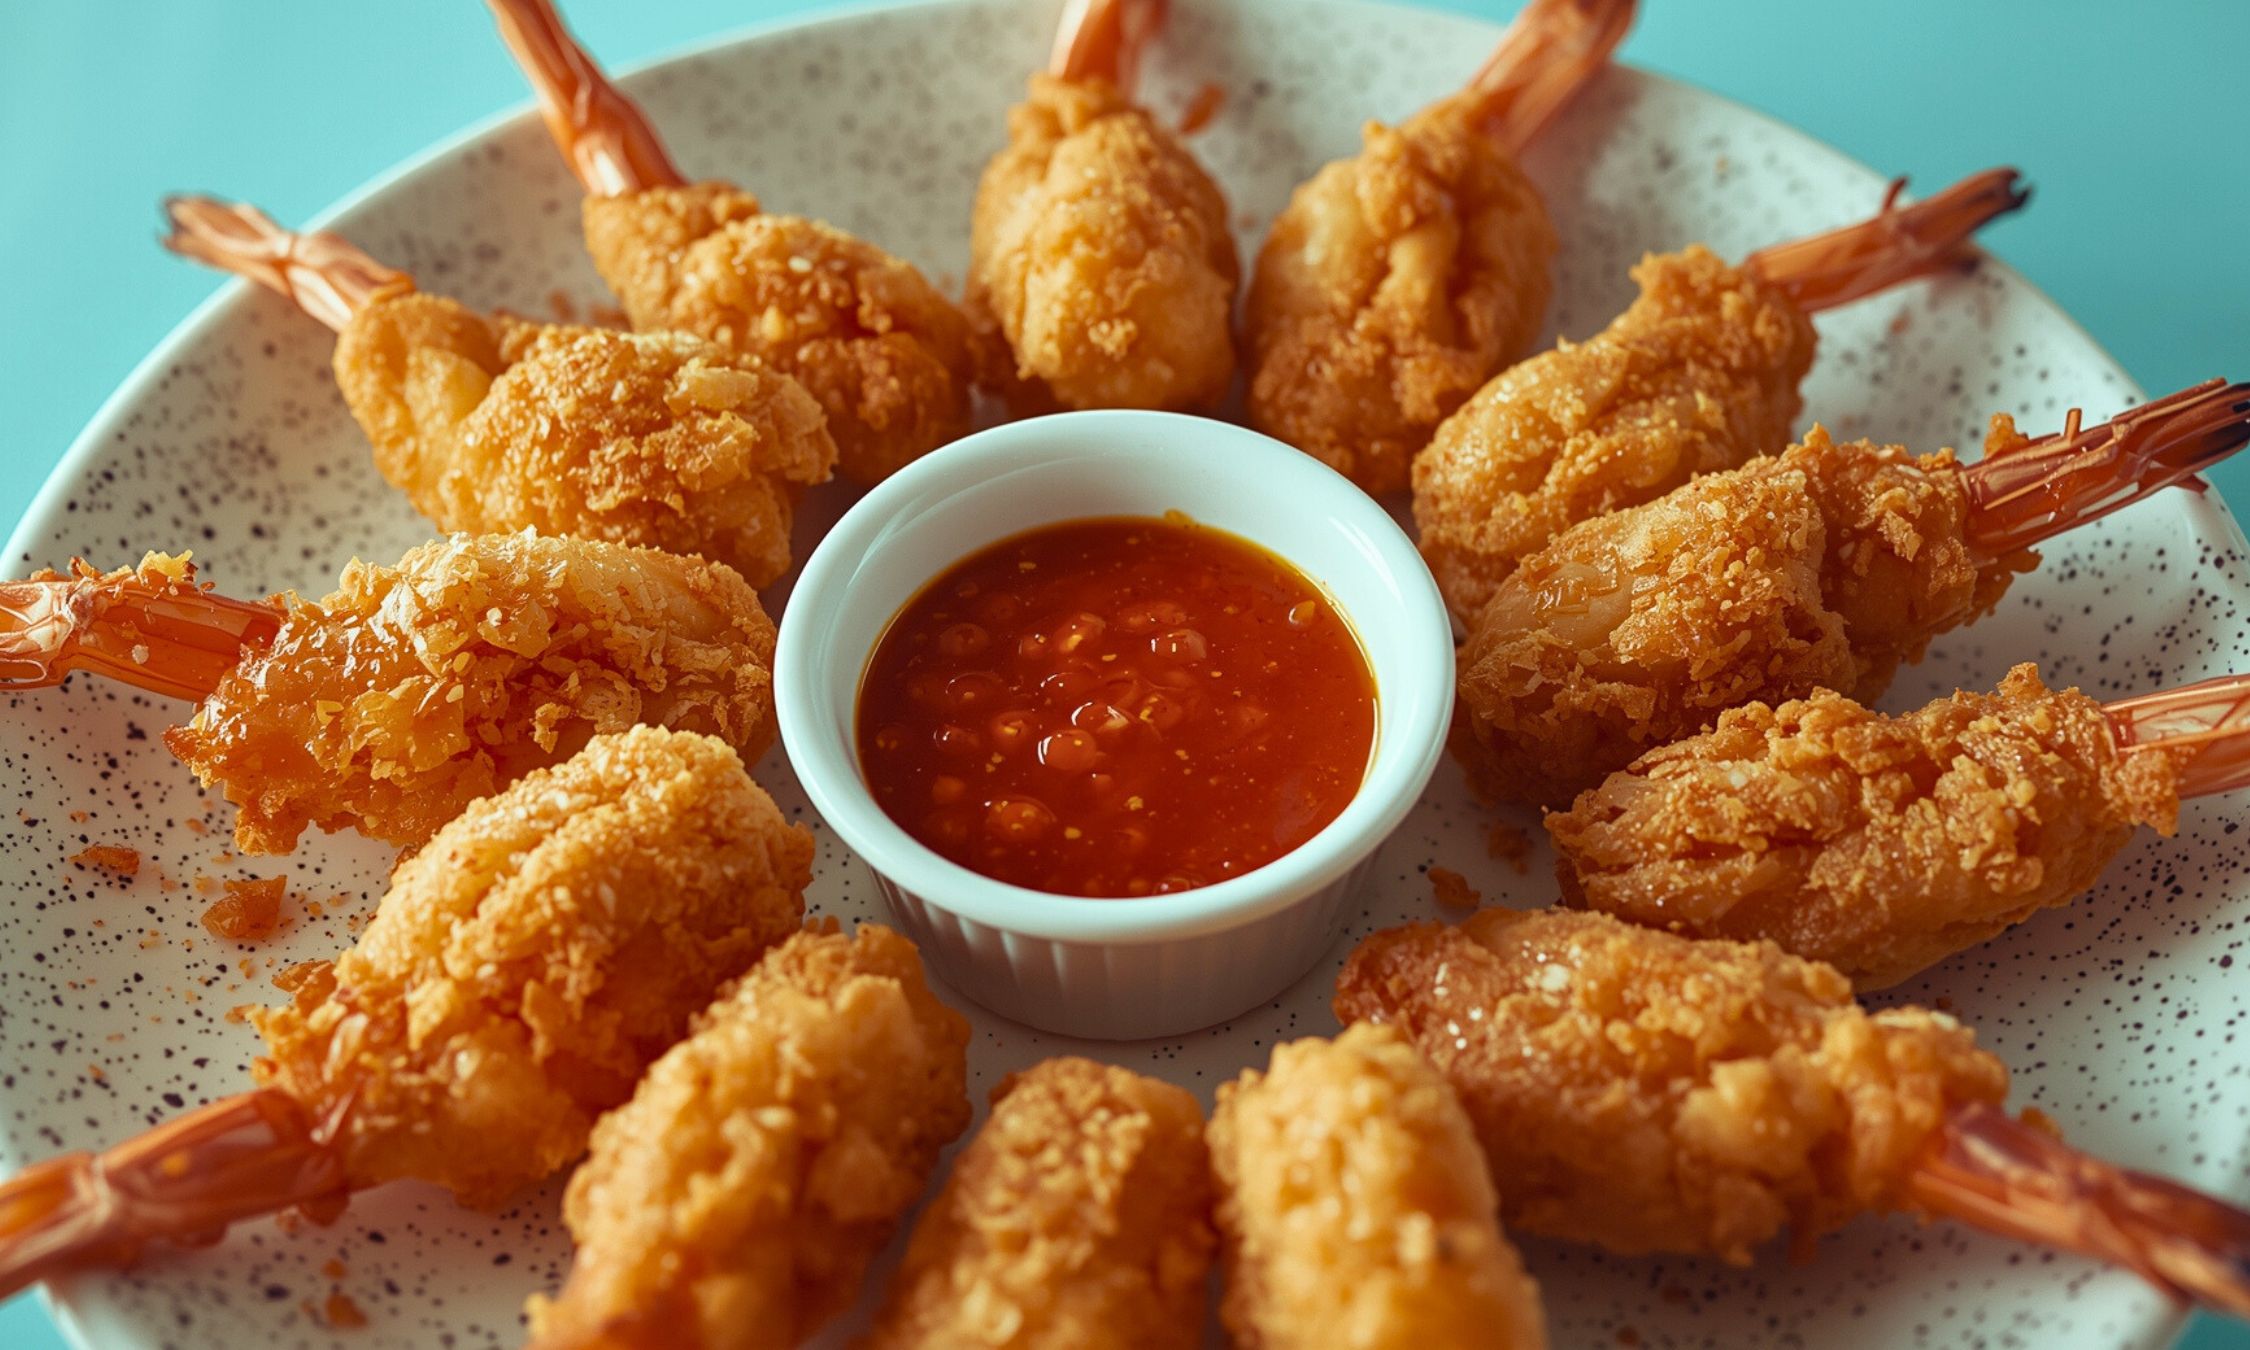
Restaurant plating isn’t complicated, it’s strategic. Arrange your baked butterfly shrimp in slight overlap on warmed plates. The golden coating catches light beautifully, creating visual appeal before the first bite.
Fresh herb garnishes add color and freshness that cuts through richness. Chopped parsley, chives, or cilantro work perfectly. A lemon wedge isn’t just pretty, that citrus acidity brightens the entire dish.
For party presentation, create height using small bowls turned upside down under your serving platter. Drape with clean kitchen towel, then arrange shrimp cascading down sides. Professional caterers use this trick constantly.
Perfect Pairings
Sauce Combinations That Complement
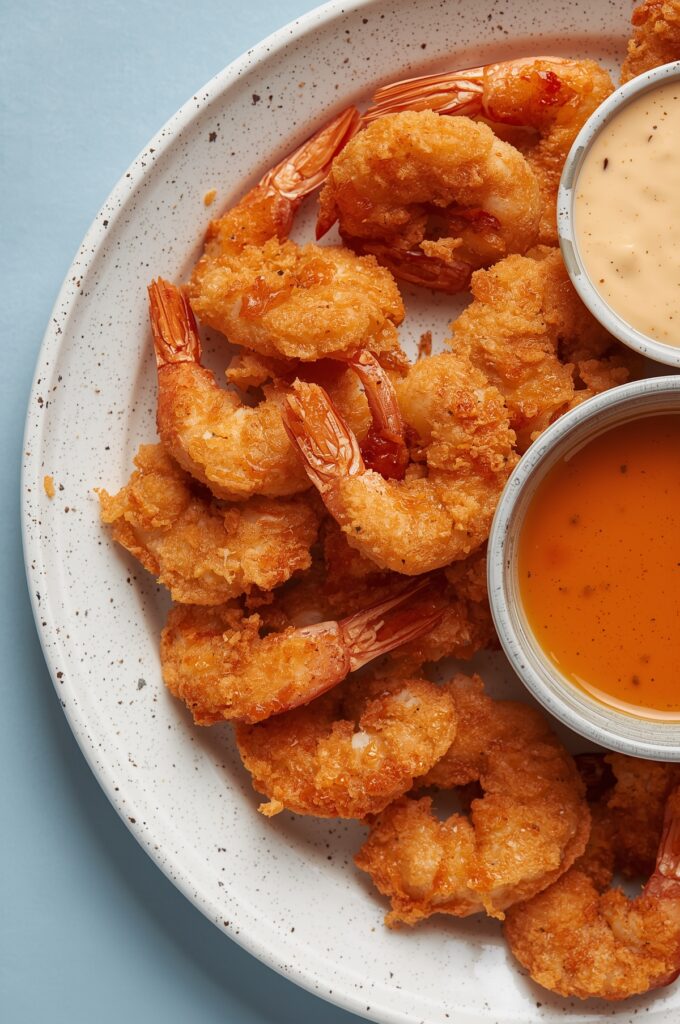
Move beyond basic cocktail sauce, your beautiful baked butterfly shrimp deserve better. Spicy aioli combines mayonnaise, garlic, lemon juice, and sriracha for creamy heat that doesn’t overpower delicate seafood.
Sweet and tangy options work wonderfully too. Mix honey with Dijon mustard and rice vinegar for Asian inspired dipping sauce. Mango chutney provides tropical sweetness that plays beautifully against crispy coating.
Traditional tartar sauce gets an upgrade with fresh herbs, capers, and lemon squeeze. Make it yourself, it takes five minutes and tastes infinitely better than store bought versions.
Side Dish Excellence
Coconut rice soaks up any sauce drippings while adding subtle sweetness that complements shrimp perfectly. Regular jasmine rice works too, but coconut rice elevates the entire meal.
Roasted vegetables add color, nutrition, and textural contrast. Asparagus, bell peppers, and zucchini roast at same temperature as your shrimp, throw them in oven first since they take longer.
Fresh salads with citrus vinaigrettes cut through richness beautifully. Mixed greens with orange segments, toasted almonds, and poppy seed dressing create restaurant worthy combination.
Troubleshooting Common Issues
When Coatings Don’t Cooperate
Coating that falls off during baking usually stems from wet shrimp or skipped flour step. That initial flour layer is crucial, it gives egg something to grab, which gives breadcrumbs something to stick to. Always pat shrimp completely dry first.
Soggy coatings happen when shrimp crowd the pan or oven temperature runs too low. Give each piece breathing room and verify your oven temperature with independent thermometer. Most home ovens run 25 degrees off their settings.
Pale coatings that won’t brown often lack that oil and butter drizzle we discussed. That fat layer is essential for proper browning. Don’t skip it or try using cooking spray instead, results won’t compare.
Texture and Timing Solutions
Rubbery shrimp result from overcooking every single time. Shrimp cook incredibly fast, they’re done when they just turn opaque and feel slightly firm. Keep cooking and they’ll turn into expensive erasers.
Uneven cooking usually means inconsistent butterflying or size variations. Take time to butterfly each shrimp to same depth and try using similar sized pieces. Consistent preparation leads to consistent results.
If your baked butterfly shrimp curl up during baking despite proper butterflying, make deeper cuts next time. Really open them up like books, they should lay completely flat before coating.
Making Baked Butterfly Shrimp Ahead
Smart Prep Strategies
These shrimp actually benefit from some advance preparation. Bread them completely up to four hours ahead, then cover and refrigerate. The coating adheres better and flavors meld beautifully.
For entertaining, this make ahead approach eliminates last minute stress. Your guests arrive to find you relaxed and confident instead of frantically breading shrimp while they’re trying to chat.
Just remember to add extra minute or two to baking time when starting from refrigerator temperature. The internal temperature needs longer to come up to proper cooking heat.
Storage and Reheating Success
Leftover baked butterfly shrimp keep well refrigerated for up to two days. Never microwave them, you’ll destroy the beautiful coating texture you worked so hard to achieve.
Oven reheating at 350°F for about five minutes brings them back to life nicely. Air fryer works even better, two to three minutes at 350°F and they’re nearly as crispy as when first made.
For longer storage, freeze breaded uncooked shrimp on baking sheet until solid, then transfer to freezer bags. They’ll keep for up to three months and bake straight from frozen, just add few extra minutes to cooking time.
Nutritional Benefits of Baked Butterfly Shrimp
Baking instead of deep frying dramatically reduces calories while maintaining all flavor and satisfaction. You’re looking at roughly 60% fewer calories compared to traditional fried versions. That’s significant difference for health conscious diners.
Shrimp themselves are nutritional powerhouses, high in protein, low in calories, packed with selenium and vitamin B12. They provide complete amino acid profiles while staying naturally low in saturated fat.
The coating adds some carbohydrates and small amount of healthy fats from olive oil. Using whole wheat breadcrumbs when possible adds fiber and nutrients without affecting taste significantly.
Wrapping It Up
Baked butterfly shrimp proves that restaurant quality doesn’t require restaurant equipment or professional training. This technique delivers impressive results using standard home kitchen tools and readily available ingredients.
The beauty lies in simplicity, proper butterflying, smart coating technique, and consistent oven heat. Master these fundamentals and you’ll turn out gorgeous, crispy baked butterfly shrimp every single time. No guesswork, no anxiety, just delicious results.
Remember that great cooking comes from understanding your ingredients and treating them with respect. These shrimp need gentle heat, proper seasoning, and just enough time to develop that perfect golden crust. Give them what they need and they’ll reward you with something that tastes like years of experience went into making it.
Your friends and family will think you’ve been holding out on them all this time. The truth? You just learned to work smarter, not harder. This recipe represents everything beautiful about home cooking, simple techniques that yield extraordinary results.
Frequently Asked Questions
Can I prepare baked butterfly shrimp coating ahead of time?
Absolutely, and it actually improves the final result. Bread your shrimp completely, arrange on baking sheets, and cover tightly with plastic wrap. They keep in the refrigerator for up to four hours before baking. The coating adheres better during this resting time, and flavors meld beautifully. Just add extra minute or two to baking time since they’ll start cold. Don’t prep more than four hours ahead though, longer sitting can make coatings soggy.
What’s the secret to keeping baked butterfly shrimp crispy when reheating?
Skip the microwave entirely if you want any hope of maintaining crispiness. Your regular oven at 350°F for about five minutes works well, but air fryer is the real game changer here. Two to three minutes at 350°F in air fryer brings them almost back to original crispiness. The circulating hot air recreates that fresh from the oven texture better than any other reheating method. Toaster ovens work similarly well for smaller portions.
How do I know when my baked shrimp are perfectly cooked?
Perfect shrimp feel firm but still have slight give when gently pressed, think cooked chicken breast texture. They’ll be completely opaque with no translucent areas remaining. The coating should be golden brown and sound hollow when tapped lightly with fork. Overcooking turns them rubbery, so err on side of slightly underdone if you’re unsure. They’ll finish cooking from residual heat even after leaving oven.
Why does my Baked Shrimp coating sometimes fall off during baking?
This frustrating problem usually stems from skipping flour step or not patting shrimp dry enough before coating. That initial flour dredge is like primer, it gives egg wash something to grip, which gives breadcrumbs something to stick to. Wet shrimp prevent proper adhesion no matter how careful your technique. Also ensure you’re not overcrowding pan, which creates steam that can loosen even well adhered coatings.
Can I make these butterfly shrimp without using eggs in coating?
Yes, though coating won’t stick quite as tenaciously. Buttermilk works surprisingly well as egg substitute and adds subtle tangy flavor that pairs beautifully with seafood. You can also make light batter using flour mixed with milk or water, but handle coated shrimp extra gently to prevent coating from sliding off. Some people use mayonnaise thinned with little water, it sounds weird but creates excellent adhesion and browning.

Swiftly Captions by Tina Smith — Quick, flavorful food recipes made simple, bringing fresh inspiration to your kitchen every day


