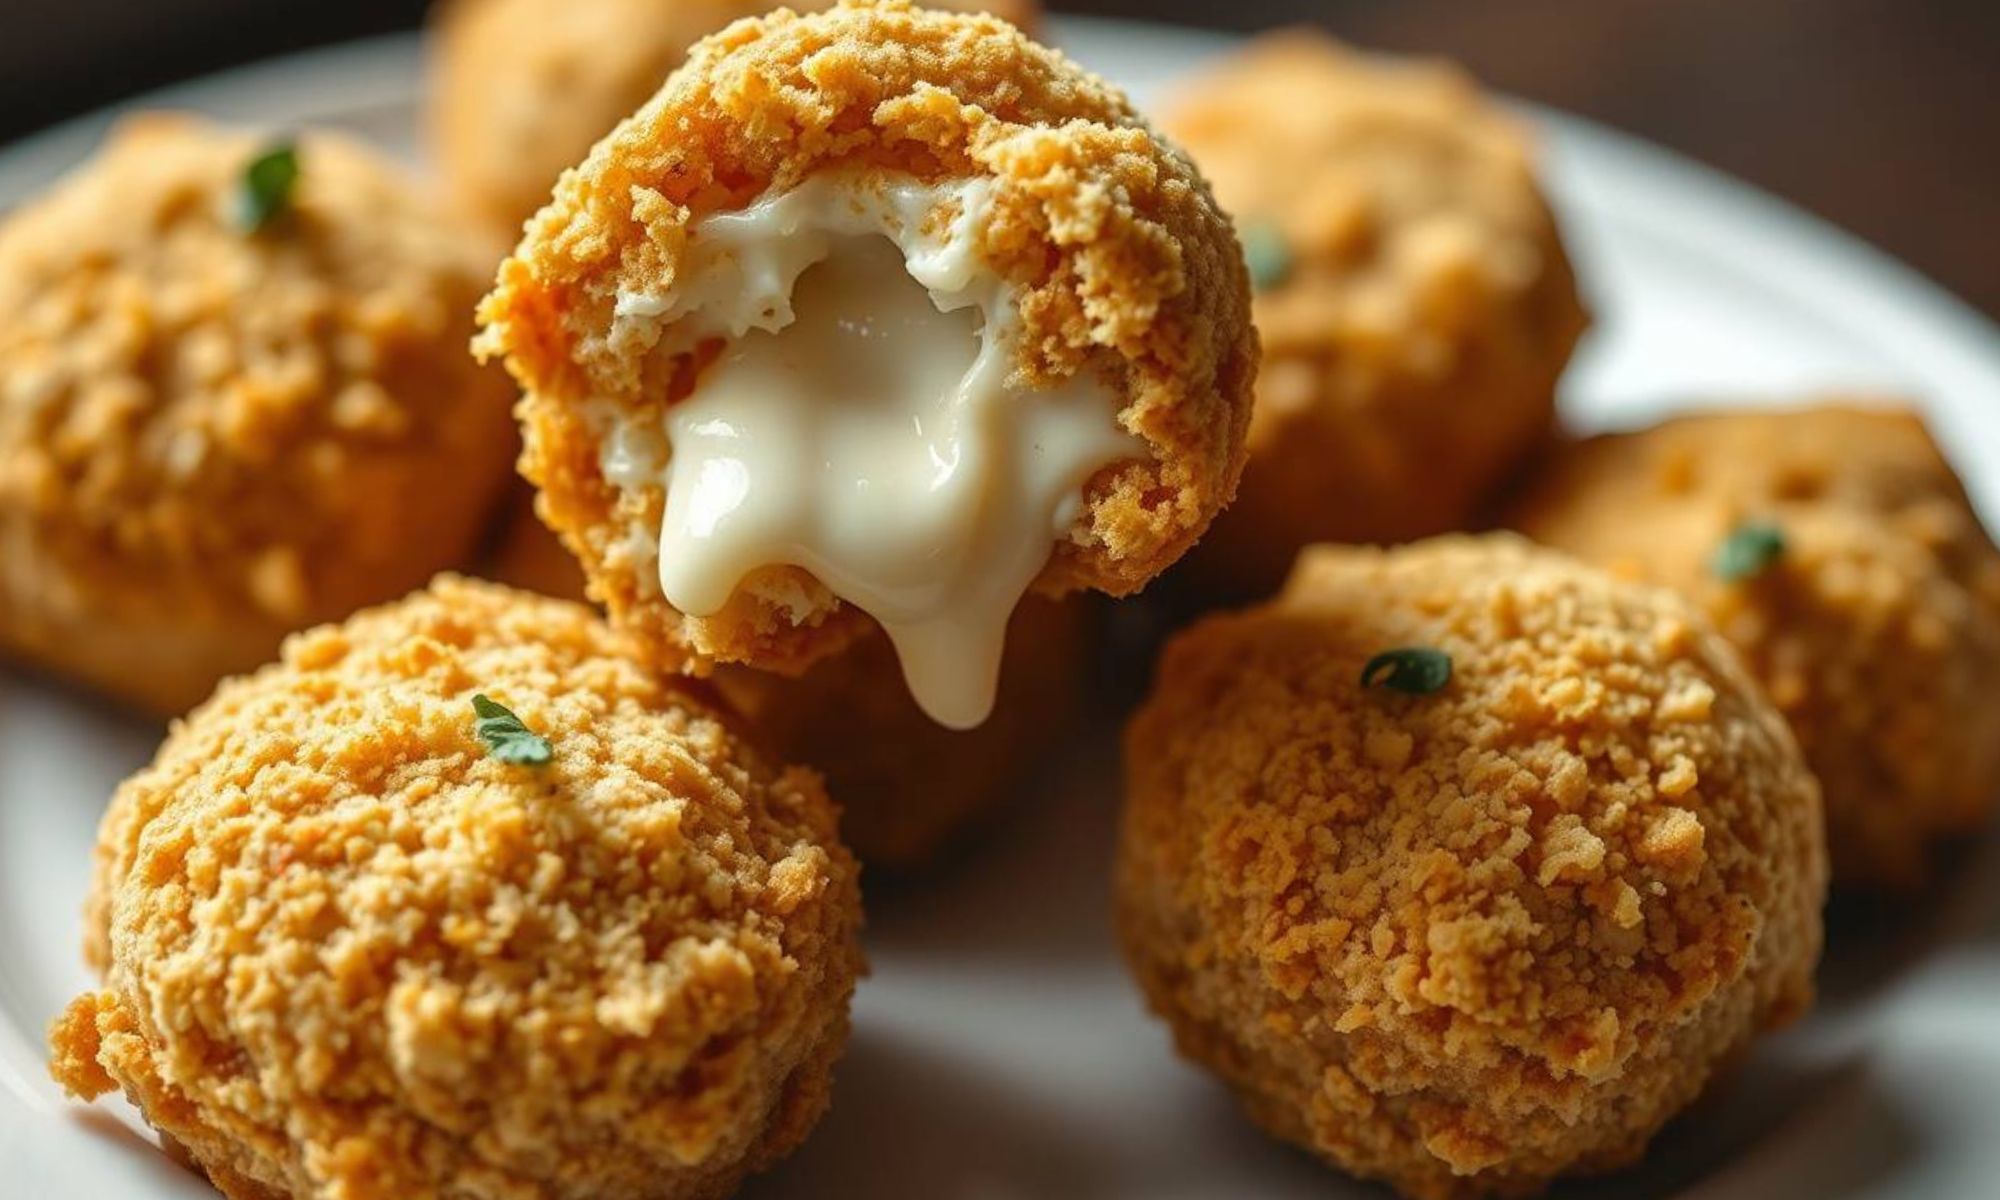
I still remember the first time I bit into fried cheesecake bites. It was at a local street fair. I held a warm paper tray, unsure of what to expect. But that very first bite? Absolute magic. The golden, crispy shell gave way to a rich, creamy center that melted in my mouth. It was like cheesecake turned party perfect and unforgettable. I couldn’t believe something so simple could taste that amazing.
Since that moment, I’ve been hooked. I’ve tested, tweaked, and perfected my own version of fried cheesecake bites at home. They’re now a family favorite, and honestly? I’d choose them over regular cheesecake any day. In this post, I’ll show you how to get that perfect crunch, golden, not greasy while keeping the center soft, creamy, and full of flavor. I’ll also share a little trick my mom swears by to get the coating just right. Go too fast, and you’ll ruin the texture. But follow these easy steps, and you’ll master it in no time.
Whether you deep fry or air fry, these fried cheesecake bites deliver a satisfying bite every time. They’re fast, fun, and seriously addictive. Great for parties, lazy weekends, or anytime you need a sweet little pick me up. Get ready to fall in love. Fried cheesecake bites are about to become your go to dessert.
Ingredients That Make Magic Happen

Let’s talk about what goes into these beauties, in the order you’ll actually use them. Each ingredient plays a key role in building that perfect crispy-creamy bite.
For the Cheesecake Base:
- 16 oz cream cheese, room temperature (don’t skip this step!)
- 1/2 cup granulated sugar
- 2 large eggs
- 1 teaspoon vanilla extract
- 1/4 cup sour cream
- 2 tablespoons all purpose flour
For the Coating:
- 2 cups panko breadcrumbs
- 1 cup all purpose flour
- 3 large eggs, beaten
- 1/2 teaspoon cinnamon
- Pinch of salt
For Frying:
- Vegetable oil (enough for deep frying, about 6 cups)
Smart Swaps That Actually Work
Can’t do dairy? Greek yogurt cream cheese works surprisingly well, though you’ll get a slightly tangier bite. For the sour cream, try cashew cream or even thick coconut cream from the top of a chilled can.
Gluten free? Swap that flour for almond flour in the cheesecake and use gluten free panko. The texture changes slightly but it’s still incredible.
Here’s something most people don’t know: the type of cream cheese matters more than you think. Philadelphia is reliable, but if you can find a local brand that’s less processed, you’ll taste the difference. Look for cream cheese that feels heavy in your hands, that density translates to richness.
Room temperature cream cheese isn’t negotiable here. Cold cream cheese means lumpy filling, and nobody wants that surprise in their perfect bite. Pull it out about two hours before you start, or if you’re impatient like me, cut it into cubes and let it sit for thirty minutes.
The Step by Step Magic of Fried Cheesecake Bites

Step 1: Create Your Cheesecake Base
Preheat your oven to 325°F. This lower temperature sets filling gently without browning.
Beat that room temperature cream cheese until it’s smooth as silk. This takes about 3-4 minutes with an electric mixer, and don’t rush it. Any lumps now will haunt you later.
Gradually add the sugar, beating until it dissolves completely. You’ll know you’re there when the mixture looks almost fluffy. Add eggs one at a time, then vanilla and sour cream. That flour goes in last, just mix until combined. Overbeaten filling creates dense cheesecake. Nobody wants that.
Pour into a greased 8×8 pan and bake for about 35-40 minutes. The center should still jiggle slightly when you shake the pan. It sets fully while cooling.
Here’s where patience pays off: let it cool completely, then refrigerate for at least 4 hours. Overnight is even better. Cold cheesecake holds its shape when you cut and fry it.
Step 2: Shape Your Bites
Once your cheesecake is properly chilled, cut it into 1-inch cubes. Any bigger and they won’t cook evenly; any smaller and they’ll fall apart on you.
Here’s a trick my grandmother taught me: dip your knife in warm water between cuts. Clean, sharp edges make all the difference in how they hold together during frying.
Place the cubes on a parchment lined baking sheet and freeze them for 30 minutes. This simple step separates amateurs from pros. Frozen edges ensure the outside crisps up before the inside begins to melt into the oil.
Step 3: The Coating Game
Set up your breading station: flour in one dish, beaten eggs in another, and panko mixed with cinnamon and salt in a third. Work in batches of 4-5 pieces at a time.
Roll each frozen cube in flour first, this helps the egg stick. Then egg, letting excess drip off. Finally, press gently into the panko mixture, making sure every surface is covered.
The secret to coating that stays put? Press the breadcrumbs firmly into the surface. Don’t just roll it around, really press it in. This creates a barrier that prevents the filling from leaking out.
Step 4: The Frying Finale
Heat your oil to 350°F. This temperature is critical, too hot and the outside burns before the inside warms; too cool and they’ll absorb oil like sponges.
Don’t have a thermometer? Drop a cube of bread in the oil. If it sizzles immediately and browns in about 60 seconds, you’re ready.
Fry in small batches, about 4-5 pieces at a time. They only need 2-3 minutes until golden brown all over. Use a slotted spoon to turn them gently, they’re delicate at this stage.
The moment they hit that perfect golden color, get them out. They’ll continue cooking from residual heat, and overcooked cheesecake bites are sad cheesecake bites.
The Science Behind the Sizzle of Fried Cheesecake Bites
What’s really happening when you fry cheesecake might surprise you. That high heat creates what’s called the Maillard reaction on the breadcrumb coating, the same chemical process that makes bread crust golden and gives fried foods their distinctive flavor.
Meanwhile, inside your protective coating, the cheesecake is gently warming. The proteins in the cream cheese and eggs have already been set during baking, so they won’t curdle now. Instead, they just warm through, becoming creamy and luxurious.
The freezing step isn’t just for structure, it’s about timing. Frozen centers take longer to heat through, giving that coating time to crisp perfectly. It’s like having a built in timer that prevents overcooking.
Here’s something fascinating: the oil temperature matters because of heat transfer rates. At 350°F, the oil transfers heat fast enough to crisp the outside but not so fast that it penetrates deep before the surface sets. Too hot, and you get burnt outsides with cold centers. Too cool, and oil seeps in before the coating can protect the filling.
The panko breadcrumbs aren’t just for crunch, their irregular shape creates air pockets that insulate the filling while crisping beautifully. Regular breadcrumbs would work, but you’d lose that incredible textural contrast.
Making Them Beautiful & Delicious

Presentation matters, even for comfort food. Dust these beauties with powdered sugar right after frying, the residual heat will help it stick without melting completely.
For plating, think about color contrast. A dark plate makes the golden coating pop. A small dollop of berry compote or a drizzle of chocolate sauce on the side adds elegance without overwhelming the star of the show.
Want to go fancy? A light sprinkle of cinnamon sugar while they’re still warm, or a delicate garnish of fresh mint leaves. Keep it simple, these bites are already perfect.
Pairing suggestions? A glass of dessert wine like Moscato complements the richness beautifully. For non alcoholic options, try a strong cup of coffee or even a creamy vanilla milkshake if you’re feeling indulgent.
These are best served immediately while the contrast between hot crispy coating and warm creamy center is at its peak. But if you need to hold them for a party, keep them warm in a 200°F oven for up to 30 minutes.
Wrapping Up Fried Cheesecake Bites
These fried cheesecake bites aren’t just dessert, they’re an experience. Every bite delivers that perfect contrast of textures and temperatures that makes comfort food so comforting.
The beauty of these fried cheesecake bites lies in their perfect balance. They’re impressive enough for special occasions but approachable enough for a weekend treat. The techniques you’ll learn here, proper coating, temperature control, timing, will serve you well in countless other recipes.
Most importantly, don’t be afraid to make them your own once you’ve mastered the basics. Try different spice combinations in the coating. Experiment with flavored cheesecakes as your base. Add a surprise center of jam or chocolate. That’s how family recipes are born.
Remember: cooking is about more than following instructions. It’s about understanding why each step matters, so you can adapt and improve. These fried cheesecake bites are your gateway to that deeper understanding.
FREQUENTLY ASKED QUESTIONS
Can I make the cheesecake base ahead of time?
Absolutely! The cheesecake base actually improves with time. Make it up to 3 days ahead and keep it covered in the refrigerator. Just cut and freeze right before coating and frying.
What if my coating falls off during frying?
This usually means the oil wasn’t hot enough, or the pieces weren’t frozen long enough. Make sure your oil hits 350°F and those cubes are properly frozen. Also, press that coating firmly, it needs to really stick.
Can I bake these instead of frying?
You can, but you’ll lose that signature crispy texture. If you want to bake them, try 400°F for about 12-15 minutes, turning once. They’ll be good, just different from the fried version.
How do I know when the oil is the right temperature without a thermometer?
Drop a small piece of bread into the oil. If it sizzles immediately and turns golden brown in about 60 seconds, you’re at the right temperature. If it browns too quickly, the oil’s too hot.
Can I freeze the coated bites before frying?
Yes! Once coated, you can freeze them for up to a month. Fry directly from frozen, just add an extra minute to the cooking time. This is perfect for party prep.

Swiftly Captions by Tina Smith — Quick, flavorful food recipes made simple, bringing fresh inspiration to your kitchen every day


