Ever opened a jar of garlic powder and felt a little… disappointed? The smell’s faint. The flavor’s dull. And it just doesn’t pack the punch your cooking deserves. That’s exactly what pushed me to try something different, and trust me, once I did, there was no turning back.
The solution? A simple yet game changing method: Granulated Garlic Recipe. It brings out real garlic flavor, strong, clean, and beautifully aromatic. You’ll skip the bland store bought version and make a pantry staple that’s bursting with boldness. And the best part? It’s surprisingly easy to do.
This post will walk you through every step of making your own granulated garlic from scratch, from selecting the right garlic, to drying it properly, and grinding it into perfect golden bits. You’ll learn the tricks to lock in flavor and preserve it for months. Whether you’re a seasoned cook or just starting out, this Granulated Garlic Recipe is a skill every home cook should have.
Ready to boost your spice rack and never settle for flavorless garlic again? Let’s get into it, because homemade always tastes better, and this recipe proves it.
What Makes Homemade Granulated Garlic Worth Your Time
Let’s be real here, commercial granulated garlic often tastes like cardboard with a faint garlic memory. It’s been sitting on shelves for who knows how long, losing potency every day. Your homemade version packs a punch that’ll make you wonder why you ever settled for store bought.
Granulated garlic sits perfectly between garlic powder and fresh garlic. It’s got more texture than powder but dissolves better than minced garlic when you need that flavor distributed evenly. Think of it as the goldilocks of garlic seasonings.
You control the drying process because you start with fresh, quality garlic. No anti caking agents, no mystery preservative, just pure garlic goodness.
Ingredients & Smart Swaps
Here’s what you’ll need, in the order you’ll actually use them:
- 1 pound fresh garlic bulbs (about 8-10 large heads)
- 1 tablespoon sea salt (optional, for preservation)
That’s it. Seriously.
Now, let’s talk garlic selection because this makes all the difference. You want firm bulbs with tight, papery skin. Avoid anything sprouting green shoots or feeling soft when you squeeze it. Those little green sprouts? They’re bitter and will ruin your final product.
Can’t find good fresh garlic? Here’s your backup plan. Look for pre peeled cloves at warehouse stores just make sure they’re still firm and smell right. Sometimes frozen garlic works too, though you’ll need to thaw and drain it thoroughly first.
About that salt, it’s totally optional, but it helps preserve your granulated garlic and prevents clumping. If you’re watching sodium, skip it entirely. The garlic will keep just fine without it.
Step-by-Step Magic
Prep Like a Pro
Start by breaking apart all your garlic heads and separating the cloves. It might look like a lot at first, but trust me, once you see how much flavor homemade granulated garlic adds to your meals, you’ll wish you had prepped more. Here’s a simple trick to make peeling faster and less frustrating: gently smash each clove with the flat side of your knife. The skins will loosen up and slide right off with almost no effort.
Resist the urge to toss everything into a garlic press or food processor—those tools have their place, but not in this part of the Granulated Garlic Recipe. For this step, precision matters. Use a sharp knife to slice the cloves thinly, aim for about 1/8 inch thick. Not only does this size help everything dry evenly, but it also keeps you from ending up with a mix of burnt chips and under-dried pieces. Consistency is key if you want a smooth, flavorful grind later on.
Taking your time here sets the tone for the entire Granulated Garlic Recipe. A little patience now means you’ll get golden, crisp garlic slices ready for grinding into that intensely fragrant, flavor-packed powder you can proudly call your own.
The Drying Process
You’ve got three solid methods here, and I’ll walk you through each one.
Oven Method (My Personal Favorite)
Preheat your oven to its lowest setting, usually around 170°F. If your oven doesn’t go that low, crack the door open slightly to keep temps down.
Arrange your sliced garlic on parchment lined baking sheets in a single layer. No overlapping, trust me on this. Sprinkle with salt if you’re using it.
Here’s where patience becomes your best friend. This process takes 6-8 hours, and you’ll need to flip the slices every 2 hours. I know, I know it feels like forever. But that slow, gentle heat is what creates the perfect texture.
Test readiness, the garlic should snap crisply between your fingers and smell incredible.
Dehydrator Method
If you’ve got a food dehydrator, you’re golden. Set it to 115°F and arrange the garlic slices on the trays. This method takes 8–12 hours but requires less babysitting than the oven approach. Just load it up, walk away, and let the machine do its magic. The slow, steady drying preserves the garlic’s natural oils and flavor like nothing else.
Air Drying Method
Nonna probably did it this way. Thread the garlic slices onto clean string and hang them in a dry, well-ventilated area away from direct sunlight. Takes about 2–3 days, but you get major points for traditional technique, and honestly, there’s something beautiful and nostalgic about watching those slices slowly transform. It’s simple, hands-off, and doesn’t require any fancy equipment—just patience and a little kitchen charm.
The Final Transform
Once your garlic is completely dried and golden, let it cool fully before moving to the next step. This pause might seem minor, but it’s crucial, warm garlic can create moisture in your grinder, and that’s the last thing you want when aiming for a perfect Granulated Garlic Recipe.
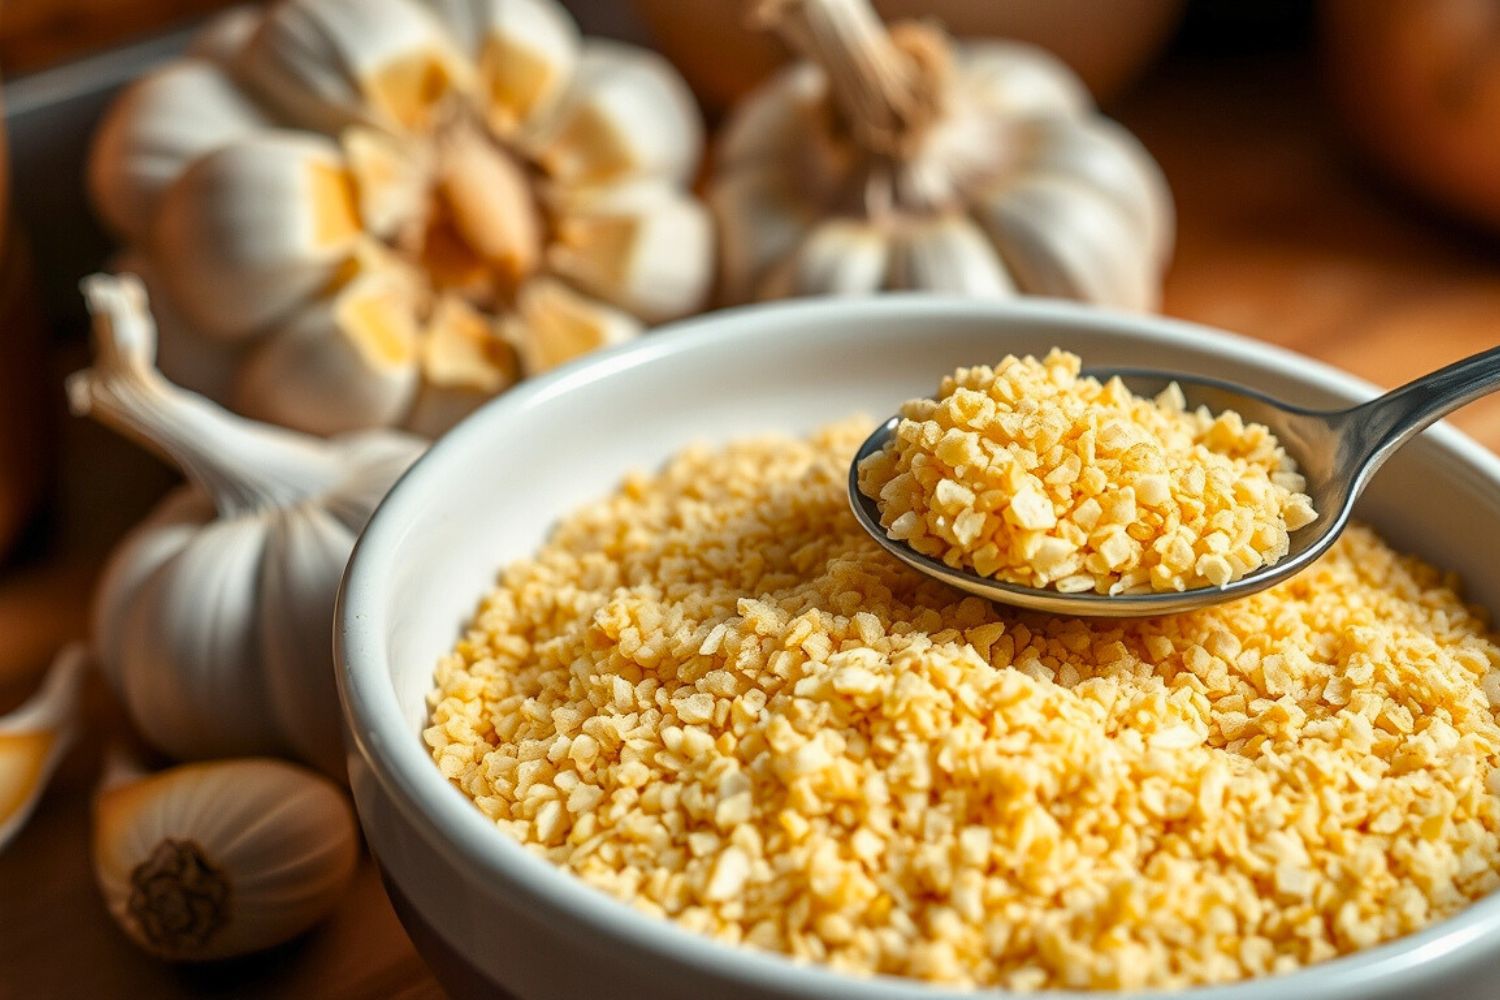
Now comes the fun part: grinding it into those flavorful granules. For small batches, a clean coffee grinder is your best friend. Pulse in short bursts to keep it from turning into a fine powder. You’re aiming for that sweet spot, coarser than powder, finer than flakes.
If you’re working with a larger quantity (and after your first batch, you likely will), a standard food processor with the regular blade does the job beautifully. Just like before, pulse gently and check the texture often. Overprocessing can turn your carefully dried slices into dust, and for a true Granulated Garlic Recipe, texture is everything.
The Science Behind the Sizzle
Here’s what’s really happening during this transformation. Removing moisture concentrates all those sulfur compounds that give garlic its punch. The slow drying process breaks down some of the harsher elements while preserving the complex flavors we love.
That’s why slow and low is crucial. High heat destroys the delicate flavor compounds and can make your garlic bitter. Think of it like making jerky patience creates perfection.
The granular texture you’re creating has serious advantages over powder. Those little granules hold onto flavor better and don’t clump as easily. They also distribute more evenly in dry rubs and seasonings.
Here’s something cool the Maillard reaction that happens during drying actually creates new flavor compounds that weren’t in the fresh garlic. That’s why your homemade granulated garlic tastes more complex than the fresh stuff.
Making It Beautiful & Delicious
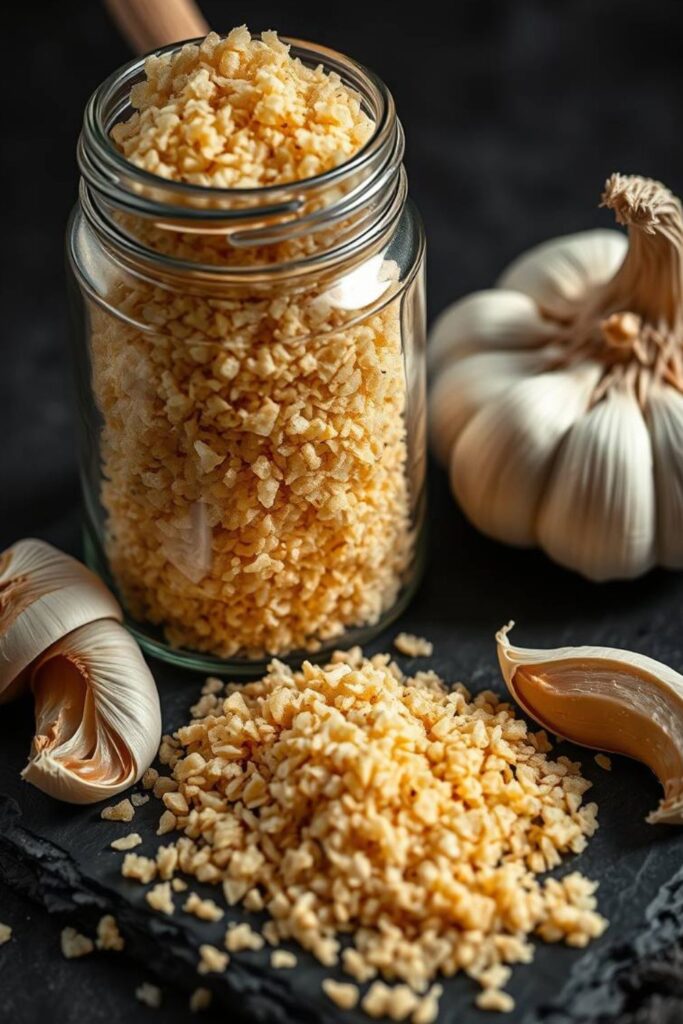
Store your granulated garlic in airtight containers away from light and heat. Mason jars work perfectly—they’re not just functional but also add a rustic charm when lined up neatly in your spice cabinet. Pro tip: tuck a dried bay leaf into each jar. It naturally repels insects, keeps your granules dry, and adds a faint, woodsy aroma that pairs beautifully with the garlic.
This homemade granulated garlic isn’t just a pantry staple, it’s a flavor upgrade. Toss it into dry rubs for grilled meats, stir it into compound butters, or finish roasted veggies with a pinch for a pop of rich, garlicky depth. It adds bold flavor without moisture, making it ideal for spice blends, marinades, or even sprinkled onto popcorn for a savory kick.
Want to elevate your spice game? Try mixing equal parts of your granulated garlic with granulated onion, dried thyme, rosemary, or oregano for a custom all-purpose seasoning. It’s a blend that’ll have people asking what makes your dishes taste so incredible, and you’ll know it all started with your own Granulated Garlic Recipe.
For long-term storage, a cool, dark cupboard or pantry is ideal. It’ll hold peak flavor for up to two years, though chances are, you’ll use it well before then. Once you start reaching for it in everyday cooking, you’ll wonder how you ever got by without it..
Final Thoughts on the Granulated Garlic Recipe
Making granulated garlic at home isn’t just about saving money, though let’s be honest, you absolutely will. It’s about taking full control over one of your kitchen’s most-used ingredients. With a homemade Granulated Garlic Recipe, you know exactly what’s going into your food no additives, no anti-caking agents, just pure garlic flavor.
The difference in taste between a fresh batch you made yourself and the stuff that’s been sitting on a store shelf for who-knows-how-long? It’s honestly night and day. That robust, slightly sweet depth from freshly dehydrated garlic is something store-bought just can’t match. Once you taste your own Granulated Garlic Recipe in action, there’s no going back to the bland, mass-produced version.
Begin with a small batch to test the waters and get comfortable with the drying and grinding process. You’ll be amazed at how quickly you go through it once you start using it in everything from soups and sauces to rubs and marinades. And don’t be surprised if friends start asking what your secret is. It might just be your homemade garlic magic..
Frequently Asked Questions
How long does homemade granulated garlic last?
Store it properly in airtight containers away from light and heat, and your granulated garlic stays fresh for 18–24 months. It won’t spoil after that, but the flavor starts to fade. Keep moisture out—any humidity causes clumping and can lead to mold. For best results, add a small food-safe silica pack to the container. A cool, dark pantry or spice drawer is ideal for long-term storage.
Can I use a regular oven if it doesn’t go below 200°F?
Absolutely! Just prop the oven door open slightly with a wooden spoon to let moisture escape and keep the temperature lower. You might need to rotate your pans more frequently, but it works just fine. Drying times will be shorter, so check every hour to avoid over-browning. If you’re using convection mode, that can also help maintain even airflow.
What’s the difference between granulated garlic and garlic powder?
Granulated garlic has a coarser texture, think coarse salt versus table salt. It doesn’t dissolve as quickly as powder, which makes it perfect for rubs and seasoning blends where you want little bursts of flavor. Powder integrates completely into sauces and batters, while granules add texture and slower flavor release. Both are made from dried garlic, but how you grind it changes the impact in your cooking.
My garlic turned brown during drying is it ruined?
Light browning is totally normal and actually adds a nice roasted flavor note. Dark brown or black spots mean the heat was too high. As long as it doesn’t smell burned or bitter, you’re good to go. Slight color variation can even bring depth to your granulated garlic. Just keep an eye on thin slices, which can darken more quickly than thicker ones.
Can I mix different types of garlic in one batch?
Sure can! Different garlic varieties give you slightly different flavor profiles, varieties tend to be more complex, while softneck is milder. Mixing them creates a more nuanced final product. Just make sure you slice them all to the same thickness so they dry evenly. It’s a great way to explore and personalize your Granulated Garlic Recipe for future batches.

Swiftly Captions by Tina Smith — Quick, flavorful food recipes made simple, bringing fresh inspiration to your kitchen every day


