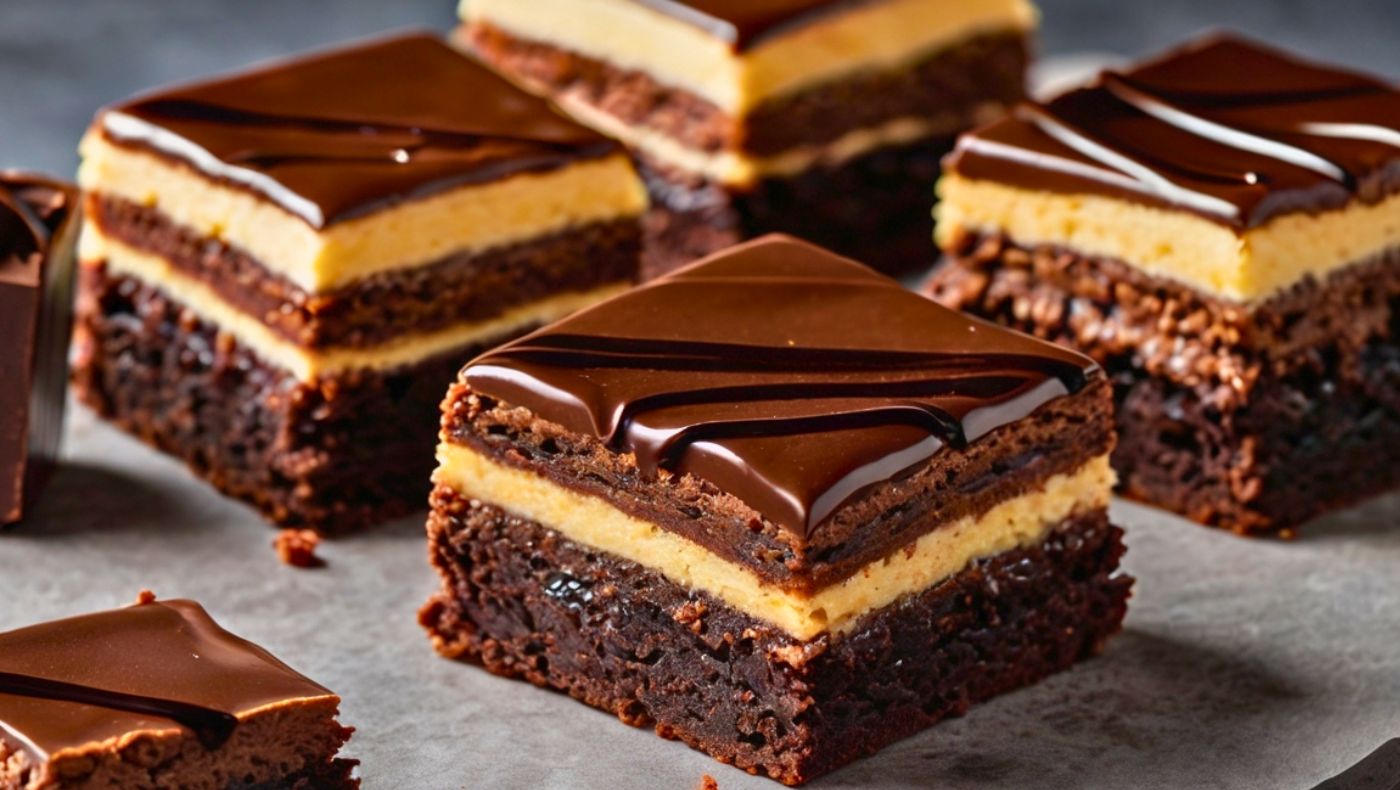
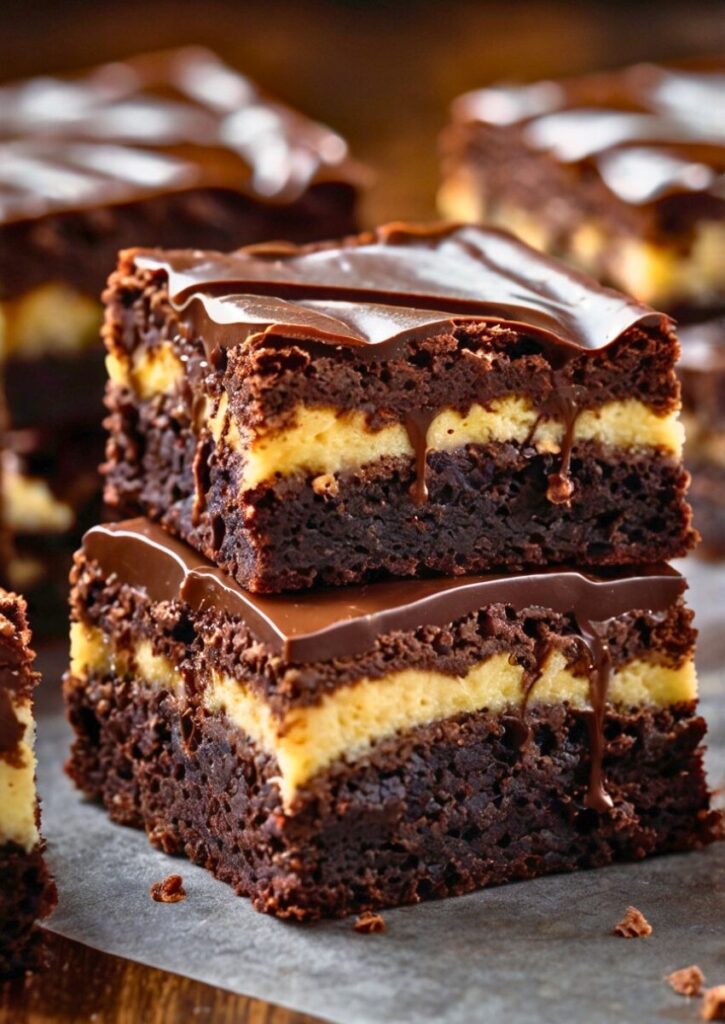
Craving a dessert that cools and comforts? Try mint brownies. Rich chocolate. Smooth mint. A perfect match. The first time I baked mint brownies, the aroma alone was addictive. Fudgy base. Creamy mint layer. A glossy chocolate topping. Each bite hits with bold flavor and cool freshness.
In this post, you’ll learn how to make mint brownies step by step. Simple ingredients. Easy steps. Big results. I’ll share tips for perfect layers, rich flavor, and a bakery style finish. These mint brownies are perfect for parties, holidays, or anytime cravings hit. Get ready to impress with every bite.
Mint brownies represent one of confectionery’s most sophisticated flavor marriages. The deep, earthy richness of chocolate dances with mint’s bright, cooling sensation. This isn’t your average brownie recipe. It’s a masterclass in flavor layering. Transforms a simple dessert into something extraordinary.
The secret lies not just in adding mint. Understanding how different mint varieties interact with chocolate’s complex flavor compounds makes the difference. Fresh spearmint brings grassy notes. Complements dark chocolate’s earthiness perfectly. Peppermint extract delivers that classic cooling punch. And chocolate mint, yes, that’s a real herb, creates an almost mystical harmony. Will make your taste buds question everything they thought they knew about dessert.
Ingredients & Substitutions for Mint Brownies

Creating the perfect MINT BROWNIES begins with quality ingredients and a few smart swaps that can make this treat work for almost any kitchen. Each layer, from the fudgy base to the refreshing mint center and silky glaze, depends on balance and quality. Here’s what you need and how to make it your own:
For the Brownie Base:
- 8 oz high quality dark chocolate (70% cocoa), chopped
- 1/2 cup unsalted European butter
- 3/4 cup granulated sugar
- 1/4 cup packed brown sugar
- 3 large eggs, at room temperature
- 1 teaspoon vanilla extract
- 3/4 cup all purpose flour
- 1/4 cup unsweetened cocoa powder
- 1/2 teaspoon kosher salt
The foundation of these mint brownies is all about depth and richness. Use dark chocolate bars with at least 70% cocoa, brands like Valrhona, Ghirardelli, or even Trader Joe’s produce consistent, smooth results. Avoid chocolate chips, which are loaded with stabilizers that hinder smooth melting.
Want a gluten free option? Swap the all purpose flour with almond flour or a 1:1 gluten free baking blend. Note that this will slightly alter the texture, making the brownies more dense and fudgy, something many actually prefer.
And if European butter isn’t available, no problem. Use regular unsalted butter but increase the amount by one tablespoon. Just remember to cut back the heavy cream in the mint layer slightly to maintain the right consistency.
For the Mint Layer:
- 2 tablespoons fresh mint leaves, finely chopped
- 1/2 teaspoon peppermint extract
- 4 oz cream cheese, softened
- 1/4 cup powdered sugar
- 2 tablespoons heavy cream
This layer gives your mint brownies their signature cool contrast. If fresh mint isn’t on hand, simply increase the peppermint extract to 3/4 teaspoon, but go slowly. Peppermint extract can vary greatly in intensity, and too much can easily overwhelm the flavor, making your brownies taste medicinal.
Cream cheese gives this layer its smooth, slightly tangy body, while heavy cream lightens the texture just enough. For a firmer mint layer, reduce the cream by half.
For the Chocolate Glaze:
- 4 oz dark chocolate, chopped
- 3 tablespoons heavy cream
- 1 tablespoon corn syrup
Finish your brownies with a sleek, glossy chocolate glaze. The corn syrup ensures a smooth finish that sets beautifully without cracking. Choose high quality chocolate once again for a luscious final touch.
Step by Step Instructions
Preparing the Foundation
Preheat your oven to 325°F. Line an 8×8 baking pan with parchment paper. Leave overhang for easy removal. This temperature seems low. It’s intentional. Slower baking prevents the edges from becoming leathery. The center stays gooey.
Melt the chocolate and butter using a double boiler method. Fill a saucepan with two inches of water. Bring to a gentle simmer. Place a heat proof bowl on top. Bottom shouldn’t touch the water. Add chocolate and butter. Stir occasionally until smooth.
Here’s where most people mess up. They rush this step. The chocolate should melt slowly and evenly. See any graininess? You’ve overheated it. Start over, seriously. Seized chocolate will ruin your entire batch.
Building the Batter
Remove the chocolate mixture from heat. Whisk in both sugars. The mixture should look glossy and slightly warm to touch. Add eggs one at a time. Whisk vigorously after each addition. This creates the brownies’ signature shiny top crust.
Beat in vanilla. Then fold in the flour mixture in two additions. Don’t overmix. Just until the flour disappears. Overmixing develops gluten. Creates tough, cake like brownies instead of the fudgy texture we’re after.
The Mint Integration
This is where the magic happens. Gently fold in the chopped fresh mint leaves, distributing them evenly throughout the batter. The heat from the warm chocolate will begin releasing the mint’s essential oils immediately.
Pour the batter into your prepared pan and smooth the top with an offset spatula. Bake for 32-35 minutes, until a toothpick inserted in the center comes out with a few moist crumbs attached.
Creating the Mint Layer
While the brownies cool, prepare the mint cream layer. Beat the softened cream cheese until completely smooth, any lumps will show in the final product. Gradually add powdered sugar, then the peppermint extract and heavy cream.
The consistency should be spreadable but not runny. If it’s too thick, add cream by the teaspoon. Too thin? Add more powdered sugar.
The Chocolate Glaze Finale
For the glaze, heat the cream and corn syrup in a small saucepan until just simmering. Pour over the chopped chocolate and let sit for one minute, then whisk until smooth. The corn syrup adds shine and prevents the chocolate from cracking when cut.
Cooking Techniques & Science

The science behind mint brownies is fascinating. Menthol, the compound responsible for mint’s cooling sensation, doesn’t actually lower temperature, it tricks your brain’s temperature receptors. When combined with chocolate’s warm, rich compounds, it creates a sensory contrast that intensifies both flavors.
This is why timing matters so much. Adding fresh mint to warm chocolate batter releases more essential oils than mixing it into cold batter. But too much heat destroys mint’s delicate compounds entirely.
The three layer construction serves a purpose beyond aesthetics. The dense brownie base provides richness, the mint layer adds brightness and textural contrast, and the chocolate glaze ties everything together while adding visual appeal.
Temperature control throughout the process is crucial. Room temperature eggs mix more easily and create better texture. Cold cream cheese won’t blend smoothly. And that gentle oven temperature prevents the edges from overcooking while the center reaches perfect doneness.
Professional bakers often use the “jiggle test” instead of relying solely on toothpicks. The center should still jiggle slightly when you shake the pan, residual heat will finish cooking the brownies as they cool.
Serving & Pairing Suggestions
Mint brownies deserve thoughtful presentation. Cut them with a sharp knife dipped in warm water between cuts, this prevents the chocolate glaze from cracking and creates clean edges.
Serve them at room temperature for the best texture contrast. Too cold and the mint layer becomes hard; too warm and everything gets messy.
For an elegant presentation, dust the tops with powdered sugar just before serving. The white powder against dark chocolate creates striking visual contrast.
These brownies pair beautifully with vanilla bean ice cream, the vanilla enhances both the mint and chocolate without competing. Coffee is another natural companion; the bitterness balances the sweetness while the warmth plays against mint’s coolness.
For dinner parties, consider serving smaller portions alongside fresh berries. The fruit’s acidity cuts through the richness while adding color to the plate.
Wine pairing might sound unusual, but a good port or late harvest dessert wine creates an sophisticated finish to upscale meals.
Advanced Variations and Professional Tips
Once you’ve mastered the basic technique, consider these professional variations. Chocolate mint leaves, if you can find them, create an even more integrated flavor profile. They’re available at specialty nurseries and some farmers markets and bring a fresh, nuanced taste to mint brownies.
For restaurant quality presentation, make individual brownies in silicone molds. This eliminates cutting and creates perfect portions every time, ideal for elegant entertaining or upscale catering events.
The mint layer can be flavored differently for seasonal variations. Add orange zest for winter, or fresh basil for an unexpected summer twist. Both herbs complement chocolate beautifully and create conversation starting desserts that elevate your mint brownies beyond the usual.
Professional bakers often make a double batch of brownies and freeze half unfrosted. Wrap tightly in plastic wrap, then foil. They’ll keep for three months and thaw to perfect texture overnight in the refrigerator.
For catering situations, these brownies actually improve after sitting overnight. The flavors meld and intensify, creating more complex taste profiles and a more satisfying bite in every slice.
Troubleshooting Common Issues
If your brownies turn out too cake like, you’ve likely overmixed the batter or used too much flour. Measure flour by spooning it into the cup and leveling, don’t scoop directly from the bag.
Cracked tops usually indicate too high oven temperature or overbaking. The surface sets too quickly, then cracks as the interior continues to rise.
If the mint layer separates or looks curdled, your cream cheese wasn’t fully softened, or you added the liquid too quickly. Start over with room temperature ingredients and add liquids gradually while beating constantly.
Chocolate glaze that looks dull or separated means the chocolate overheated. Next time, let the cream mixture cool slightly before pouring it over the chocolate.
Storage and Make Ahead Tips
These mint brownies actually benefit from overnight aging. The flavors meld and deepen, creating more complex taste profiles than fresh cut brownies. That cooling mint and rich chocolate settle into perfect harmony by day two.
Store covered at room temperature for up to four days. The mint layer stays fresh longer than you’d expect, the sugar acts as a natural preservative, maintaining both flavor and texture.
For longer storage, freeze mint brownies (unfrosted) wrapped tightly in plastic wrap, then foil. They’ll keep for up to three months. Thaw overnight in the refrigerator, then add the mint layer and glaze before serving to preserve the clean, layered look.
Professional kitchens often prepare the brownie base several days in advance, storing it wrapped and uncut. This practice not only improves texture but also makes final assembly more efficient during high demand service hours. Even in home kitchens, prepping parts of your mint brownies ahead can streamline the process and elevate the final result.
The Cultural Heritage of Mint and Chocolate
The combination of mint and chocolate has deep roots in confectionery history. Ancient civilizations used mint for both culinary and medicinal purposes, while chocolate was considered food of the gods by the Aztecs.
European confectioners first paired these flavors in the 18th century, creating mint chocolate bonbons for aristocratic tables. The combination’s popularity spread through colonial America, where mint grew wild and chocolate became more accessible.
Today’s mint brownies represent the democratization of these luxury flavors, transforming an expensive delicacy into an accessible home dessert that still maintains its sophisticated appeal. Beloved for their rich contrast and refreshing bite, mint brownies are now a timeless staple in both casual kitchens and fine bakeries.
Modern pastry chefs continue pushing boundaries with this classic combination, adding elements like sea salt, chili, or even lavender to create new interpretations of the traditional pairing, keeping this flavor duo fresh and exciting for every generation.
Final Thoughts on Mastering Mint Brownies
Mint brownies represent everything beautiful about baking. Simple ingredients transform through technique. Create something greater than the sum of their parts. The contrast between rich chocolate and bright mint creates sensory experiences. Linger long after the last bite.
Success with this recipe comes from understanding each component’s role. Respect the science behind the techniques. Don’t rush the chocolate melting. Don’t overmix the batter. Don’t skip the cooling time between layers.
Most importantly, taste as you go. Different mint varieties have varying intensities. Peppermint extracts differ dramatically between brands. Trust your palate over strict measurements. Mint intensity matters more than exact measurements.
These mint brownies reward patience and attention to detail. Results rival professional bakeries. Master this recipe. You’ll have a signature dessert that impresses every time. Whether it’s a casual family dinner or an elegant dinner party.
The beauty of mint brownies lies in their ability to surprise. That first bite delivers familiar chocolate comfort. Followed by mint’s unexpected brightness. Then the sophisticated interplay of textures and temperatures. Keeps people coming back for more.
Frequently Asked Questions about Mint Brownies
Q: Can I use dried mint instead of fresh mint leaves?
A: Fresh mint leaves provide better flavor integration and texture. Dried mint can work in a pinch, but use only half the amount and crush it between your fingers to release oils before adding to the batter. The flavor won’t be as bright or complex as fresh mint. If using dried mint, consider pairing it with a touch more peppermint extract to help boost the aroma. Still, nothing quite replicates the clean, vibrant burst that fresh mint brings to mint brownies.
Q: How do I prevent the mint layer from sliding off when I cut the brownies?
A: Make sure the brownie base is completely cool before adding the mint layer, and chill the assembled brownies for at least 30 minutes before adding the chocolate glaze. Use a sharp knife dipped in warm water, wiping clean between cuts. The layers will stay put if they’re properly set. Rushing the process can cause the glaze to slide or the mint layer to smudge. Patience here ensures those beautiful, clean layers that make mint brownies so visually irresistible.
Q: Can I make these brownies dairy free?
A: Yes, substitute the butter with coconut oil (solid, not melted) and replace the cream cheese in the mint layer with cashew cream or dairy free cream cheese. Use coconut cream instead of heavy cream in both the mint layer and chocolate glaze. The texture will be slightly different but still delicious. Chill the brownies well, as dairy free versions can soften faster at room temperature. A hint of vanilla or almond extract can also enhance the flavor in vegan mint brownies.
Q: Why do my brownies taste too minty/not minty enough?
A: Peppermint extract strength varies significantly between brands. Start with less than the recipe calls for and taste the batter before baking. You can always add more extract to the mint layer if needed. Fresh mint intensity also varies by season, summer mint is typically stronger than winter greenhouse varieties. When in doubt, balance with a touch of vanilla to soften sharp mint tones.
Q: How far in advance can I make these for entertaining?
A: The brownie base can be made up to 3 days ahead and stored covered at room temperature. Add the mint layer and glaze the day of serving for best appearance and texture. Fully assembled brownies actually taste better after sitting overnight, as the flavors meld together beautifully. For longer storage, refrigerate them in an airtight container and bring to room temperature before serving for the best flavor.

Swiftly Captions by Tina Smith — Quick, flavorful food recipes made simple, bringing fresh inspiration to your kitchen every day


