Can a cake feel like a cozy coffee hug? If you love rich espresso and soft chocolate mousse, you’re in for a treat. This Mocha Mousse Cake Recipe – So Easy, So Good! brings both flavors together in one smooth, dreamy bite.
I still remember the first time I made it. It was a rainy Sunday, and I wanted something warm and indulgent. Something quick. Something satisfying. I mixed my favorite coffee and chocolate, crossed my fingers and it worked. What came out? A creamy, mousse filled cake that won everyone over. And the best part? It’s easier than you’d think.
In this post, I’ll show you how to make this Mocha Mousse Cake Recipe in simple steps. No stress. No mess. Just rich flavor and light texture. I’ll even share my trick for keeping the mousse airy and the glaze perfectly shiny.
Whether you’re baking to impress or just treating yourself, this Mocha Mousse Cake Recipe is one you’ll save. One slice, and you’ll know it’s easy, it’s good, and it’s unforgettable.
Why This Mocha Mousse Cake Works Every Time
The secret lies in the technique. We build flavors in layers. Each component does its job perfectly. The cake base stays incredibly moist because we add hot coffee directly to the batter, sounds crazy, but trust me on this one.
The mousse gets its incredible texture from properly whipped cream folded with melted chocolate that’s cooled just right. Too hot and you’ll deflate everything. Too cool and it won’t incorporate smoothly.
I learned this recipe from my friend Maria, who ran a small café in my neighborhood. She made these cakes every Friday, and by noon they’d be gone. When she finally shared her method with me, I understood why people lined up for them.
Ingredients & Smart Swaps
For the Chocolate Cake Base:
- 1¾ cups all purpose flour
- 2 cups granulated sugar
- ¾ cup unsweetened cocoa powder
- 2 teaspoons baking soda
- 1 teaspoon baking powder
- 1 teaspoon salt
- 2 large eggs
- 1 cup buttermilk
- 1 cup strong hot coffee
- ½ cup vegetable oil
- 1 teaspoon vanilla extract
For the Mocha Mousse:
- 8 oz dark chocolate (70% cocoa), chopped
- 2 tablespoons instant espresso powder
- 3 tablespoons hot water
- 4 large egg yolks
- ⅓ cup granulated sugar
- 2 cups heavy cream
- 1 teaspoon vanilla extract
For the Ganache Topping:
- 6 oz dark chocolate, chopped
- ¾ cup heavy cream
- 2 tablespoons butter
- 1 tablespoon corn syrup (for that glossy finish)
Let’s Talk Substitutions
Can’t find buttermilk? Mix 1 cup milk with 1 tablespoon white vinegar. Let it sit for 5 minutes and you’re good to go.
No instant espresso? Regular instant coffee works fine, just use 3 tablespoons instead of 2. The flavor won’t be quite as intense, but it’ll still be delicious.
Worried about raw eggs in the mousse? Use pasteurized eggs, or heat the yolk mixture to 160°F while whisking constantly. Takes an extra step, but worth it for peace of mind.
For my dairy free friends, coconut cream whips beautifully for the mousse. Just chill the can overnight and use only the thick part on top.
Here’s something most people don’t know: cocoa powder quality makes a huge difference. Dutch processed gives you deep, rich color and mellow flavor. Natural cocoa is more acidic and lighter. Either works, but I prefer dutch processed here.
Step by Step Magic
Making the Cake Base
Start by preheating your oven to 350°F. Grease a 9-inch springform pan and line the bottom with parchment paper. This cake likes to stick, so don’t skip this step.
In a large bowl, whisk together all your dry ingredients. I mean really whisk, you want even distribution. No cocoa lumps hiding in corners.
In another bowl, beat the eggs lightly, then add buttermilk, hot coffee, oil, and vanilla. The hot coffee seems weird, but it blooms the cocoa and creates incredible moisture.
Pour the wet ingredients into the dry ingredients and stir until just combined. The batter will be thin, thinner than you expect. Don’t panic, this is exactly what we want.
Pour into your prepared pan and bake for 45-50 minutes. A toothpick should come out with just a few moist crumbs. This cake continues cooking from residual heat, so slightly underdone beats overdone.
Cool completely in the pan. I’m serious about this, rushing this step ruins your mousse layer.
Creating the Mocha Mousse
Melt your chocolate in a double boiler or microwave in 30-second intervals. Stir until smooth and let it cool to room temperature.
Dissolve the espresso powder in hot water. Set aside to cool.
In a medium bowl, whisk egg yolks with sugar until pale and thick. This takes about 3 minutes by hand, less with a mixer.
Slowly drizzle in the cooled chocolate, whisking constantly. Add the espresso mixture and vanilla. The mixture should be smooth and glossy.
Now for the tricky part, the cream. Whip it to soft peaks, not stiff. Soft peaks hold their shape but still have give. Overwhip and your mousse becomes grainy.
Fold one third of the whipped cream into the chocolate mixture to lighten it. Then gently fold in the remaining cream in two additions. Use a rubber spatula and cut down through center, along bottom, up the sides. Rotate the bowl as you go.
The mousse should be light and airy with no cream streaks visible.
Assembly Time
If your cake domed while baking, level it with a serrated knife. Place it back in the clean springform pan.
Pour the mousse over the cake and smooth the top with an offset spatula. The mousse should come almost to the top of the pan.
Refrigerate for at least 4 hours, but overnight is even better. This gives everything time to set properly.
The Ganache Finale
Heat the cream until it just begins to simmer. Don’t let it boil, you’ll ruin the texture.
Pour the hot cream over the chopped chocolate and let it sit for 2 minutes. Add the butter and corn syrup, then stir from the center outward until smooth and glossy.
Let the ganache cool for 10 minutes, it should coat the back of a spoon but still pour easily.
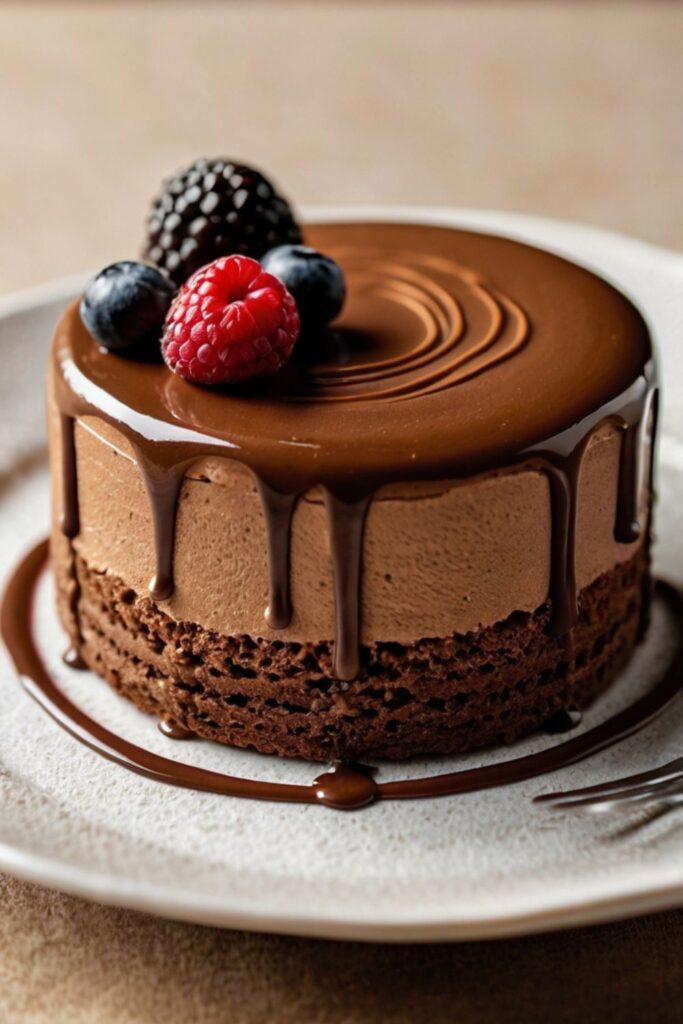
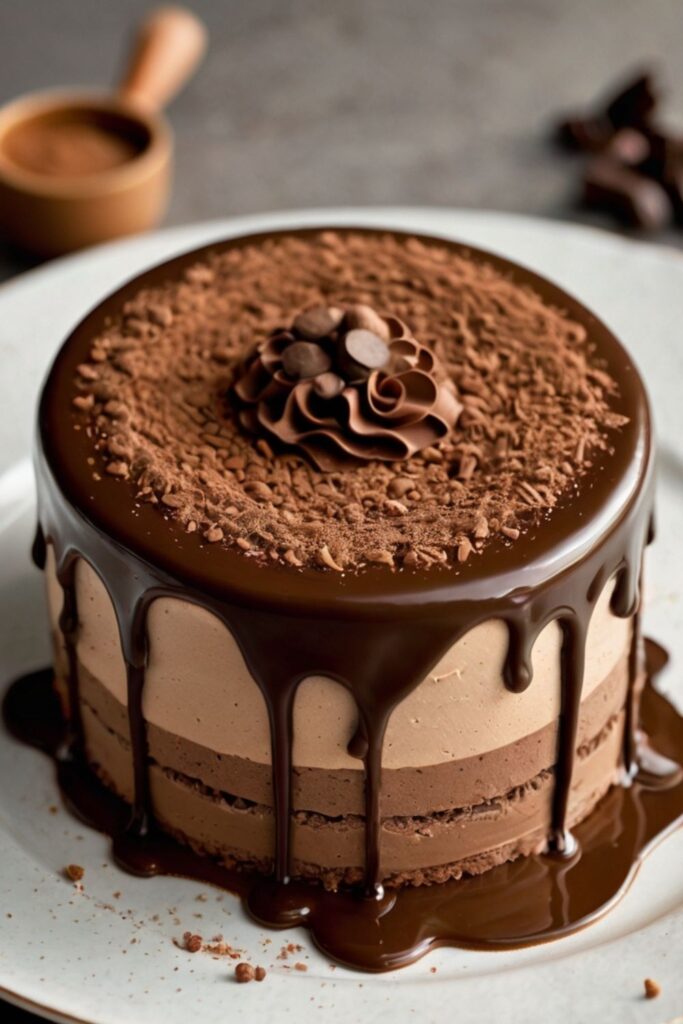
Remove the cake from the refrigerator and pour the ganache over the center. Use an offset spatula to encourage it to the edges, letting it drip down the sides naturally.
Refrigerate for another 30 minutes to set the ganache.
The Science Behind the Magic
What happens here is pretty fascinating. The hot coffee in cake batter serves multiple purposes. It blooms the cocoa, releasing more flavor compounds. It also creates steam during baking, which makes the crumb incredibly tender.
The mousse gets texture from a technique called pâte à bombe. Cooking egg yolks with sugar creates stability and richness. When you fold in whipped cream, you create thousands of tiny air bubbles suspended in chocolate mixture.
Temperature control is everything in this recipe. Too hot chocolate will deflate your whipped cream. Too cold chocolate won’t incorporate smoothly. Room temperature is your sweet spot.
The ganache uses perfect chocolate to cream ratio for glossy, pourable consistency. The corn syrup prevents chocolate from seizing and adds professional looking shine.
Here’s something most home cooks don’t realize: letting cake rest overnight isn’t just about setting. It’s about flavor development. Coffee and chocolate notes meld together, creating complexity you can’t achieve with immediate serving.
Tool Talk
A springform pan is non negotiable here. You need clean removal without disturbing those beautiful layers.
For the mousse, a balloon whisk works better than beaters. You have more control over the cream and less chance of overwhipping.
An offset spatula is your best friend for smooth ganache application. The angled blade lets you work without your hand getting in the way.
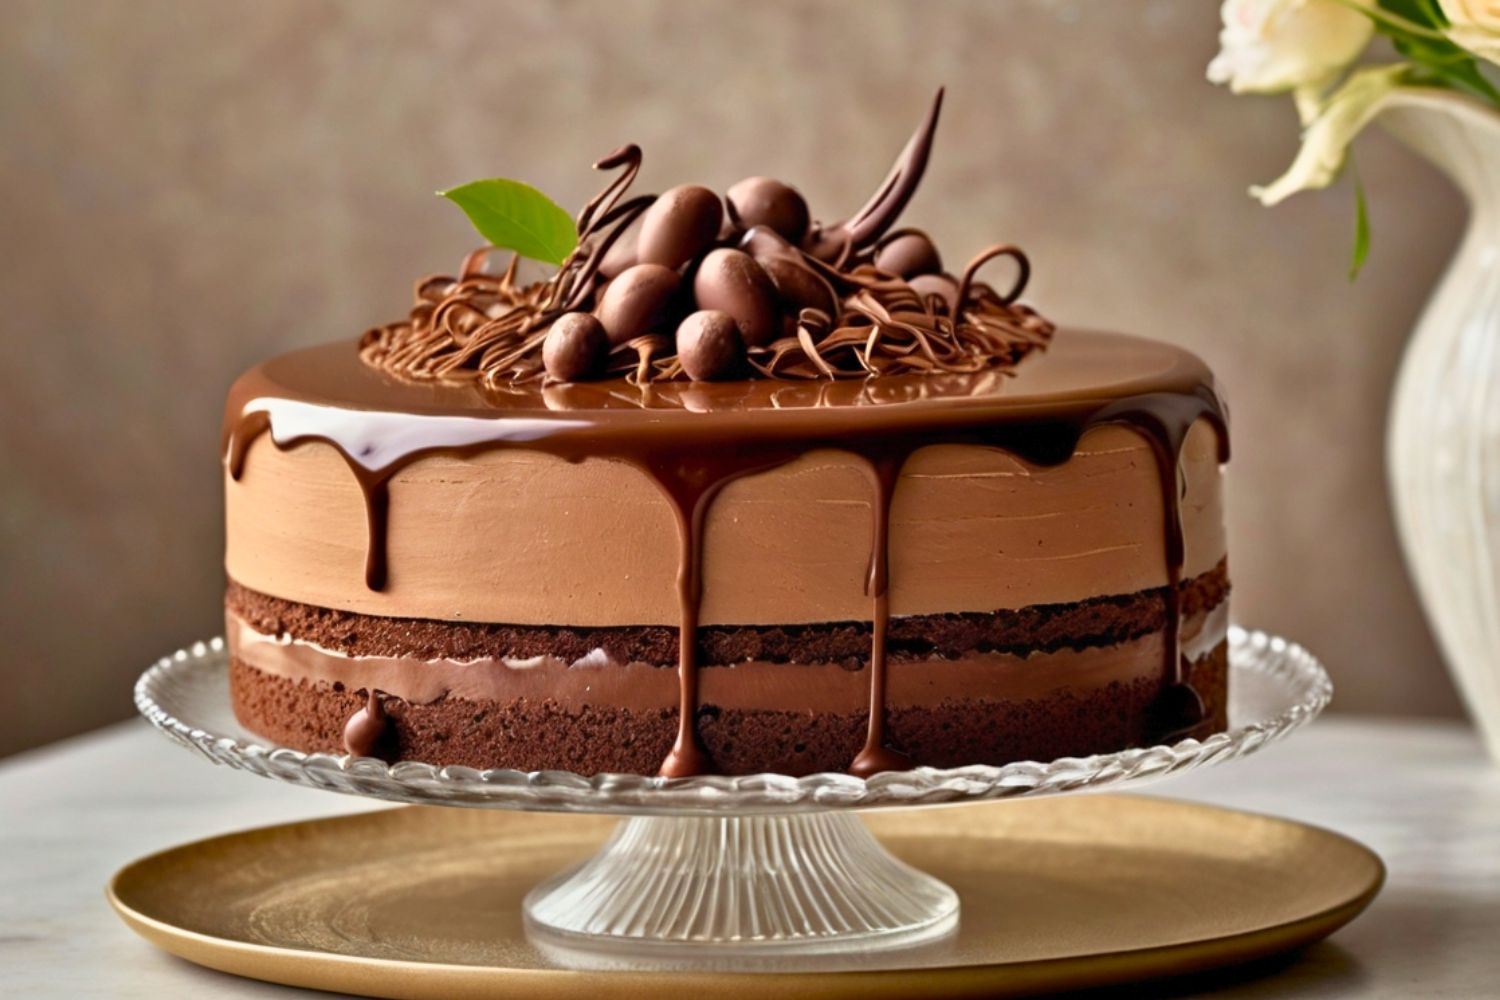
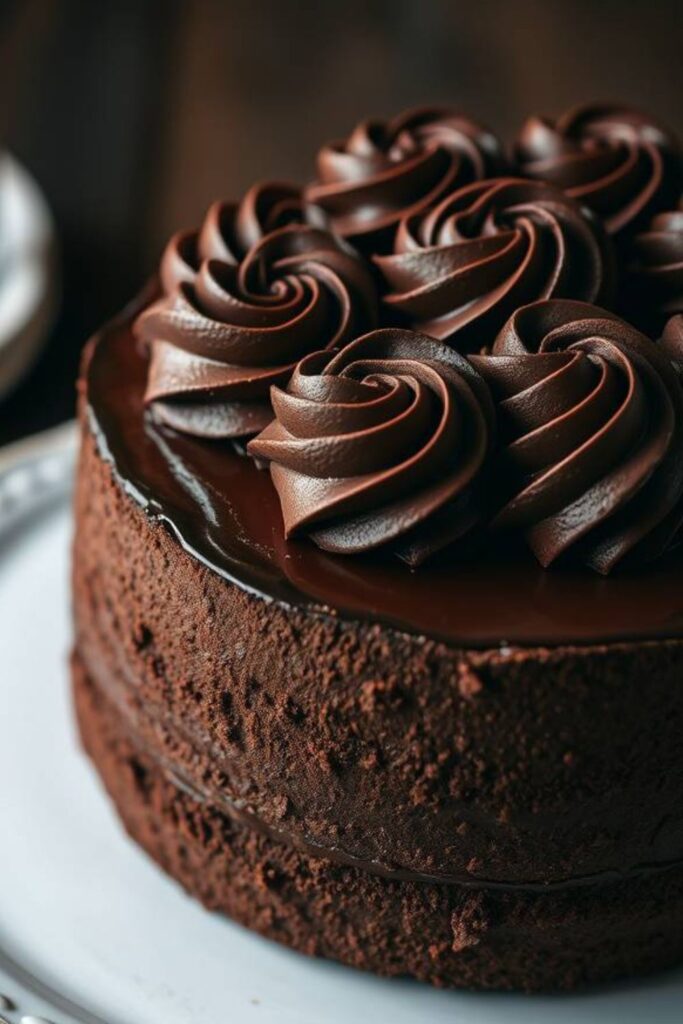
Making It Beautiful & Delicious
When you remove the springform ring, run a thin knife around edges first. This prevents any sticking that could mar your beautiful sides.
For clean slices, use a sharp knife dipped in warm water and wiped clean between cuts. This prevents dragging and keeps each piece pristine.
Want to get fancy? Dust the top lightly with cocoa powder or add a few chocolate curls. Fresh berries make a beautiful contrast to all that rich chocolate.
This cake pairs beautifully with bold red wine like Cabernet Sauvignon. The tannins complement chocolate while fruit notes balance coffee. For non drinkers, strong black coffee or espresso creates lovely flavor echo.
If you’re feeling adventurous, try adding a thin raspberry jam layer between cake and mousse. The tartness cuts through richness perfectly.
Storage & Make Ahead Tips
This cake actually improves with time. Make it 2-3 days ahead and store covered in refrigerator. The flavors develop and textures settle into perfection.
Individual slices freeze beautifully for up to 3 months. Wrap them tightly in plastic wrap, then foil. Thaw in refrigerator overnight.
You can make cake base up to a week ahead and freeze it. Just wrap it well and thaw completely before adding mousse.
Troubleshooting Common Issues
If your mousse seems too loose, you might have added chocolate while it was still too warm. Next time, let it cool completely before folding in cream.
Grainy mousse usually means overwhipped cream. Remember, soft peaks are your goal.
If ganache breaks (looks oily and separated), it’s usually a temperature issue. Try whisking in a tablespoon of warm cream to bring it back together.
Cake sinking in the middle? Your oven might be running hot, or you opened the door too early. Give it the full baking time without peeking.
Wrapping It Up
This mocha mousse cake recipe is gonna become your secret weapon for impressive desserts. It looks complicated but breaks down into simple, manageable steps that build on each other.
The beauty of this recipe lies in its balance. Rich but not overwhelming. Coffee forward but not bitter. Elegant but approachable. It’s the kind of dessert that makes people remember your dinner parties.
Don’t be afraid to make it your own once you’ve mastered the basics. A pinch of cinnamon in the cake. A splash of rum in the mousse. Salted caramel drizzled over the ganache. The foundation is solid enough to support your creativity.
Most importantly, have fun with it. Baking should bring joy, not stress. Take your time, trust the process, and enjoy every delicious bite of your creation.
Frequently Asked Questions
Can I make this cake without eggs in the mousse?
Absolutely! You can make an eggless version by using gelatin to set the mousse. Dissolve 1 packet of unflavored gelatin in 2 tablespoons of cold water, then warm it gently until dissolved. Fold it into the chocolate mixture before adding the whipped cream. The texture will be slightly different but still delicious.
My ganache turned out too thick. How do I fix it?
This usually happens if the cream wasn’t hot enough or if you used too much chocolate. Gently warm the mixture in a double boiler while whisking, or whisk in a tablespoon of warm cream at a time until you reach the right consistency. It should coat a spoon but still pour smoothly.
How far ahead can I make this cake?
This cake is actually better after sitting overnight! You can make it up to 3 days ahead. The flavors meld beautifully and the textures settle perfectly. Just keep it covered in the refrigerator and add any final garnishes right before serving.
Can I use milk chocolate instead of dark chocolate?
You can, but the flavor will be much sweeter and less intense. If you go this route, reduce the sugar in the mousse by half and consider adding an extra tablespoon of espresso powder to maintain that coffee balance. Dark chocolate really is best for this recipe though.
What if I don’t have a springform pan?
You can use a regular 9-inch cake pan, but removal will be trickier. Line it with parchment paper extending up the sides, creating a sling. This way you can lift the whole cake out once it’s set. Just be extra careful during removal, this cake is more delicate than a regular layer cake.

Swiftly Captions by Tina Smith — Quick, flavorful food recipes made simple, bringing fresh inspiration to your kitchen every day