Have you ever craved a fall dessert that’s creamy, rich, and easy to make? Let me tell you, No Bake Pumpkin Pie Delight changed how I do Thanksgiving. One year, my oven gave out, and I had to improvise. I whipped this up with pantry staples, and the result was pure magic. No baking. No stress. Just spiced pumpkin bliss on a crisp crust.
In this post, I’ll guide you step-by-step through making No Bake Pumpkin Pie Delight. You’ll learn how simple ingredients come together for a show-stopping dessert. No fancy tools. No complicated steps. Just a foolproof method anyone can follow.
Whether you’re short on time or avoiding the oven, this No Bake Pumpkin Pie Delight has you covered. It’s cool, creamy, and packed with warm fall flavors.
So grab your whisk, this No Bake Pumpkin Pie Delight might just become your favorite no-fuss dessert.
Ingredients & Smart Swaps
Here’s everything you’ll need, listed in the order you’ll actually use them (because who has time for alphabetical ingredient lists when you’re cooking?):
For the Crust:
- 1½ cups graham cracker crumbs
- ⅓ cup sugar (brown sugar adds lovely depth)
- ½ cup unsalted butter, melted
For the Filling:
- 1 can (15 oz) pure pumpkin puree (not pumpkin pie filling!)
- 1 cup cream cheese, softened
- 1 cup powdered sugar
- 1 teaspoon vanilla extract
- 1 teaspoon ground cinnamon
- ¼ teaspoon ground nutmeg (freshly grated is a game changer)
- 1 cup whipped cream
Now, let’s talk swaps because life doesn’t always cooperate with our ingredient lists.
Can’t find graham crackers? Crushed digestive biscuits work beautifully, or try crushed vanilla wafers for something different. Feeling adventurous? Oreo crumbs create this amazing chocolate pumpkin combination that’ll make people ask what your secret is.
Dairy issues? No problem at all. Lactose-free cream cheese works just as well, and coconut cream whips up into a fantastic substitute for regular whipped cream. Just chill that coconut cream overnight first, trust me on this one.
The spices are where you can really make this recipe your own. Love ginger? Toss in a pinch. Want more warmth? A tiny bit of cardamom works magic. That cinnamon measurement? Consider it a starting point, not a rule.
Here’s the thing about picking ingredients – always go for pure pumpkin puree over the pre-spiced filling. You want control over those flavors, and the filling’s usually way too sweet anyway. Fresh spices make a ridiculous difference too. That nutmeg? If you can grate it fresh, do it. Your kitchen will smell incredible. Your pie will taste like autumn itself.
Step-by-Step Magic: The Ultimate No Bake Pumpkin Pie Delight Guide
Now that you’ve got your ingredients ready, let’s walk through the steps to bring this no bake pumpkin pie to life — from building the perfect crust to whipping up the lightest, dreamiest filling
Step 1: Build That Perfect Crust
Start with your graham cracker crumbs and sugar in a bowl. If you’re using brown sugar, you’re already winning – that caramel undertone is gonna be gorgeous.
Pour in that melted butter and mix until everything looks like wet sand. Here’s the key: it should hold together when you squeeze it, but not be swimming in butter. Too dry? Add a little more butter, one tablespoon at a time.
Press this mixture into your 9-inch pie dish like you mean it. Don’t be gentle here – you want it firmly packed. Use the bottom of a measuring cup to get it even, and don’t forget to press it up the sides too. That crust is gonna support everything, so make it solid.
Step 2: Create the Filling Magic
This is where the real magic happens. Beat that softened cream cheese until it’s completely smooth. And I mean completely – any lumps now will haunt your pie later. This is your chance to channel some energy into that mixer and really go for it.
Gradually mix in the pumpkin puree. Don’t dump it all in at once or you’ll end up with orange splatters everywhere. Add the powdered sugar, vanilla, cinnamon, and that precious nutmeg. Taste as you go – this is your pie, after all.
Here’s where technique matters: fold in that whipped cream gently. You’re not trying to beat the air out of it. You want to keep all that fluffiness because that’s what gives your filling that cloud-like texture that melts on your tongue.
Step 3: Bring It All Together
Spoon that gorgeous filling into your crust, spreading it evenly with the back of your spoon. Don’t stress about making it perfectly smooth – a few gentle swirls actually look pretty rustic and inviting.
Cover with plastic wrap and here comes the hard part – waiting. You need at least four hours in the fridge, but overnight is even better. This isn’t just about setting; it’s about letting all those flavors get to know each other.
Many cooks rush the chilling time, but don’t. It’s tempting when your kitchen smells like pumpkin spice heaven, but patience pays off. An underchilled pie won’t slice cleanly and may lose its shape.
Another thing that can go sideways – if your cream cheese wasn’t soft enough, you’ll have lumps. Take it out of the fridge about an hour before you start, or give it a quick 10-second zap in the microwave if you’re in a hurry.
The Science Behind the Sizzle
Let’s get a little nerdy for a minute because understanding the why makes you a better cook.
That folding technique with the whipped cream? It’s all about preserving air bubbles. When you beat cream, you’re essentially trapping air inside tiny fat globules. Fold too aggressively, and you’ll deflate all that hard work. The result is a dense, heavy filling instead of that light, airy texture we’re after in a perfect no bake pumpkin pie.
The spices aren’t just flavor bombs – they’re actually working some chemistry magic too. Cinnamon contains compounds that enhance sweetness perception, which means you can use less sugar and still get that satisfying sweetness. Nutmeg has warming compounds that literally make your mouth feel cozy.
Chilling does more than just firm things up. It allows the proteins in the cream cheese to relax and meld with the other ingredients. The flavors literally marry during that time in the fridge, which is why day-old no bake pumpkin pie often tastes even better than fresh.
Speaking of tools, a good stand mixer makes the cream cheese step foolproof, but a hand mixer works fine too. Just give your arm a workout. And invest in a decent pie dish – the difference between a flimsy aluminum pan and a proper ceramic or glass dish is night and day when it comes to how your crust holds up.
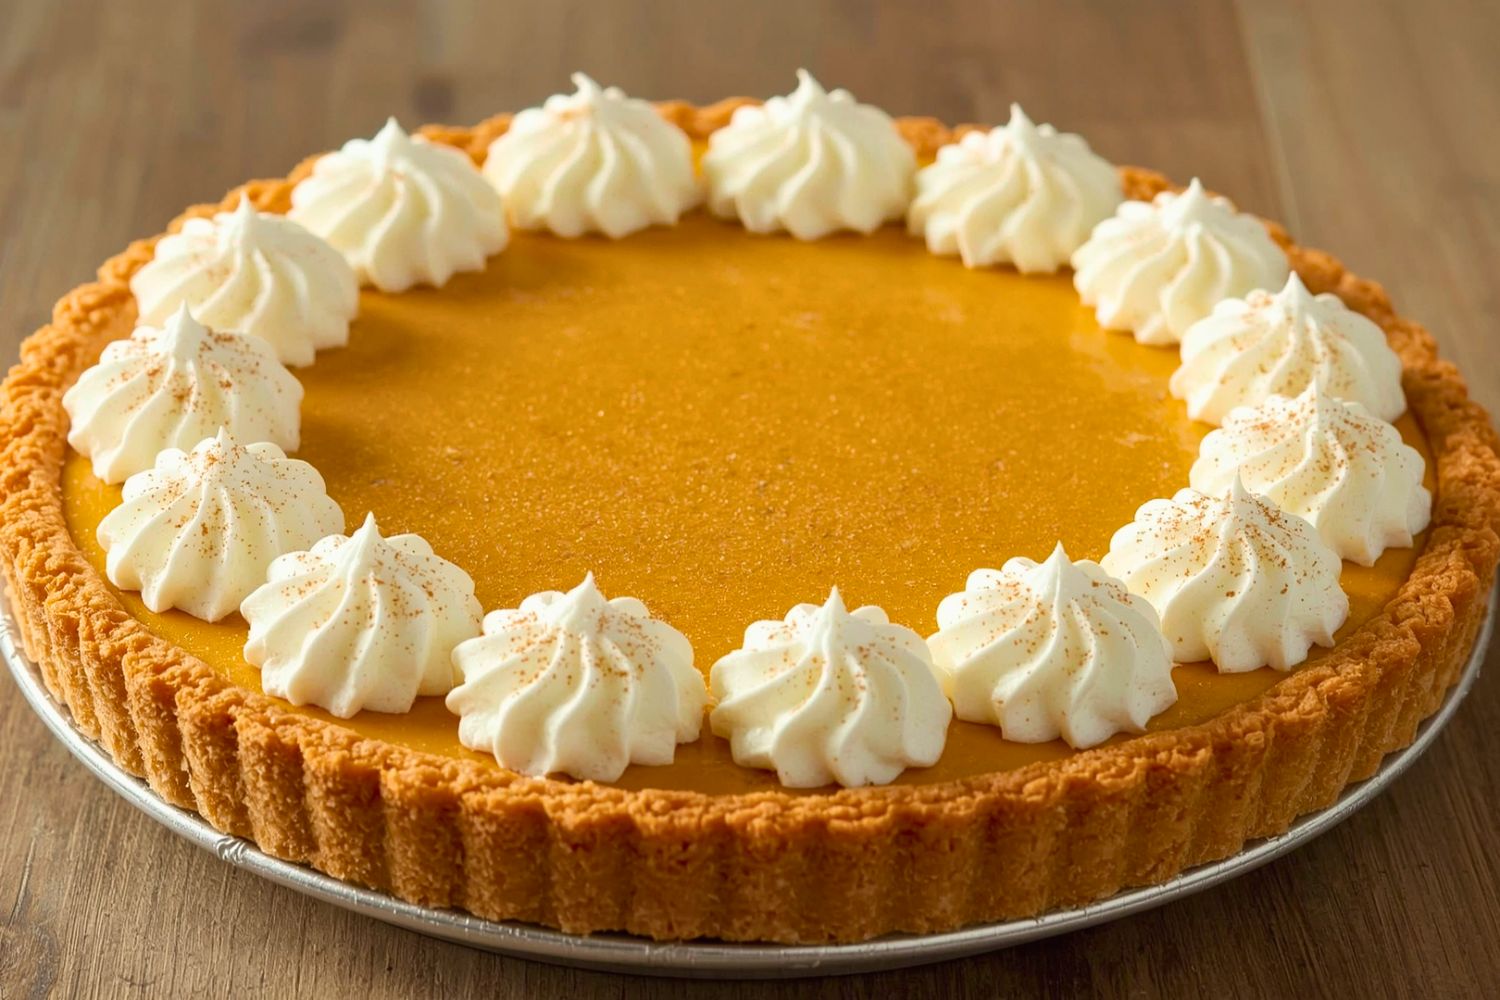
Making It Beautiful & Delicious
Presentation isn’t everything, but it sure doesn’t hurt when you’re serving something this delicious — especially a no bake pumpkin pie.
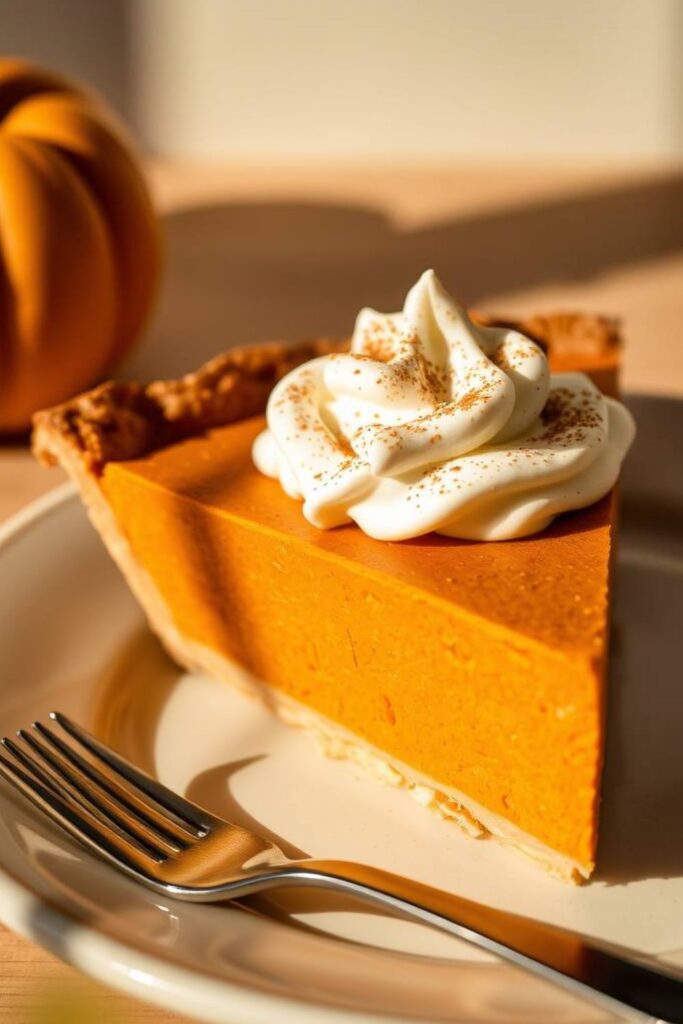
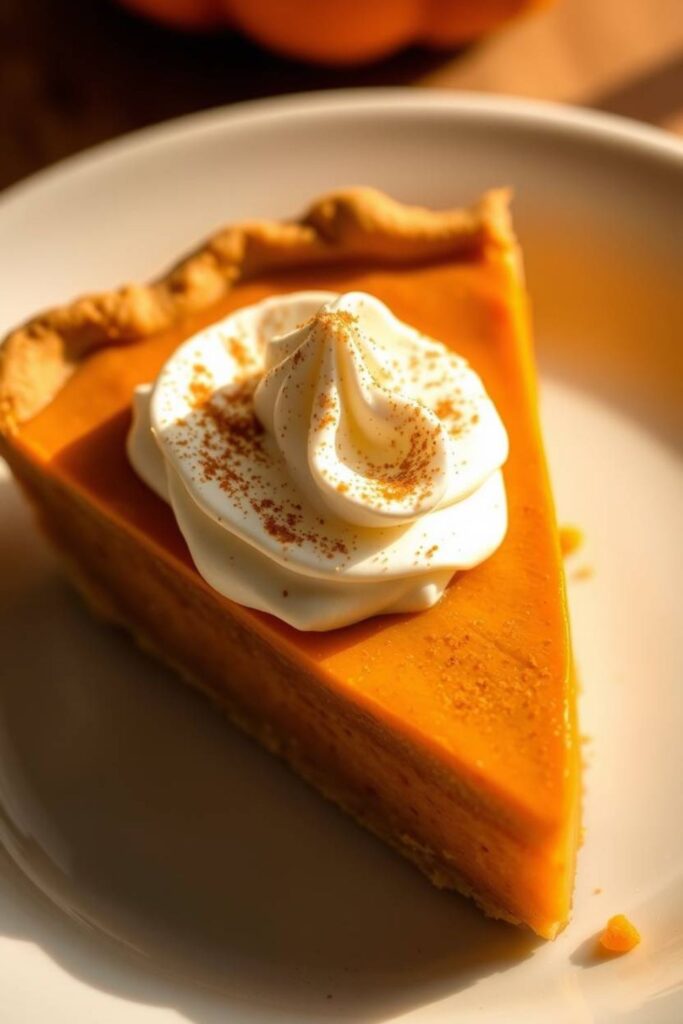
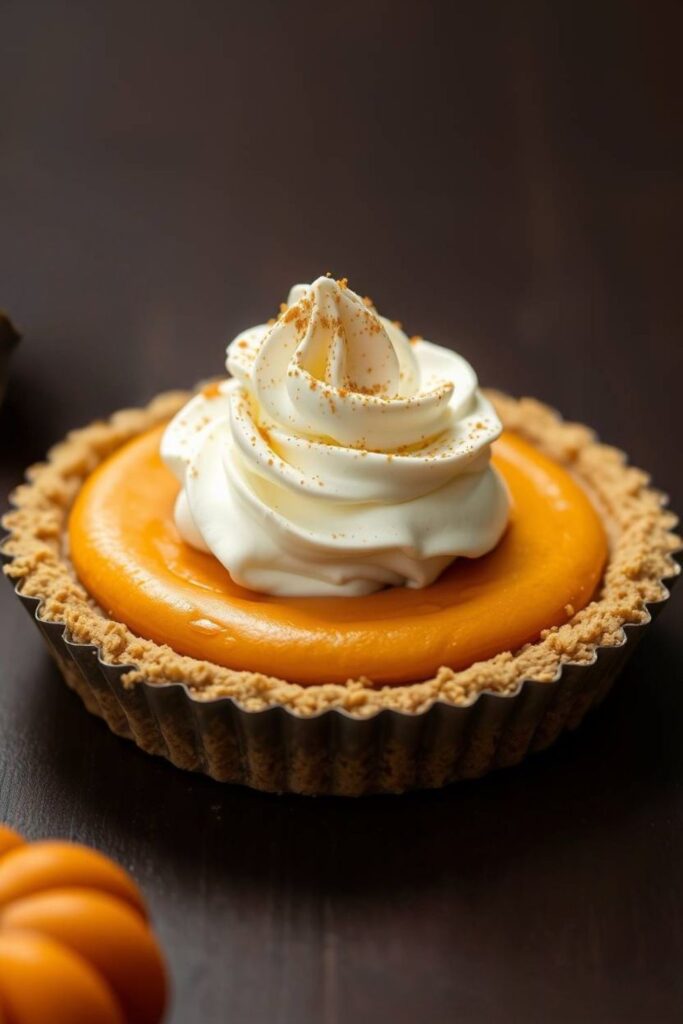
A simple dollop of whipped cream on each slice instantly makes it look bakery-worthy. Want to get fancy? Pipe some rosettes with a star tip. A light sprinkle of cinnamon or a few toasted pumpkin seeds adds texture and visual interest.
For serving, this no bake pumpkin pie plays beautifully with vanilla ice cream or a drizzle of caramel sauce. The temperature contrast between the cool pie and cold ice cream is absolutely divine. A warm spiced cider alongside makes the whole experience feel like fall in a bite.
If you’re feeling ambitious, a thin drizzle of melted chocolate over the top creates this gorgeous web pattern that looks way more complicated than it actually is.
Color-wise, that rich orange filling against the golden crust is already stunning. But a few candied pecans or a sprinkle of toasted coconut can add another layer of autumn vibes
Final Thoughts on the Perfect No Bake Pumpkin Pie
This No Bake Pumpkin Pie Delight isn’t just about skipping the oven – it’s about creating something special without the stress. Every bite delivers that perfect balance of creamy, spiced, and satisfying that makes pumpkin pie such a beloved classic.
The beauty of this recipe lies in its flexibility. Once you’ve mastered the basic technique, you can play around with different spice combinations, try alternative crusts, or even experiment with mix-ins like mini chocolate chips or chopped crystallized ginger.
Remember, confidence is your best ingredient. Don’t be afraid to taste and adjust as you go. Your palate knows what it likes, and cooking should be about creating something that makes you happy.
If things don’t go exactly as planned, don’t panic. Filling too thick? A splash of milk will loosen it up. Too thin? A bit more powdered sugar helps it set. The best cooks aren’t the ones who never make mistakes – they’re the ones who know how to fix them gracefully.
Most importantly, this pie is about creating moments. Whether you’re sharing it at a holiday table or enjoying a quiet slice with your morning coffee, it’s bound to bring a smile to your face and warmth to your heart.
Frequently Asked Questions
Can I Make No Bake Pumpkin Pie Ahead of Time?
Absolutely! This pie actually improves with time. You can make it up to three days ahead, and it’ll be perfectly set and even more flavorful. Just keep it covered in the fridge and add any garnishes right before serving.
What if I don’t have a pie dish?
No worries at all. A 9-inch springform pan works beautifully and makes serving easier. You can even use a deep-dish tart pan or divide the filling between individual ramekins for personal-sized portions.
Can I freeze this pie?
You can, but the texture changes a bit. The filling might separate slightly when thawed. If you do freeze it, let it thaw completely in the fridge and give it a gentle stir before serving. Fresh is definitely better with this one.
My filling turned out grainy – what went wrong?
This usually happens when the cream cheese isn’t soft enough or when the powdered sugar isn’t fully incorporated. Make sure your cream cheese sits at room temperature for at least an hour, and beat it really well before adding anything else.
Can I use homemade whipped cream instead of store-bought?
Of course! Homemade whipped cream actually works better because you can control the sweetness and thickness. Just don’t overbeat it – you want soft peaks, not butter. A tablespoon of powdered sugar and a splash of vanilla make it perfect for folding into the filling.

Swiftly Captions by Tina Smith — Quick, flavorful food recipes made simple, bringing fresh inspiration to your kitchen every day