Picture this: you walk into your kitchen after a long day, and instead of facing a sink full of dishes and hours of prep, you grab one pot and create something that tastes like it took all afternoon. That’s the magic of this One Pot Sticky Coconut Rice Chicken a dish that broke every rule I thought I knew about cooking rice and chicken together.
Three years ago, I was hosting my sister’s birthday dinner and completely miscalculated the timing. Twenty people were arriving in an hour, and I had nothing ready except panic. That’s when desperation met inspiration in my cluttered kitchen. I threw chicken thighs, jasmine rice, and whatever was left in my pantry into my biggest Dutch oven. What emerged wasn’t just dinner, it was a revelation that changed how I think about one pot cooking forever.
This isn’t your typical throw everything together meal. The rice absorbs every drop of coconut milk and chicken drippings, creating this incredibly creamy, almost risotto like texture that’ll make you question why you’ve been cooking these ingredients separately all this time. The chicken gets fall apart tender while developing these gorgeous caramelized bits that add depth to every single grain of rice.
Why This One Pot Sticky Coconut Rice Chicken Changes Everything
Here’s what makes this recipe different from every other one pot meal you’ve tried. Most recipes treat the pot like a convenient cooking vessel. This one treats it like a flavor laboratory where every ingredient transforms the others.
The coconut milk doesn’t just add richness, it becomes the cooking liquid that creates steam, prevents sticking, and turns ordinary jasmine rice into something that tastes like it came from a Thai restaurant. The chicken releases its natural juices as it cooks, and instead of losing those precious drippings, they get absorbed right back into the rice.
But here’s the real secret: we’re gonna brown everything first. I know, I know, it seems like extra work for a one pot meal. Trust me on this. Those golden brown bits on the bottom of your pot? That’s called fond, and it’s basically concentrated flavor that’ll make your rice taste like it’s been slow cooking all day.
The Cultural Magic Behind the Method
This technique actually borrows from several cooking traditions. The browning method comes from French cuisine, where building layers of flavor is everything. The coconut rice base draws inspiration from Southeast Asian cooking, where coconut milk and rice create some of the most comforting dishes on earth. And the one pot approach? That’s pure American practicality at its finest.
Essential Ingredients & Smart Kitchen Swaps
Your Shopping List (in the order you’ll actually use them):
For the chicken:
- 8 bone in, skin on chicken thighs (about 3 pounds)
- 2 tablespoons coconut oil or vegetable oil
- Salt and fresh cracked black pepper
For the rice base:
- 1 large yellow onion, diced
- 4 cloves garlic, minced
- 1 tablespoon fresh ginger, grated
- 2 cups jasmine rice (long grain works too)
- 1 can (14 oz) full fat coconut milk
- 2 cups low sodium chicken broth
- 2 tablespoons soy sauce
- 1 tablespoon fish sauce (game changer, don’t skip)
- 1 tablespoon brown sugar
For the finish:
- 3 green onions, sliced thin
- 1/4 cup fresh cilantro, chopped
- Lime wedges for serving
- Crushed red pepper flakes (optional)
Smart Swaps for Real Life
Can’t find jasmine rice? Basmati works beautifully, just reduce the liquid by about 1/4 cup since it absorbs less. Regular long grain rice is fine too, but you might need to add 10-15 minutes to the cooking time.
No fish sauce? Mix 1 tablespoon soy sauce with 1/2 teaspoon anchovy paste. Still no luck? Just use an extra tablespoon of soy sauce and accept that you’re missing some depth (but it’ll still be delicious).
Chicken thighs sold out? Drumsticks work great, just increase cooking time by 10 minutes. Chicken breasts will work in a pinch, but they’ll be drier and less flavorful than thighs.
Coconut milk skeptics, listen up: you can substitute half the coconut milk with heavy cream, but you’ll lose that subtle tropical sweetness that makes this dish special. Light coconut milk works too, but add an extra 2 tablespoons of butter for richness.
Ingredient Insider Secrets
Here’s what separates the good cooks from the great ones: choosing the right chicken thighs. Look for pieces that are roughly the same size so they cook evenly. The skin should look tight and pale yellow, not gray or slimy. And please, please don’t remove the skin, that’s where all the flavor and crispiness lives.
When buying coconut milk, shake the can. You should hear liquid moving around. If it’s completely solid, it’s been sitting too long or stored poorly. The good stuff will have a thick cream on top when you open it, that’s exactly what we want.
Fresh ginger makes a massive difference here. The pre minced stuff in jars is convenient, but it lacks the bright, spicy punch that fresh ginger brings. Use a spoon to scrape off the skin, way easier than a peeler and you waste less ginger.
Step by Step Magic
Step 1: Get That Golden Foundation
Preheat your oven to 350°F. Heat that coconut oil in your largest oven safe Dutch oven or heavy pot over medium high heat. While it’s heating, season those chicken thighs generously with salt and pepper, more than you think you need. The skin should glisten with seasoning.
Place the thighs skin side down in the hot oil. Don’t crowd them, work in batches if you need to. Here’s where patience pays off: let them sizzle undisturbed for 5-7 minutes. You’ll hear them crackling and see the edges turning golden brown. That’s the sound of flavor developing.
Flip the thighs and brown the other side for another 4-5 minutes. They won’t be fully cooked yet, that’s perfect. Remove them to a plate and don’t you dare clean that pot. All those brown bits stuck to the bottom? That’s liquid gold.
Step 2: Building the Flavor Base
Lower the heat to medium and add your diced onion to the same pot. The onions will start releasing moisture and scraping up those beautiful brown bits. Cook them for 3-4 minutes until they’re translucent and fragrant.
Add the minced garlic and grated ginger. Stir constantly for about 30 seconds, just until you can smell them. Any longer and they’ll burn and turn bitter.
Now comes the rice. Pour it right into the pot and stir it around for 2-3 minutes. You’re toasting the grains, which adds a nutty depth that regular steamed rice can’t match. The rice should look slightly golden and smell toasty.
Step 3: The Liquid Gold Moment
Open that can of coconut milk and give it a good stir, the thick cream and thin liquid should combine into something smooth and gorgeous. Pour it into the pot along with the chicken broth, soy sauce, fish sauce, and brown sugar.
Stir everything together and bring it to a gentle simmer. Taste it now, it should be well seasoned but not too salty, since it’ll concentrate as it cooks. Adjust with more soy sauce or a pinch of salt if needed.
Nestle those golden chicken thighs back into the pot, skin side up. The liquid should come about 3/4 of the way up the sides of the chicken. If it’s not enough, add a bit more broth.
Step 4: The Magic Hour
Cover the pot with a tight fitting lid and slide it into your preheated oven. Set a timer for 25 minutes and resist the urge to peek. I know it’s tempting, but every time you lift that lid, you’re letting out steam and heat.
After 25 minutes, check the rice by gently lifting some with a fork from the center of the pot. It should be tender but still have a slight bite. The liquid should be mostly absorbed, and the chicken should register 165°F on an instant read thermometer.
If the rice needs more time, cover and cook for another 5-10 minutes. If it looks dry but isn’t quite tender, add 1/4 cup more broth and continue cooking.
Step 5: The Final Flourish
Remove the pot from the oven and let it rest, covered, for 10 minutes. This resting time is crucial, it lets the rice finish absorbing any remaining liquid and allows the flavors to meld together.
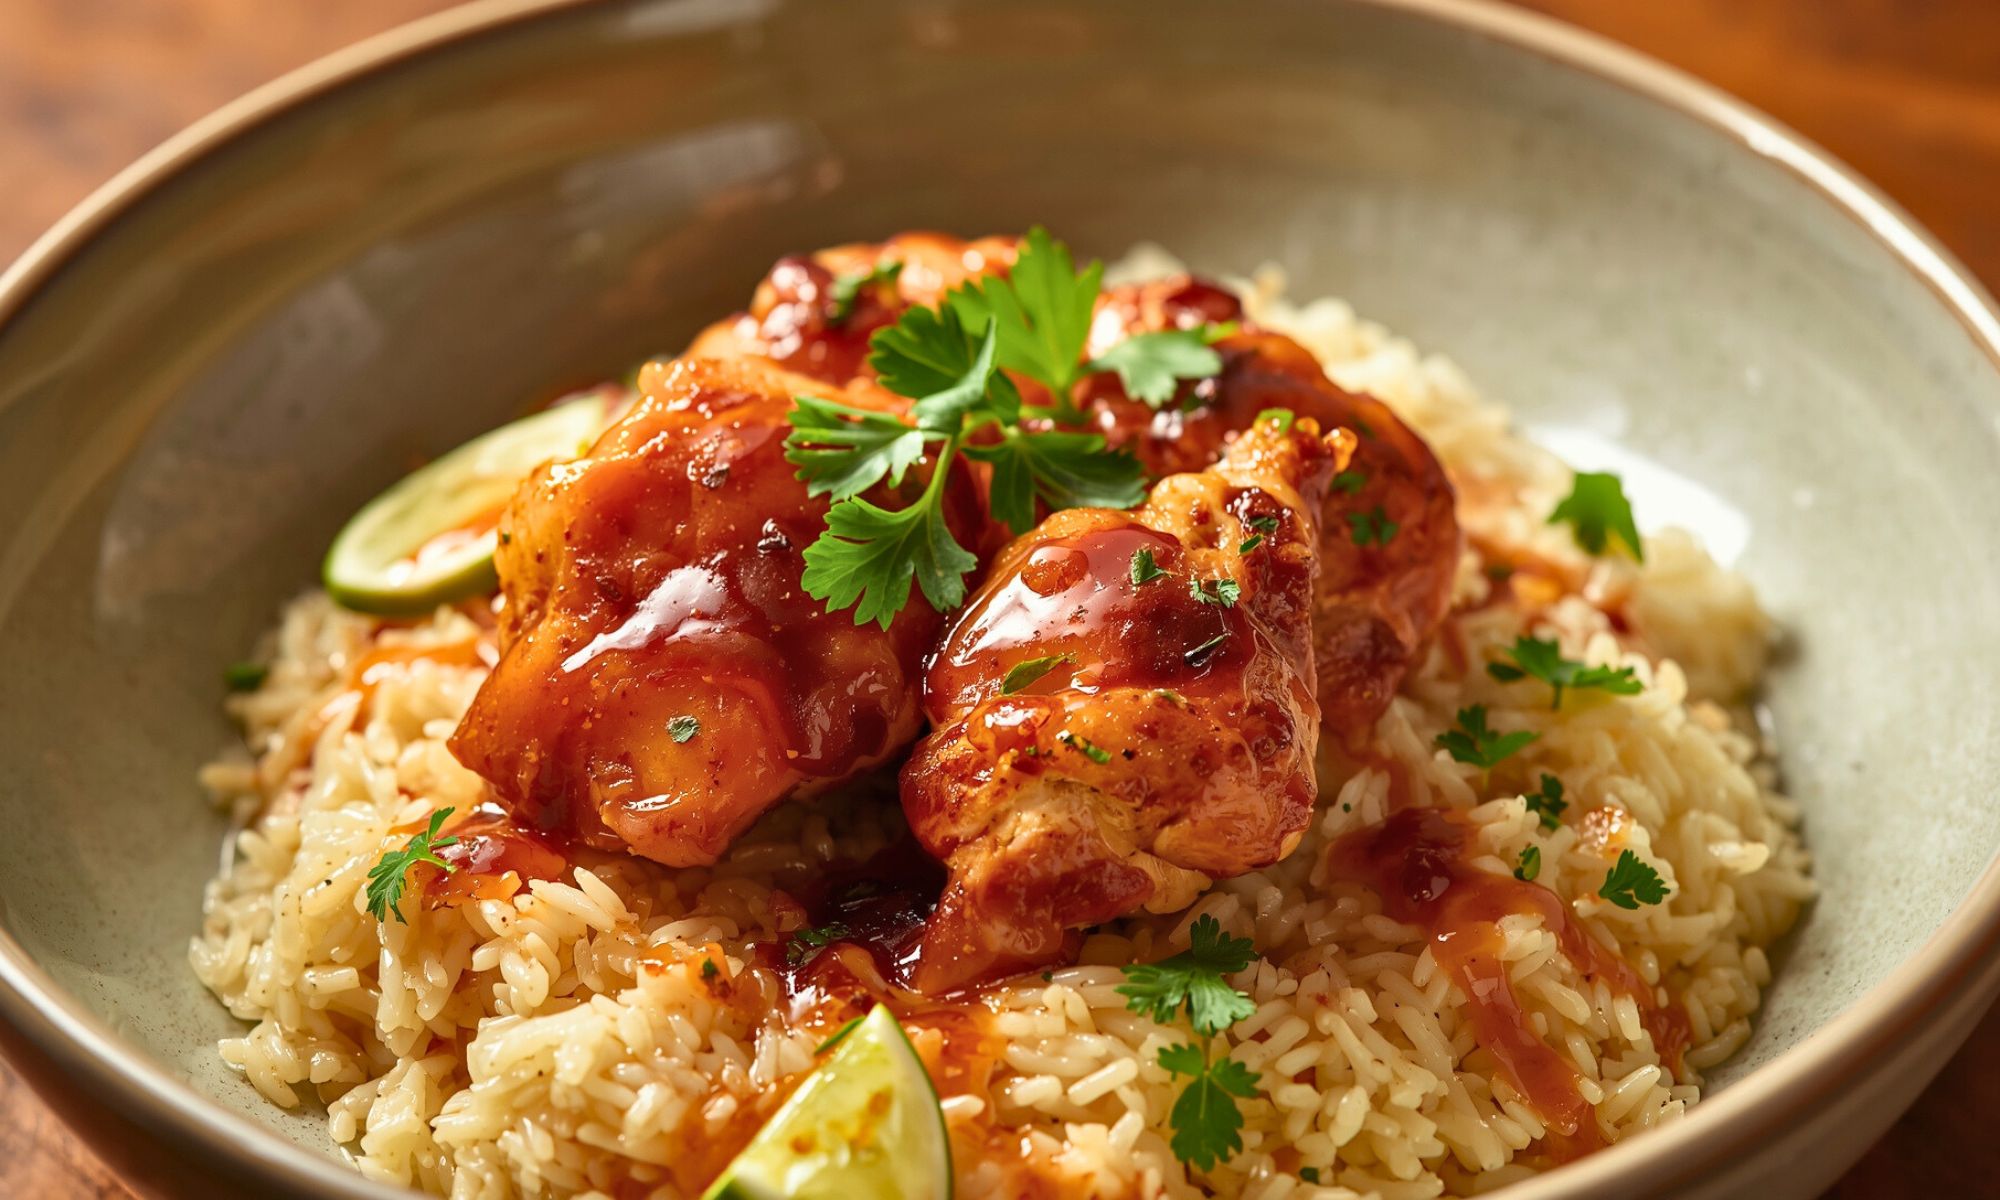
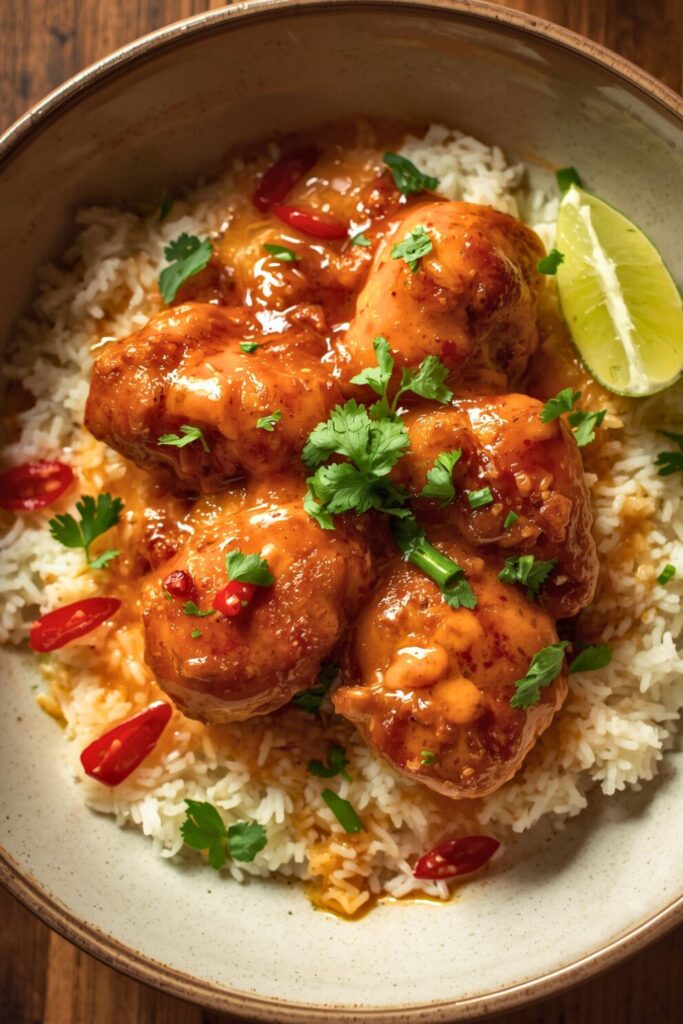
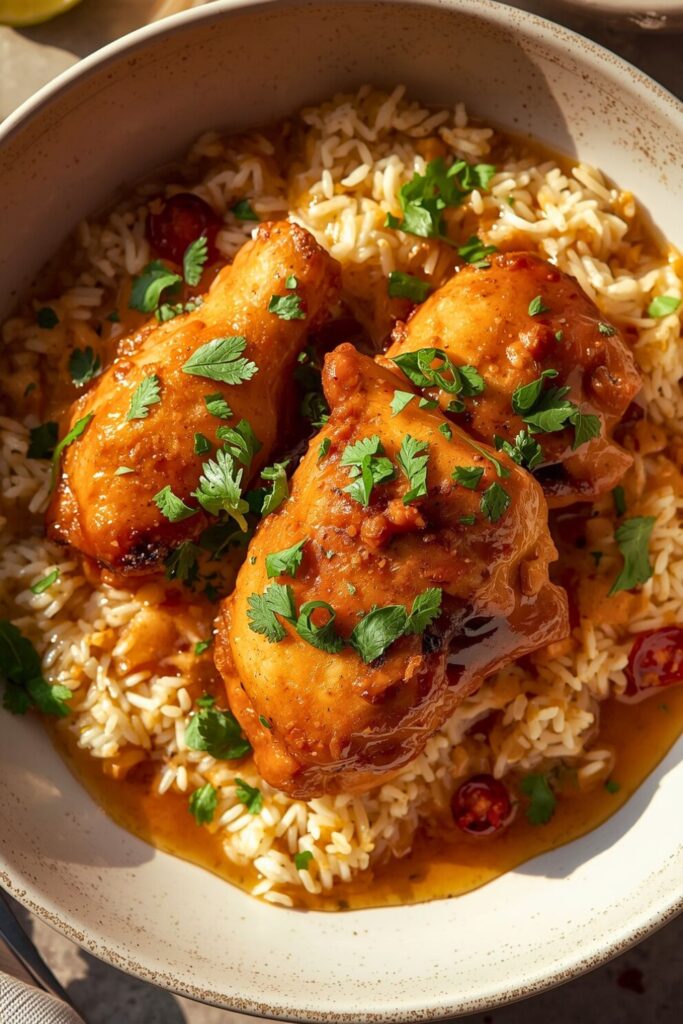
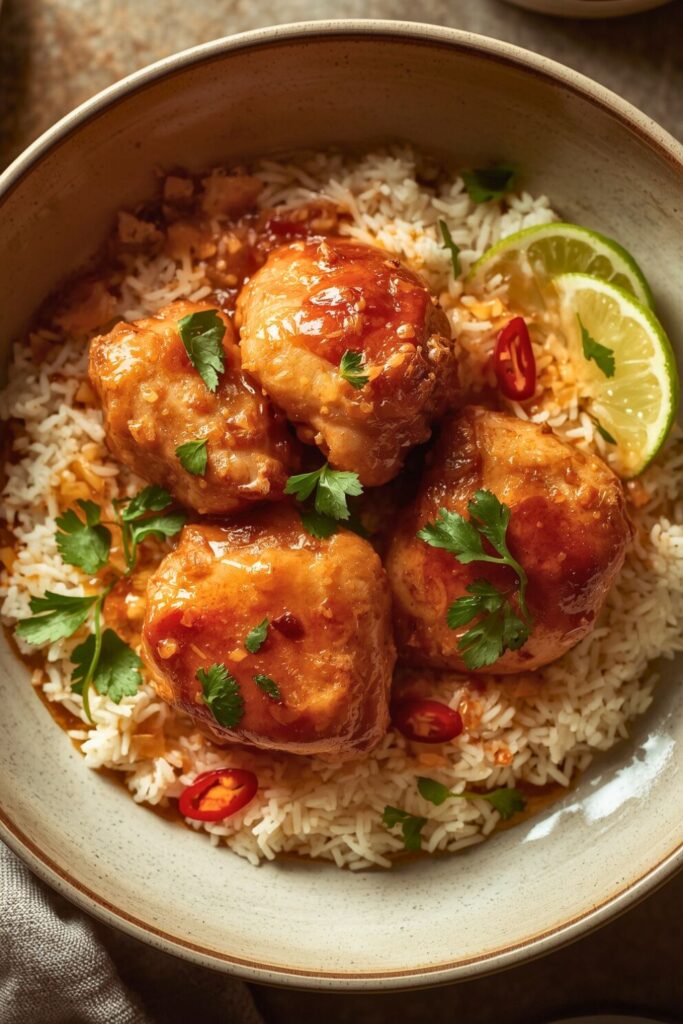
Sprinkle the sliced green onions and chopped cilantro over the top. Give everyone lime wedges and let them decide how much brightness they want to add. Some people go crazy with the lime, I’m one of them.
The Science Behind This Sticky Magic
Here’s why this method works so beautifully when other one pot rice dishes fall flat. Traditional rice cooking relies on a specific liquid to rice ratio and precise timing. But when you add chicken and vegetables to the mix, you’re introducing variables that throw off those calculations.
This recipe accounts for those variables by using the oven’s consistent, all around heat instead of stovetop cooking. The even temperature prevents hot spots that can burn the bottom while leaving the top undercooked. The coconut milk’s fat content also helps prevent sticking and adds richness that regular water or broth can’t match.
The fish sauce might seem like a small addition, but it contains glutamates, the same compounds that make parmesan cheese and mushrooms taste so savory and satisfying. It doesn’t make the dish taste fishy; it makes everything else taste more like itself.
Tool Talk That Actually Matters
Your pot choice makes a huge difference here. A heavy bottomed Dutch oven or enameled cast iron pot distributes heat evenly and retains it well. Thin bottomed pots will create hot spots and potentially burn your rice.
The lid needs to fit tightly. If yours is loose, place a sheet of aluminum foil over the pot before putting the lid on. This creates a better seal and keeps the steam where it belongs.
An instant read thermometer takes the guesswork out of chicken doneness. Thighs are forgiving, but there’s no point in risking it when a $15 thermometer gives you confidence.
Making It Restaurant Beautiful
This dish is naturally gorgeous, but a few simple tricks will make it Instagram worthy. First, let those chicken pieces rest skin side up, that crispy skin is the star of the show. Arrange them so each serving gets at least one piece with visible golden skin.
The herbs aren’t just flavor, they’re color. Scatter the green onions and cilantro unevenly for a natural, just picked look. A few lime wedges tucked around the edges add bright pops of green and yellow.
If you’re feeling fancy, add a sprinkle of toasted coconut flakes or crushed peanuts for texture contrast. A light dusting of paprika adds warmth and color to the rice.
Perfect Pairings
This rich, coconut heavy dish loves bright, acidic accompaniments. A simple cucumber salad with rice vinegar and chili flakes cuts through the richness perfectly. Steamed broccoli or snap peas add color and crunch without competing for attention.
For wine lovers, try a Riesling or Gewürztraminer, the slight sweetness complements the coconut while the acidity balances the richness. Beer drinkers should reach for a wheat beer or light lager. The bubbles cleanse the palate between bites.
Your One Pot Sticky Coconut Rice Chicken Success Story
This One Pot Sticky Coconut Rice Chicken proves comfort food doesn’t mean compromise. You get restaurant quality flavors with minimal cleanup, impressive presentation with simple techniques, and satisfied dinner guests with ingredients you can find at any grocery store.
The beauty of this One Pot Sticky Coconut Rice Chicken lies in its adaptability. Once you’ve mastered basic method, you can make it your own. Add vegetables in last 15 minutes of cooking. Swap herbs for whatever looks good at market. Adjust spice level to match your family’s preferences.
Most importantly, don’t stress about perfection. Even if rice is little too soft or chicken skin isn’t perfectly crispy, you’ll still have created something delicious and memorable. Some of my best cooking disasters turned into family favorites because they were made with love and shared with people who matter.
Next time you’re staring at your kitchen after long day, remember this One Pot Sticky Coconut Rice Chicken. One pot, minimal prep, maximum flavor, and enough leftovers for tomorrow’s lunch. That’s the kind of cooking magic that makes everyday meals feel special.
Frequently Asked Questions
Can I make this One Pot Sticky Coconut Rice Chicken ahead of time?
Absolutely, though the texture will be slightly different when reheated. Cook the dish completely, then store it covered in the refrigerator for up to 3 days. When reheating, add 2-3 tablespoons of coconut milk or chicken broth to restore moisture, then cover and warm in a 325°F oven for 20-25 minutes. The rice will be softer than the original, but the flavors actually develop and deepen overnight.
Why is my rice mushy even though I followed the recipe exactly?
This usually happens with older rice or if you’re at high altitude. Rice that’s been sitting in your pantry for over a year absorbs liquid differently than fresh rice. Try reducing the liquid by 1/4 cup next time. Also, make sure you’re not lifting the lid during cooking, each peek releases steam that the rice needs to cook properly.
Can I use boneless chicken thighs instead of bone in?
Yes, but you’ll need to adjust the cooking time and technique. Boneless thighs cook faster, reduce the oven time to 15-18 minutes and check for doneness earlier. You’ll also lose some flavor since bones add richness to the cooking liquid. Consider adding an extra 1/2 cup of chicken broth to compensate for the missing bone flavor.
What should I do if my rice is still crunchy but the liquid is gone?
This is an easy fix that happens sometimes with particularly dry rice or if your pot runs hot. Add 1/4 to 1/2 cup of warm chicken broth, stir gently, cover tightly, and return to the oven for another 10-15 minutes. The rice will finish cooking in the added moisture. Next time, check your rice at the 20 minute mark to catch this early.
How can I make this recipe dairy free and gluten free?
Good news, it already is! Just double check your soy sauce label, as some brands contain wheat. Use tamari or coconut aminos instead of regular soy sauce for guaranteed gluten free results. The fish sauce is naturally gluten free, and coconut milk is dairy free. This makes it perfect for friends with dietary restrictions without any special modifications needed.

Swiftly Captions by Tina Smith — Quick, flavorful food recipes made simple, bringing fresh inspiration to your kitchen every day


