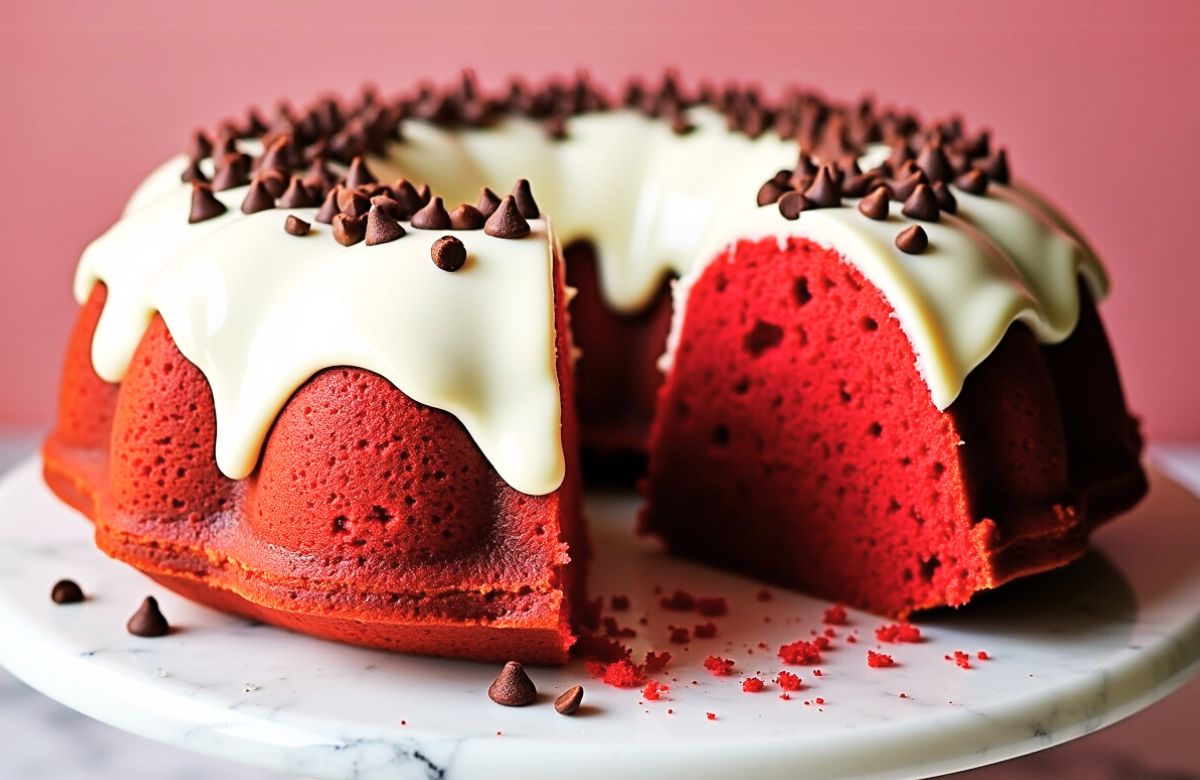
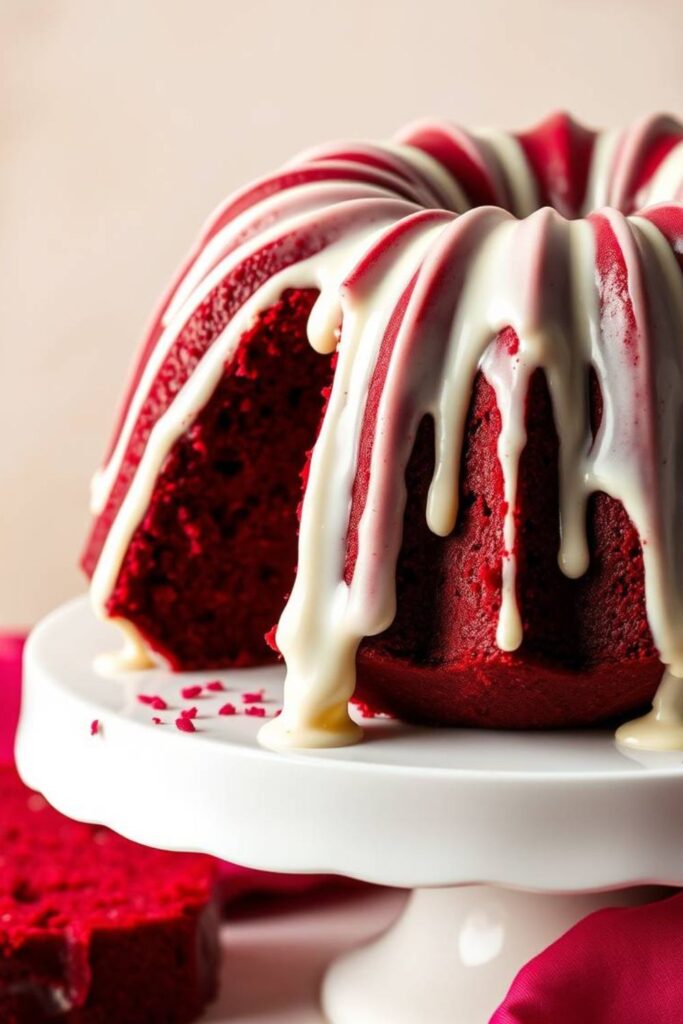
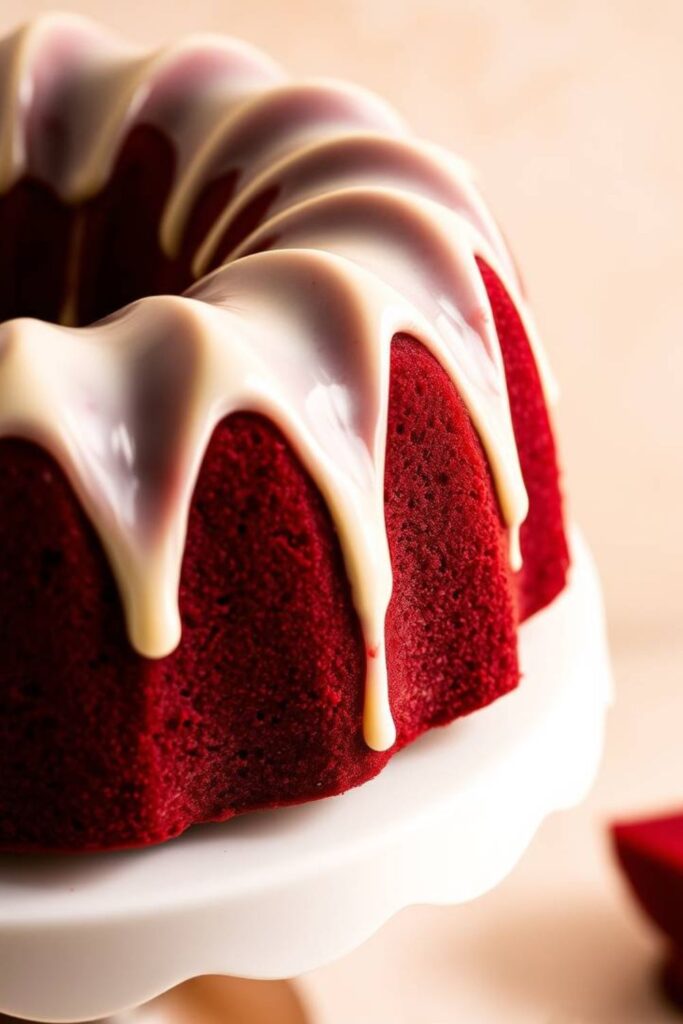
I still remember the first time I encountered a properly made red velvet bundt cake. It was at my grandmother’s kitchen table in Georgia, where the afternoon sun streamed through lace curtains and illuminated that crimson masterpiece like a jewel. The contrast between the deep ruby crumb and the snowy cream cheese glaze was nothing short of hypnotic. That’s when I understood this wasn’t just cake. It was an edible Southern heritage.
Red velvet holds a special place in American baking traditions. But here’s something not everyone realizes: a properly executed red velvet bundt cake achieves what few desserts can, a perfect balance of chocolatey undertones, buttermilk tanginess, and velvety texture, all while maintaining that signature crimson hue that makes hearts skip a beat. The bundt form elevates this classic even further, creating more surface area for that irresistible cream cheese glaze to cling to.
Ingredients & Substitutions
The secret to an exceptional red velvet bundt cake lies not just in following a recipe, but understanding why each ingredient matters. Let’s break down the components that create this iconic dessert.
Dry Ingredients
- 2½ cups all purpose flour (300g)
- 3 tablespoons natural cocoa powder (not Dutch processed)
- 1 teaspoon baking soda
- 1 teaspoon fine sea salt
All purpose flour provides the perfect structure for this cake. If you want a slightly more tender crumb, you could substitute up to ½ cup of cake flour. The cocoa powder is crucial it must be natural cocoa powder rather than Dutch processed. The natural acidity reacts with the baking soda and vinegar, creating the chemical reaction that gives red velvet its rise and distinctive flavor profile. Dutch processed cocoa is alkalized and won’t produce the same reaction, leaving your cake dense and less vibrant.
Wet Ingredients
- 1 cup unsalted butter, softened (226g)
- 2 cups granulated sugar (400g)
- 4 large eggs, room temperature
- 1 cup buttermilk, room temperature (240ml)
- 2 tablespoons liquid red food coloring (or 1-2 tablespoons gel coloring)
- 2 teaspoons vanilla extract
- 1 tablespoon white vinegar
- ½ cup sour cream (120g)
Buttermilk isn’t just traditional, it’s transformative. Its acidity tenderizes gluten proteins while adding that subtle tang that’s inseparable from authentic red velvet. No buttermilk on hand? Mix 1 cup whole milk with 1 tablespoon lemon juice or white vinegar and let stand for 5 minutes. However, real buttermilk produces superior results due to its unique cultures and flavor compounds.
The sour cream might seem unusual, but this is my professional secret for keeping bundt cakes supremely moist. The extra fat and acidity creates an insurance policy against the dreaded dry bundt. You could substitute full fat Greek yogurt, but you’ll sacrifice some of that silky mouthfeel.
Food coloring is obviously essential for that signature hue. Professional bakers often prefer gel food coloring for its concentrated potency and because it doesn’t add additional liquid to the batter. If using standard liquid food coloring, don’t exceed the recommended amount as too much can impart a bitter taste.
Cream Cheese Glaze
- 8 oz cream cheese, softened (226g)
- 2 cups powdered sugar, sifted (240g)
- 3-4 tablespoons heavy cream or milk
- 1 teaspoon vanilla extract
- Pinch of salt
For a truly luxurious glaze, European style cream cheese (like Président or Galbani) provides a higher fat content and creamier texture. However, standard Philadelphia cream cheese works beautifully too. Just ensure its properly softened cold cream cheese will leave unsightly lumps in your glaze.
Step by Step Instructions
Creating the perfect red velvet bundt requires precision and attention to detail. Let me walk you through the process with insights gained from years of professional baking experience.
Preparing the Pan
Bundt pans are notorious for their sticking tendencies, which can devastate even the most delicious cake. Here’s my foolproof method:
- Use a pastry brush to thoroughly coat every nook and cranny of your bundt pan with melted shortening (not butter, which can cause sticking due to its water content).
- Dust the greased pan with a mixture of flour and a touch of cocoa powder (this prevents white residue on your red cake).
- Tap out excess, ensuring a thin, even coating.
This method hasn’t failed me in 15 years of professional baking. A common mistake is using cooking spray, which doesn’t provide consistent coverage for intricate bundt designs.
Creating the Batter
- Preheat your oven to 325°F (165°C). Lower temperatures bake bundt cakes more evenly, preventing the dreaded “volcano” effect where the outside burns while the inside remains raw.
- Whisk the flour, cocoa powder, baking soda, and salt in a medium bowl. Sifting isn’t strictly necessary, but I recommend it for cocoa powder, which tends to clump.
- In the bowl of a stand mixer fitted with the paddle attachment, cream the butter and sugar until lightened in color and fluffy, about 4-5 minutes. Most home bakers undermix at this stage the extended creaming incorporates air pockets that are crucial for the cake’s texture.
- Add eggs one at a time, incorporating completely after each addition. Stop and scrape down the bowl frequently this ensures even distribution of fat and prevents dense streaks in your finished cake.
- Combine buttermilk, food coloring, and vanilla in a measuring cup.
- Add the dry ingredients to the butter mixture in three additions, alternating with the buttermilk mixture, beginning and ending with the dry ingredients. Mix only until just combined after each addition. Overmixing activates gluten, leading to a tough, bready texture instead of that signature velvet crumb.
- In a small bowl, combine the vinegar and sour cream, then fold into the batter using a rubber spatula. The chemical reaction begins immediately, you might even notice the batter lighten slightly in color and texture.
- Transfer the batter to the prepared bundt pan, filling no more than ¾ full. Tap the pan firmly on the counter several times to release air bubbles.
Baking
Bake for 50-60 minutes, until a wooden skewer inserted into the center comes out with a few moist crumbs (not wet batter). Resist the urge to open the oven during the first 40 minutes of baking—the change in temperature can cause your cake to collapse.
One common mistake? Overbaking. Red velvet is particularly susceptible to drying out. When testing for doneness, remember that carryover heat will continue cooking the cake after removal from the oven, so a few moist crumbs are ideal.
Cooling & Releasing
This is crucial: Cool the cake in the pan on a wire rack for exactly 15 minutes no more, no less. This timing allows the cake to set enough to hold its structure but not so long that it adheres to the pan. Run a thin offset spatula around any exposed edges, then invert onto a cooling rack.
If the cake doesn’t release immediately, don’t panic. Place a hot, damp kitchen towel over the pan for a minute the steam often helps release the cake. Never force a stuck cake; patience is your ally here.
Allow the cake to cool completely before glazing at least 2 hours, preferably 3. Rushing this step will result in a runny, messy glaze that doesn’t set properly.
Glazing
- Beat the softened cream cheese until completely smooth. Any lumps now will be impossible to remove later.
- Gradually add sifted powdered sugar, mixing on low speed until incorporated.
- Add vanilla, salt, and enough cream to achieve a thick but pourable consistency—picture warm honey.
- Pour glaze over the completely cooled cake, allowing it to dramatically cascade down the sides. For the most professional finish, place your cake on a cooling rack set over a baking sheet to catch excess glaze.
For a variation with visual impact, reserve about ¼ cup of glaze and tint it red. Drizzle this over the white glaze for a stunning contrast that hints at the cake within.
Cooking Techniques & Science
The magic of red velvet lies in its unique chemistry. Originally, the reddish hue came naturally from the reaction between acidic ingredients (buttermilk, vinegar) and natural cocoa powder. Today, we amplify this effect with food coloring, but that underlying reaction remains crucial for the cake’s texture and subtle flavor profile.
When vinegar meets baking soda, they create carbon dioxide bubbles that expand during baking, yielding that tender crumb that gives red velvet its name. The buttermilk further tenderizes the gluten strands in the flour, preventing toughness while adding tanginess.
The bundt pan’s design increases the cake’s surface area, allowing moisture to evaporate more evenly during baking. This creates the signature dense yet tender texture that distinguishes great bundts from ordinary cakes. The central tube also conducts heat into the middle of the batter, ensuring even baking without the gummy center that can plague layer cakes.
Temperature control is essential. Starting with room temperature ingredients ensures proper emulsification cold eggs or buttermilk can cause the batter to break, resulting in an uneven crumb structure. Similarly, proper creaming incorporates air bubbles that expand during baking, creating lightness within the cake’s substantial structure.
Why the modest amount of cocoa? Red velvet isn’t meant to be a chocolate cake it occupies its own distinct category. The cocoa provides subtle background notes that complement the buttermilk tang without overwhelming it. More cocoa would darken the vibrant red color and push the flavor profile into chocolate cake territory.
Serving & Pairing Suggestions
A red velvet bundt cake makes a dramatic centerpiece for any table, requiring minimal additional garnish. However, if you’re looking to elevate your presentation further, consider these professional touches:
Fresh berries, particularly raspberries or strawberries scattered around the base of the cake provide both color contrast and a complementary flavor note. For special occasions, dust the berries with a little edible gold luster dust for a truly luxurious presentation.
Serve individual slices with a quenelle of lightly sweetened whipped cream, stabilized with a touch of mascarpone for longevity. The additional creaminess echoes the cream cheese glaze while providing textural contrast.
For beverage pairings, red velvet’s complex flavor profile works beautifully with:
- Coffee particularly medium roasts with notes of nuts or caramel
- Champagne or Prosecco, whose acidity cuts through the richness
- Port wine, whose fruit forward sweetness harmonizes with the cake’s subtle chocolate undertones
- Milk, for a nostalgic, comforting combination
For a composed dessert plate, consider serving a slim wedge alongside a small scoop of cream cheese ice cream and a drizzle of warm ganache made from white chocolate. The temperature and textural contrasts create a memorable sensory experience.
Conclusion
Red velvet bundt cake represents Southern baking tradition at its finest elegant yet approachable, visually stunning yet deeply comforting. The bundt format transforms this classic into something even more special, creating the perfect ratio of tender crumb to cream cheese glaze in every bite.
The secrets to mastery lie in understanding the chemistry behind the ingredients, respecting the mixing method that produces that signature texture, and exercising patience during cooling and glazing. When executed correctly, few desserts can match its combination of visual drama and comforting familiarity.
Whether served at a holiday gathering, offered as a hostess gift, or simply enjoyed with afternoon coffee, a properly made red velvet bundt cake makes any occasion feel special. Its staying power in American baking traditions isn’t just about nostalgia or visual appeal it’s about delivering a uniquely satisfying eating experience that can’t be replicated by any other dessert.
FAQs
Why did my red velvet cake turn out brown instead of red?
The most common culprit is using Dutch processed cocoa powder instead of natural cocoa powder. Dutch processed cocoa is alkalized, neutralizing the acidity needed for the red reaction. Also, insufficient food coloring or baking at too high a temperature can cause browning that overwhelms the red hue.
Can I make this red velvet bundt cake without food coloring?
Absolutely! For a natural alternative, try 2-3 tablespoons of beet powder. The color won’t be as vibrant, but you’ll achieve a lovely reddish brown hue with no artificial ingredients. Some historical recipes used pureed beets, which adds moisture but changes the texture substantially.
Why did my bundt cake stick to the pan despite greasing it?
Several factors could be at play: insufficient greasing (especially in ornate pans), cooling too long in the pan, or using a pan with scratched non stick coating. Always use a pastry brush to apply melted shortening to every crevice, and remove the cake after exactly 15 minutes of cooling.
How far in advance can I make this cake?
The unglazed cake can be wrapped in plastic wrap and kept at room temperature for up to 2 days, or frozen for up to 3 months. For best results, glaze the day of serving, though a glazed cake will keep refrigerated for up to 3 days. Always bring refrigerated cake to room temperature before serving for optimal flavor and texture.
Why does my cream cheese glaze always run off completely?
Either your glaze is too thin or your cake hasn’t cooled completely. Ensure your cream cheese is just softened, not warm, and add powdered sugar before any liquid. Add cream slowly, a tablespoon at a time, until you reach a thick but pourable consistency. And never ever glaze a warm cake!

Swiftly Captions by Tina Smith — Quick, flavorful food recipes made simple, bringing fresh inspiration to your kitchen every day