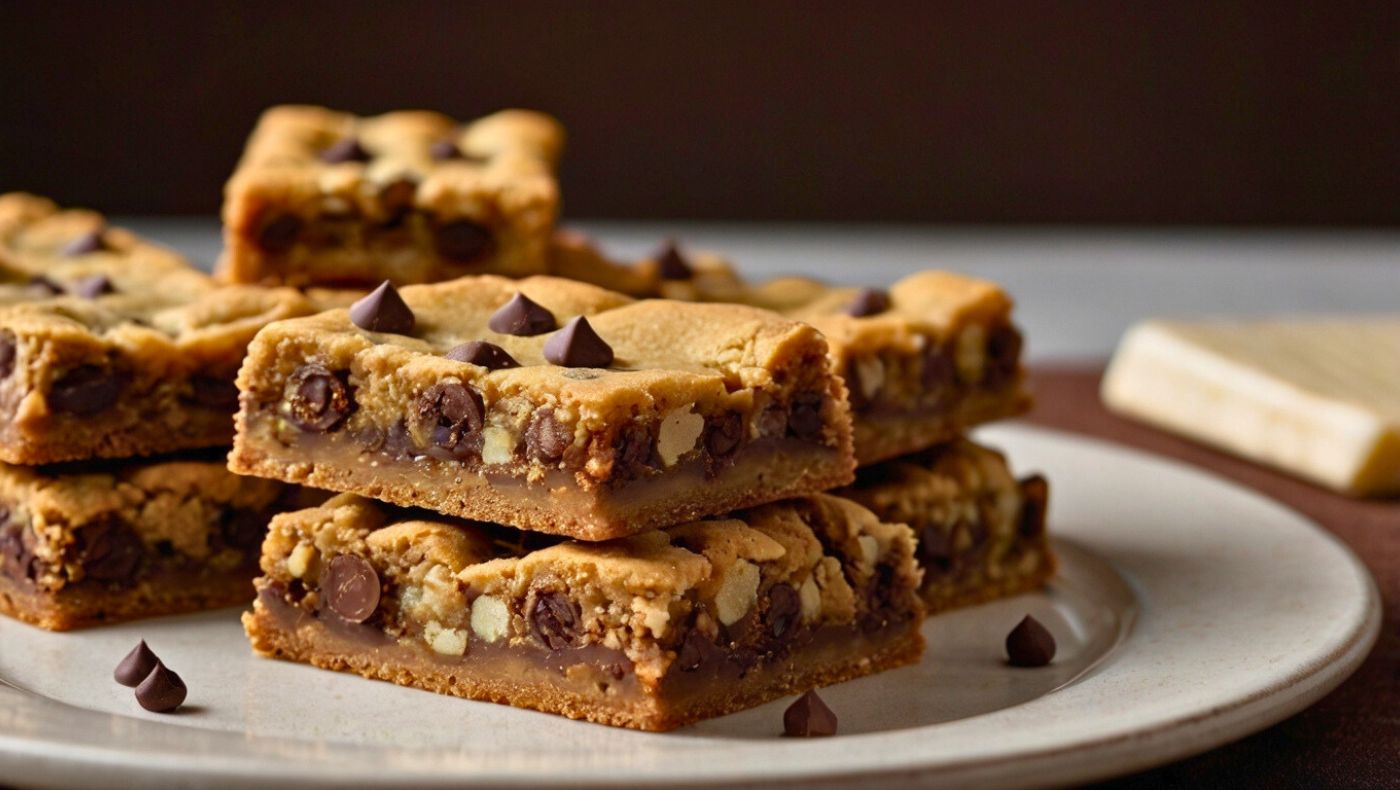
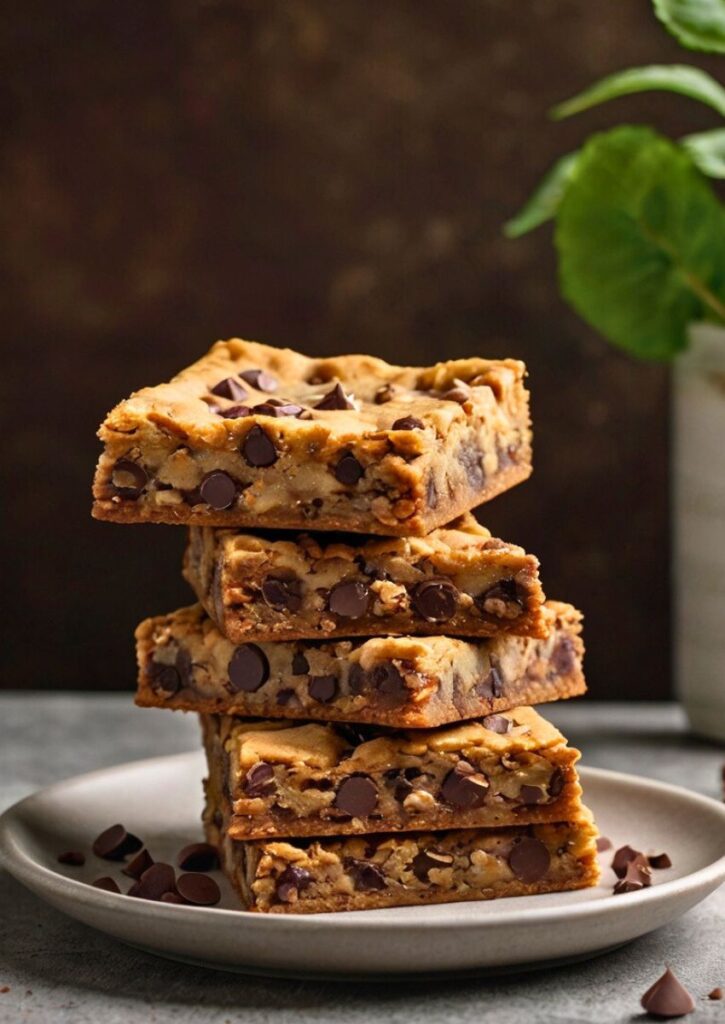
Have you ever taken one bite of something so irresistibly rich and gooey that you couldn’t help but go back for seconds… or thirds? That’s exactly what happened the first time I baked these Toffee Chocolate Chip Cookie Bars. I was just looking for a quick fix to satisfy my sweet tooth. But what came out of the oven was pure magic warm, golden bars bursting with pockets of melted chocolate and crunchy, buttery toffee bits. The kitchen smelled like a dream, and by the time they cooled, half the pan had already disappeared.
So, what makes these cookie bars stand out? It’s the texture soft and chewy on the inside with slightly crisp edges. It’s the flavor classic chocolate chip cookie goodness elevated by the rich, caramelized crunch of toffee. And most of all, it’s the simplicity no need to chill the dough or scoop individual cookies. Just spread, bake, slice, and enjoy.
In this post, I’ll walk you through every step to get these Toffee Chocolate Chip Cookie Bars just right. You’ll learn which ingredients make the biggest difference, how to avoid overbaking, and the secret to balancing sweetness with that perfect toffee snap. Whether you’re baking for a party, a potluck, or just yourself, these Toffee Chocolate Chip Cookie Bars are guaranteed to steal the show. Ready to turn your cookie game up a notch? Let’s dive in!
Ingredients & Substitutions
Core Ingredients
Unsalted butter (1 cup, room temperature): European style butter with higher fat content creates superior flavor and texture. If using salted butter, reduce added salt by half. The butter should yield slightly to pressure but not be completely soft think the consistency of good peanut butter.
Brown sugar (3/4 cup, packed): Dark brown sugar intensifies the molasses notes that complement toffee flavors beautifully. Light brown sugar works but produces a more subtle result. Avoid coconut sugar here it doesn’t cream properly and affects the bar’s structure.
Granulated sugar (1/4 cup): This small amount provides necessary structure and helps achieve the ideal chewy texture. Superfine sugar dissolves more completely if you have it on hand.
Large eggs (2, room temperature): Temperature matters enormously here. Cold eggs won’t incorporate properly, leading to dense bars. If you’ve forgotten to take them out early, place them in warm water for 10 minutes.
Pure vanilla extract (2 teaspoons): Madagascar vanilla provides the most complex flavor profile. Mexican vanilla works well too, but avoid imitation vanilla the difference is immediately noticeable in bars where vanilla plays a supporting role.
All purpose flour (2 1/4 cups): King Arthur or Bob’s Red Mill provide consistent protein content. Measure by weight (280g) for best results. Too much flour creates tough bars; too little makes them fall apart.
Baking soda (1 teaspoon): Fresh baking soda is crucial. If yours has been sitting around for more than six months, replace it. The chemical leavening creates the perfect tender crumb.
Fine sea salt (1 teaspoon): This enhances every other flavor in the recipe. Diamond Crystal kosher salt works perfectly too, but avoid table salt its harsh flavor doesn’t integrate as well.
Semi-sweet chocolate chips (1 1/2 cups): Ghirardelli or Callebaut provide superior flavor and heat resistance. Mini chips distribute more evenly but regular chips create lovely chocolate pockets. Avoid milk chocolate chips they become too sweet against the toffee.
Toffee bits (1 cup): Heath or Skor bits work wonderfully, but homemade toffee chopped into irregular pieces creates the most interesting texture. Store bought bits sometimes include chocolate coating, which can muddy flavors.
Professional Substitutions
For gluten free versions, substitute cup for cup gluten free flour blend, but add an extra 1/4 teaspoon xanthan gum if your blend doesn’t include it. The texture will be slightly different, more tender, less chewy.
Vegan adaptations require careful consideration. Replace butter with high quality vegan butter (Earth Balance works well), and substitute eggs with flax eggs (2 tablespoons ground flaxseed mixed with 6 tablespoons water, let sit 15 minutes). The bars will be slightly more fragile but equally delicious.
For those avoiding refined sugar, coconut sugar can replace brown sugar in equal amounts, though the flavor becomes more complex and less sweet. Maple sugar works too but is expensive and produces a distinctly different flavor profile.
Step by Step Instructions
Preparation Phase
Preheat your oven to 350°F and line a 9×13 inch metal baking pan with parchment paper, leaving overhang for easy removal. Metal pans conduct heat better than glass, creating more even browning. Don’t skip the parchment it’s your insurance policy against sticking disasters.
Position your oven rack in the center position. Too high and the tops brown before the centers set; too low and you get soggy bottoms that never fully cook through.
Creating the Base
Cream butter and both sugars in a stand mixer bowl for 3-4 minutes until light and fluffy. This step is non negotiable proper creaming incorporates air and creates the bars’ signature texture. The mixture should look almost white and significantly increased in volume.
Add eggs one at a time, beating well after each addition. Don’t rush this process. Each egg needs to fully incorporate before adding the next, or you’ll end up with a broken emulsion that produces dense, uneven bars.
Scrape down the bowl sides frequently during mixing. Professional bakers obsess over this detail because unmixed ingredients create inconsistent results.
Mix in vanilla extract until just combined. Over mixing at this stage develops gluten, creating tough bars instead of tender ones.
Flour Integration
Whisk flour, baking soda, and salt together in a separate bowl. This ensures even distribution and prevents pockets of leavening that create uneven rise.
Add dry ingredients to the butter mixture in two additions, mixing on lowest speed until just combined. Stop as soon as you don’t see streaks of flour. Over-mixing here is the fastest way to ruin otherwise perfect bars.
The dough should look slightly rough and just hold together when pressed. If it seems too wet, resist adding more flour, it will firm up as it chills.
Final Assembly
Fold in chocolate chips and toffee bits by hand using a wooden spoon or sturdy spatula. This prevents over mixing while ensuring even distribution. Some bakers prefer to reserve a handful of mix ins to sprinkle on top for visual appeal.
Press dough evenly into prepared pan using slightly damp hands or an offset spatula. The layer should be uniform, use a ruler if necessary. Uneven thickness creates some areas that overcook while others remain underdone.
Baking Perfection
Bake for 22-25 minutes until edges are golden brown but centers still look slightly underbaked. The surface should no longer look wet or shiny. Don’t wait for the centers to look completely done they’ll continue cooking from residual heat.
Every oven behaves differently, so start checking at 20 minutes. Look for the edges pulling slightly away from the pan sides and a light golden color across the surface.
Remove from oven and let cool in the pan for at least 2 hours before cutting. This waiting period is crucial, cutting too early results in crumbly bars that fall apart. The starches need time to set properly.
Cooking Techniques & Science
The Chemistry of Toffee Integration
Toffee pieces behave differently than chocolate chips during baking. Their lower melting point means they soften and sometimes spread, creating pockets of concentrated butterscotch flavor. This is desirable, it means the toffee is integrating with the cookie base rather than remaining isolated.
The key is using toffee pieces that are roughly the same size as your chocolate chips. Larger pieces sink to the bottom; smaller pieces disappear entirely. Aim for 1/4 inch irregular chunks that provide textural interest without overwhelming the base structure of your Toffee Chocolate Chip Cookie Bars.
Understanding Sugar Chemistry
The combination of brown and white sugars isn’t arbitrary. Brown sugar’s molasses content contributes moisture and chewiness, while granulated sugar provides structure and helps achieve proper spread. This ratio creates bars that are chewy but not gummy, sweet but not cloying.
The creaming process dissolves sugar crystals partially, creating a more tender final texture. Under-creamed sugar leaves crystals that create a grainy mouthfeel; over creamed sugar can lead to flat, dense bars.
Temperature Control
Room temperature ingredients emulsify better than cold ones, creating smoother batters that bake more evenly. Cold butter won’t cream properly; cold eggs can cause the mixture to seize and separate.
However, don’t let ingredients get too warm. Butter that’s too soft won’t hold air during creaming; eggs that are too warm can start cooking when they hit the warm butter mixture.
Pan Selection Impact
Metal pans conduct heat more efficiently than glass or ceramic, creating better browning and more even baking. Dark metal pans absorb more heat, so reduce temperature by 25°F if using them. Light colored metal provides the most consistent results.
The 9×13 inch size is crucial for proper thickness. Smaller pans create thicker bars that don’t cook evenly; larger pans produce thin bars that overbake quickly.
Serving & Pairing Suggestions
Presentation Excellence
Cut bars with a sharp knife wiped clean between cuts for professional looking edges. Mark your cutting lines lightly with a ruler first uneven bars scream “amateur” regardless of how they taste.
For special occasions, dust lightly with powdered sugar or drizzle with melted chocolate. A light sprinkle of flaky sea salt on top before baking adds sophisticated flavor contrast.
Temperature Considerations
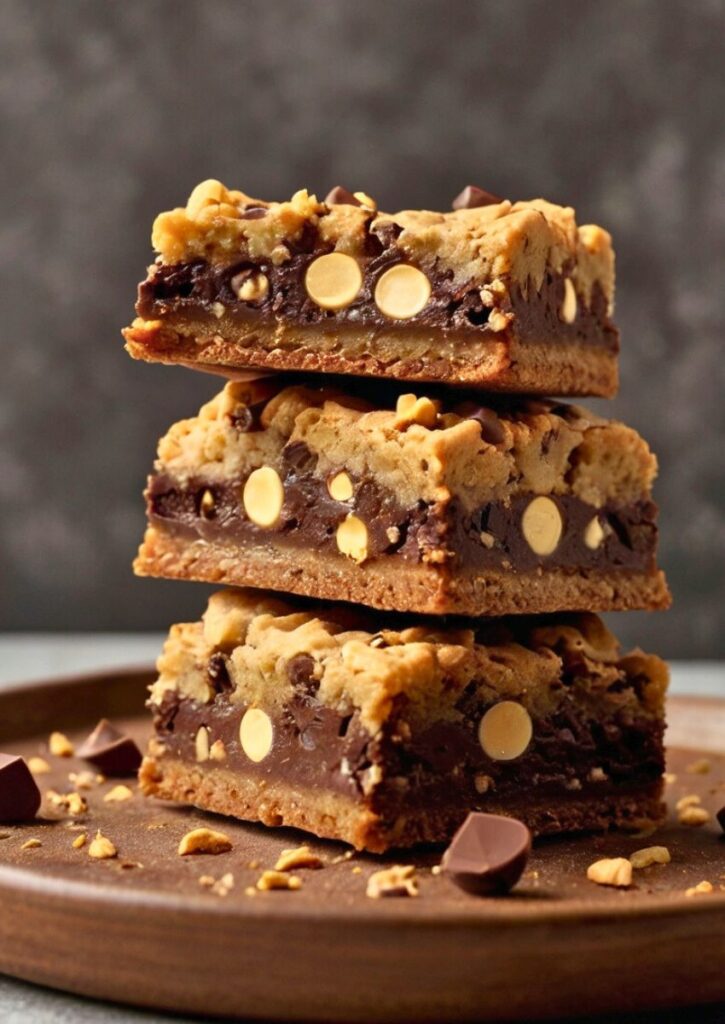
These bars taste completely different at various temperatures. Room temperature showcases all flavors equally. Slightly warm (15 seconds in the microwave) softens the toffee pieces and makes chocolate chips gooey. Chilled bars become more dense and chewy, with flavors that seem more concentrated.
Complementary Pairings
Strong coffee or espresso cuts through the sweetness beautifully. The bitter notes complement both chocolate and toffee flavors. Cold milk remains classic for good reason the fat content cleanses the palate between bites.
For dessert service, vanilla ice cream provides temperature and texture contrast. Salted caramel ice cream creates flavor harmony that enhances the toffee elements in your Toffee Chocolate Chip Cookie Bars. Avoid fruit based accompaniments they compete rather than complement.
How to Store Toffee Chocolate Chip Bar Cookies
Store in airtight containers at room temperature for up to one week. Layer between parchment paper to prevent sticking. They actually improve after a day or two as flavors meld and textures settle.
For longer storage, wrap individually in plastic wrap and freeze for up to three months. Thaw at room temperature, don’t microwave, which creates uneven heating and soggy spots.
Professional Tips & Troubleshooting
Common Mistakes and Solutions
Problem: Bars fall apart when cut. Solution: Either underbaked or cut too soon. Always let cool completely, and check that edges are pulling from pan sides before removing from oven.
Problem: Tough, dense texture. Solution: Over mixed flour or used too much. Measure flour by weight, not volume, and mix just until combined.
Problem: Uneven browning. Solution: Oven hot spots or incorrect rack position. Rotate pan halfway through baking and ensure center rack placement.
Advanced Variations
Replace half the toffee bits with chopped toasted pecans for added richness. The nuts’ oil content enhances the buttery flavors while providing textural contrast.
Substitute white chocolate chips for half the semi sweet ones to create color contrast and flavor complexity. The white chocolate’s vanilla notes complement the toffee perfectly.
Add 1 tablespoon bourbon or rum extract along with vanilla for sophisticated flavor depth. The alcohol cooks off, leaving behind complex flavor compounds that enhance both chocolate and toffee notes.
Quality Control
Professional bakers test doneness by gently pressing the center. It should spring back lightly but not feel firm. The surface should look set but not hard or crusty.
Internal temperature should reach 190°F in the center when fully baked. This ensures food safety while maintaining the desired chewy texture.
Final Thoughts on Toffee Chocolate Chip Cookie Bars
Toffee Chocolate Chip Cookie Bars represent the intersection of technique and creativity in professional baking. They require understanding of ingredient interactions, temperature control, and timing precision that separates amateur efforts from bakery quality results.
The key to success lies in respecting each component’s role. The butter provides richness and structure; sugars create texture and flavor; eggs bind everything together; flour provides foundation; and the mix ins create textural interest and flavor complexity that makes Toffee Chocolate Chip Cookie Bars so irresistible.
Most importantly, these bars teach patience. From proper creaming to complete cooling, rushing any step compromises the final result. But when executed properly, they deliver professional quality results that showcase technical skill and understanding of baking fundamentals.
Whether serving them at a high end restaurant or packaging them for retail sale, these Toffee Chocolate Chip Cookie Bars demonstrate mastery of fundamental techniques while delivering the comfort and satisfaction that keeps customers returning. They’re proof that sometimes the most impressive results come from perfecting seemingly simple recipes.
Frequently Asked Questions
Q: Can I make these bars ahead of time for events?
A: Absolutely. These bars actually improve in flavor after 24 hours as ingredients meld together. Make them up to 3 days ahead and store covered at room temperature. For longer storage, freeze individually wrapped bars for up to 3 months.
Q: Why do my toffee bits sink to the bottom during baking?
A: This happens when the dough is too thin or the toffee pieces are too large. Press dough firmly into the pan to create proper thickness, and use toffee bits roughly the same size as chocolate chips. Tossing mix ins in a light dusting of flour before folding in can also help suspend them.
Q: How do I prevent the bars from becoming too sweet?
A: Balance is key. Use semi sweet rather than milk chocolate chips, and consider adding 1/4 teaspoon extra salt to the recipe. The salt enhances other flavors while taming excessive sweetness. Also ensure you’re measuring brown sugar by packing it lightly, not firmly.
Q: What’s the best way to cut clean, professional looking squares?
A: Use a sharp chef’s knife and wipe it clean between each cut. Mark your cutting lines lightly with a ruler first, then cut in one smooth motion rather than sawing. Chilling the bars for 30 minutes before cutting can also help achieve cleaner edges.
Q: Can I double this recipe for larger crowds?
A: Yes, but use two separate 9×13 pans rather than one larger pan. Doubling in a single large pan creates uneven thickness that bakes inconsistently. The mixing process remains the same, but you may need to increase mixing times slightly to accommodate the larger volume.