Walking Taco Casserole Delight is what dinner looks like when life’s a little chaotic and you need a win fast. You’ve had that day. Long, messy, and dinner is a mystery. The kind where it’s already 6:30, the kids are restless, and the fridge is full of random leftovers. You’re tired, hungry, and craving something quick, cheesy, and satisfying.
That’s exactly where I was last weekend standing in my kitchen, staring into a half stocked pantry, hoping something would spark an idea. I had leftover ground beef, a crinkled bag of tortilla chips, and a taco craving that refused to back down. Not the usual assemble it yourself tacos. I needed something cozy, melty, and ready to serve by the scoop. That’s when this casserole came to life.
I browned the beef with taco seasoning, garlic, and a dash of cumin. The smell alone, warm and spicy, was enough to make my stomach growl. I stirred in creamy beans, crushed the chips right over the pan, and blanketed it all with gooey, shredded cheese. As it baked, the kitchen filled with that comforting, unmistakable taco night aroma.
What came out was better than expected. Crispy edges, melty cheese, bold flavor in every bite, it hit every craving in one pan. This easy taco casserole recipe is hearty, fast, and flexible enough for busy weeknights, game days, or solo dinners with your favorite show playing.
Stick around I’ll walk you through how to make this cheesy taco bake step by step, share a few delicious twists, and offer tips to make it your own. Trust me, once you try Walking Taco Casserole Delight, it’ll earn a permanent spot in your weeknight rotation.
The Story Behind the Flavor
Someone brilliant created walking tacos as carnival food genius. Instead of making messy handheld tacos, dump all fixings into corn chip bags. Pure inspiration strikes again. Walking Taco Casserole takes that genius idea and elevates it into something that would make grandmothers proud. Keep that fun, casual vibe that makes everyone smile.
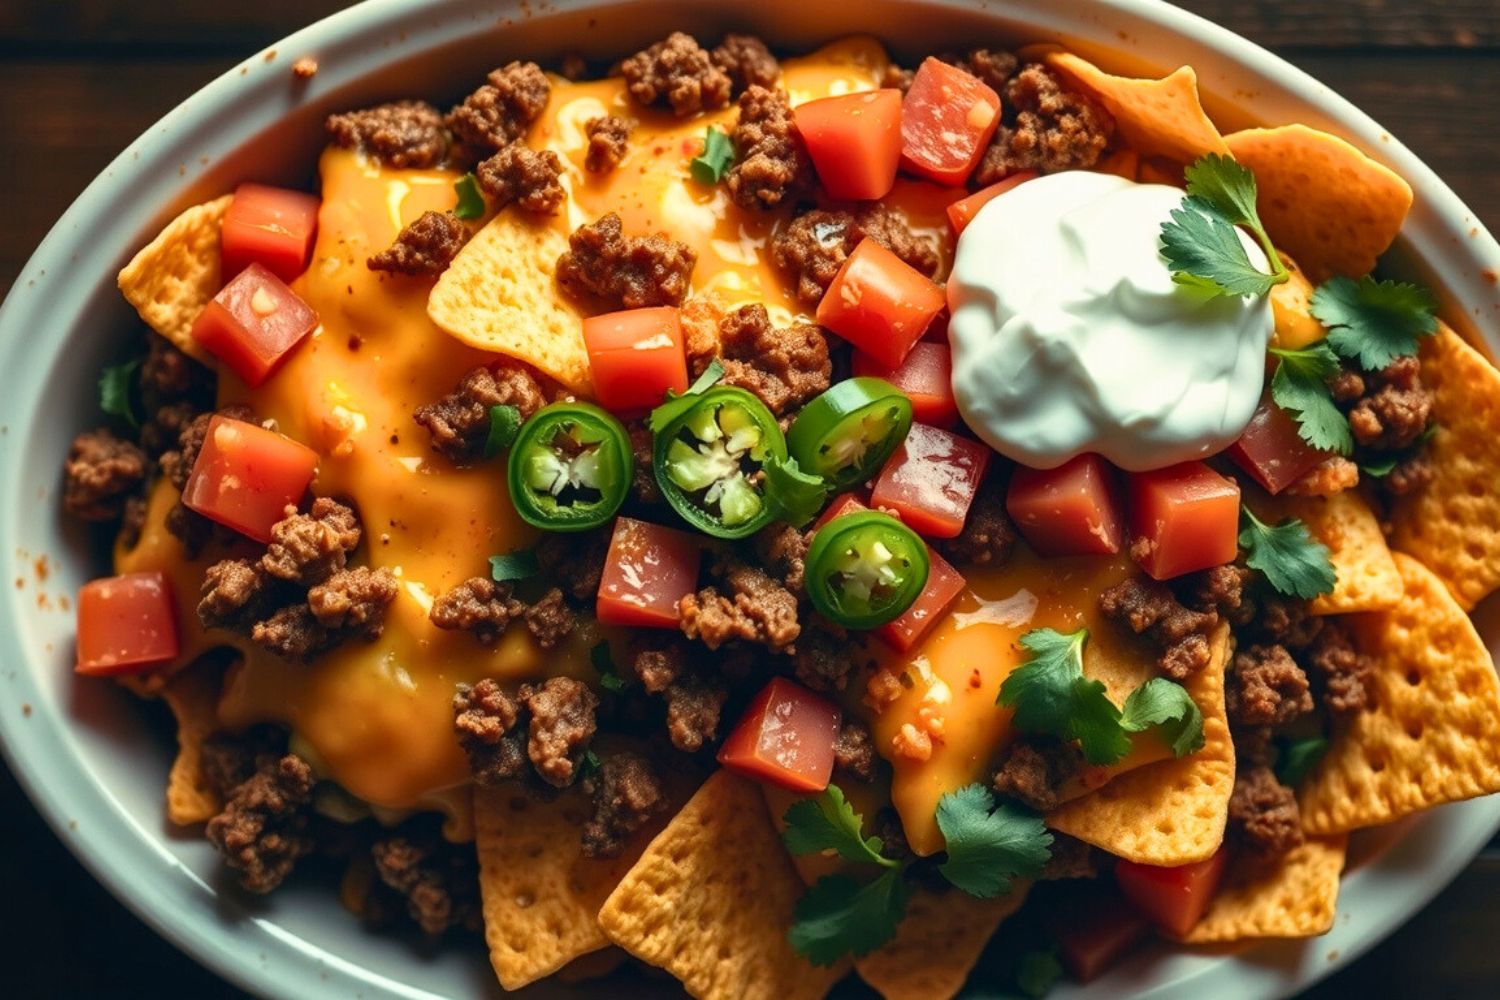
This casserole layers those bold flavors, perfectly seasoned meat, tangy cheese, crisp lettuce, and fresh tomatoes. It creates perfect bites every time. No more chasing runaway toppings or eating structurally compromised chip loads.
Ingredients That Make Magic Happen

Here’s what you need, in cooking order (who needs alphabetical ingredients when hunger strikes?):
For the Layers:
- 1 pound ground beef (or turkey if you’re feeling virtuous)
- 1 packet taco seasoning (homemade is fantastic, store bought is perfectly fine)
- 1 can (15 oz) black beans, drained and rinsed
- 1 can (14.5 oz) diced tomatoes, drained
- 1 cup frozen corn kernels
- 1/4 cup water
For the Layers:
- 1 large bag (about 9 oz) Fritos corn chips, lightly crushed
- 2 cups shredded Mexican cheese blend
- 1 cup sour cream
- 1/2 cup mayonnaise
- 1 packet ranch dressing mix
For the Fresh Finish:
- 2 cups shredded lettuce
- 2 medium tomatoes, diced
- 1/2 red onion, finely diced
- 1/4 cup fresh cilantro, chopped
- Sliced jalapeños (optional, but recommended)
Smart Swaps That Actually Work
Can’t handle dairy? Swap cheese for plant based alternatives. The melty kinds work best. Greek yogurt replaces sour cream for lighter options, though expect tangier flavor.
Swap in turkey or chicken for the beef. Even lentils or crumbled tempeh create satisfying vegetarian versions. Get that seasoning ratio right. Don’t shy away from seasoning boldly.
No Fritos? Tortilla chips work fine, minus distinctive corn flavor.Don’t shy away from seasoning boldly. Doritos can be fantastic for adventurous cooks Nacho Cheese ones add extra flavor kids love.
Insider secret about ingredients: fresher isn’t always better for casseroles. Those slightly past prime tomatoes? Perfect here. They break down creating jammy flavor pockets.
How to Make Walking Taco Casserole Delight – Step-by-Step Magic
Getting the Foundation Right Start by preheating your oven to 350°F. Trust this temperature, it melts everything beautifully without turning chips into cardboard.
Brown ground meat in large skillet over medium high heat. Don’t crowd it or stir too much initially. Let it develop crispy, caramelized edges adding dish depth. My abuela said patience pays off, and she knew.
Once meat browns properly (6-8 minutes), drain most fat but leave some behind that’s flavor, not grease. Add taco seasoning with quarter cup water, then stir in black beans, drained tomatoes, and corn. Simmer 5 minutes until everything mingles and liquid reduces.
Creating the Layers While meat mixture simmers, make creamy layer by mixing sour cream, mayo, and ranch packet. This might seem excessive, but this combination creates tangy richness balancing bold spices perfectly.
Now comes assembly fun. In greased 9×13 baking dish, spread half your crushed Fritos across bottom. Don’t crush too fine; you want texture surviving baking.
Layer half meat mixture over chips, then dollop half creamy mixture on top. Sprinkle with half the cheese. Repeat layers once more, ending with cheese.
The Baking Magic Slide this beauty into preheated oven for 20-25 minutes. You’ll know it’s ready when cheese melts and gets golden edge spots, and everything bubbles happily.
Here’s a trick saving you from soggy disappointment: let it rest 10 minutes after baking. I know it’s torture when something smells amazing, but resting time lets everything set properly for clean slices instead of delicious mess.
Common Pitfalls to Dodge Don’t drain meat too thoroughly you need flavorful drippings. But don’t skip draining entirely, or you’ll create greasy casserole nobody wants.
Watch your oven like a hawk during final minutes. Cheese goes from perfectly melted to burnt faster than you can say “dinner’s ready.” No recovery from burnt cheese.
If top chip layer browns too quickly, tent with foil. You want even heating throughout, not just surface attention.
The Science Behind the Sizzle
This Walking Taco Casserole works through clever food science happening behind the scenes. When you layer chips with moist ingredients, bottom layers absorb enough liquid to soften into savory bread pudding, while top layers stay relatively crisp for textural contrast.
Sour cream and mayo combination might seem redundant, but each brings different properties. Sour cream adds tangy flavor and creamy texture, while mayo contributes richness and helps everything bind without breaking when heated.
That post-baking resting period isn’t about patience—it’s about starch retrogradation. Chip starches continue absorbing moisture after heat removal, helping everything hold together when sliced.
Cultural fusion happens naturally in American comfort food, and Walking Taco Casserole proves it perfectly. Take Mexican flavors and techniques, combine with American convenience ingredients, and create something both familiar and exciting—that’s kitchen evolution keeping cooking interesting.
Your pan choice matters more than expected. Glass or ceramic 9×13 dishes conduct heat differently than metal, giving more even heating and better edge browning. Metal pans work fine, but adjust timing slightly.
Making It Beautiful and Delicious
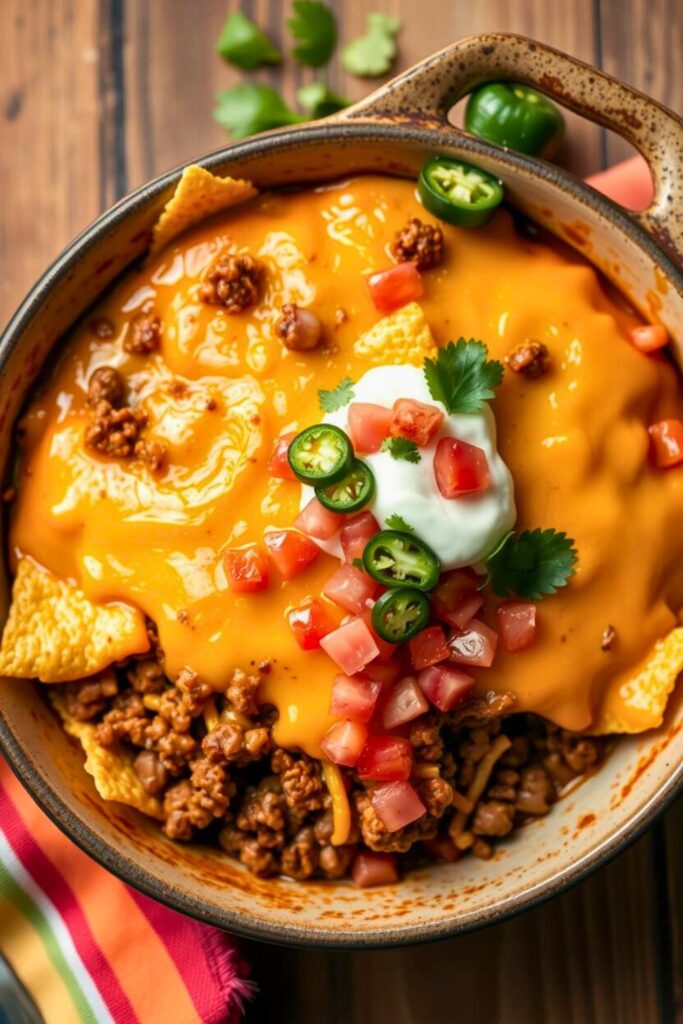
Magic happens after baking when you add fresh toppings. Here your walking taco casserole transforms from good to absolutely irresistible.
Let each serving hit plates, then top with fresh shredded lettuce, diced tomatoes, red onion, and cilantro. Contrast between warm, cheesy comfort and cool, crisp freshness makes people close eyes and make happy sounds.
For photo worthy presentation, try individual ramekin servings. Layer everything similarly, just in smaller portions. They’ll look restaurant worthy, and everyone gets perfect portions.
This dish pairs beautifully with simple Mexican beer or crisp Sauvignon Blanc white wine. Acidity cuts through richness perfectly. For non alcoholic options, try horchata or lime spiked sparkling water.
Side wise, keep it simple. Fresh salad with lime vinaigrette, sliced avocado, or good salsa with extra chips for crunch lovers. Don’t overthink it this dish stars.
Walking Taco Casserole Delight – Bringing It All Together
Walking taco casserole represents everything I love about comfort food approachable, satisfying, bringing people together around tables. It’s the recipe making weeknight dinners feel special without requiring culinary degrees.
This dish’s beauty lies in flexibility. Make it yours by adjusting spice levels, swapping proteins, or adding family favorite taco toppings to fresh layers. Some families love black olives or different cheese blends. Others go wild with multiple peppers or add refried bean layers.
Here’s my final advice: don’t fear making this recipe yours. Cooking should express your taste and family preferences, not rigid rules you’re afraid to break. Start with this foundation, then let creativity take over.
Leftovers (if any exist) reheat beautifully in 300°F oven for 15 minutes. Add fresh toppings after reheating, and you’ll have meals tasting like day one.
Questions About Walking Taco Casserole
Can I make this ahead of time?
Absolutely! Assemble everything up to the baking step, cover tightly with foil, and refrigerate for up to 24 hours. When you’re ready to eat, just pop it in the oven straight from the fridge you might need to add 5-10 extra minutes to the baking time since it’s starting cold.
What if I can’t find Fritos?
Any corn chip will work, though Fritos have that distinctive corn flavor that really makes walking tacos special. Tortilla chips are fine, but crush them a bit so they layer nicely. Avoid flavored chips unless you want those flavors in your final dish.
How do I keep the chips from getting soggy?
The key is not overdoing the liquid ingredients and letting the casserole rest after baking. Also, add your fresh toppings right before serving, never before baking. Some sogginess is actually desirable in the bottom layers, it creates that wonderful contrast with the crispier top layer.
Can I freeze this dish?
You can freeze it before baking for up to 3 months. Thaw completely in the refrigerator before baking, and expect to add about 10 minutes to the cooking time. I don’t recommend freezing after baking the texture of the chips doesn’t recover well from freezing and reheating.
What’s the best way to reheat leftovers?
Oven reheating at 300°F gives you the best results. Cover with foil to prevent over browning and heat for about 15 minutes until warmed through. Microwave works in a pinch, but you’ll lose some of the textural contrast that makes this dish special.

Swiftly Captions by Tina Smith — Quick, flavorful food recipes made simple, bringing fresh inspiration to your kitchen every day


